5: Forward message to application
Learn how to forward the uplink messages to your own application by using application URL
You've just sent your first messages with NB-IoT and now you are ready to enter the Callback URL of your own application where you wish to retrieve the data of your device.
This quick guide will show how this can be done by using Beeceptor as a web application mock.
The guide will walk you through the following steps:
- Setup your own application URL with Beecepter.
- Configure your own application URL to IoT Creators portal.
- Test your sample of application integration.
In case you are under time pressure and you want to see the following tutorial in a more compact way you can find it on Youtube https://www.youtube.com/embed/TnpilqKPCkE.
The video handles the whole story in 5 minutes 😃
If the URL field is missing in your project dashboard, we have to upgrade your starterkit. In this case you can send an e-mail to [email protected]
Setup your own application URL with Beeceptor
Many many applications today have REST APIs to inject data. To keep it simple in this tutorial we use Beeceptor https://beeceptor.com/ to create an application URL as API.
To do so, just perform the following steps:
Go to https://beeceptor.com and input a unique name for your endpoint into the input field.
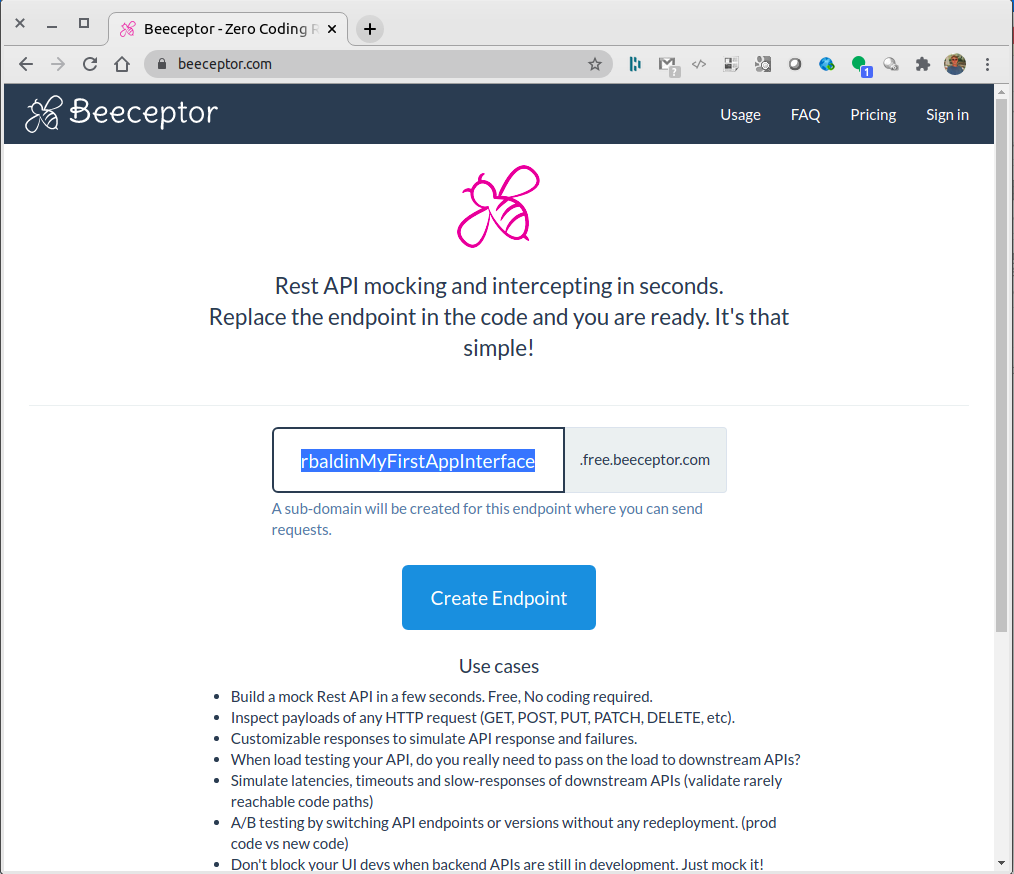
Push the Create Endpoint button.
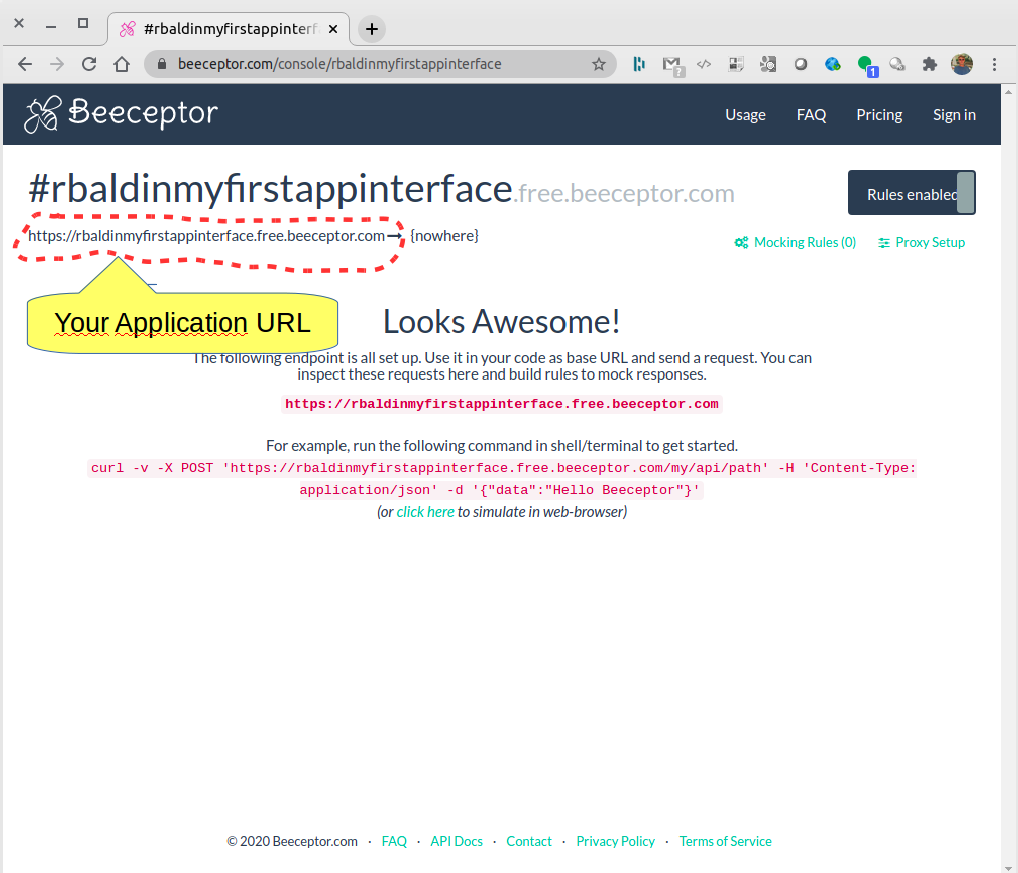
On the upper left you see your application URL which you need to know for later.
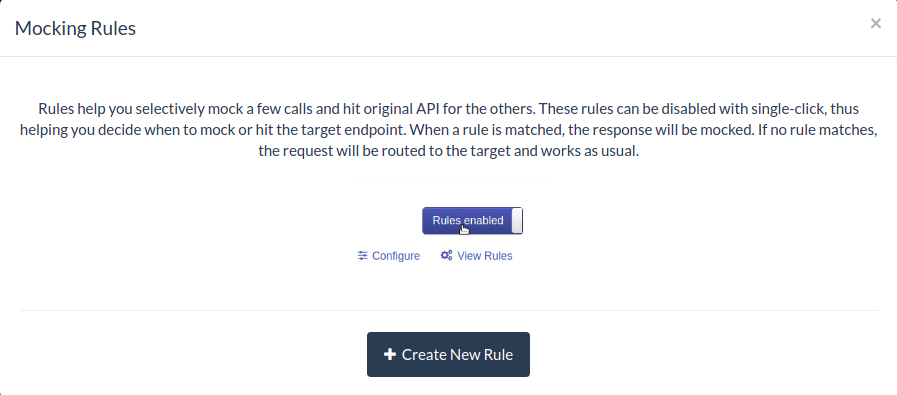
Next we need to create a mockup implementation for this endpoint. We need to do this otherwise the URL is not callable as API. To do so push the link Mocking Rules (0)*.
The confirmation dialog you can just confirm by clicking the + Create New Rule.
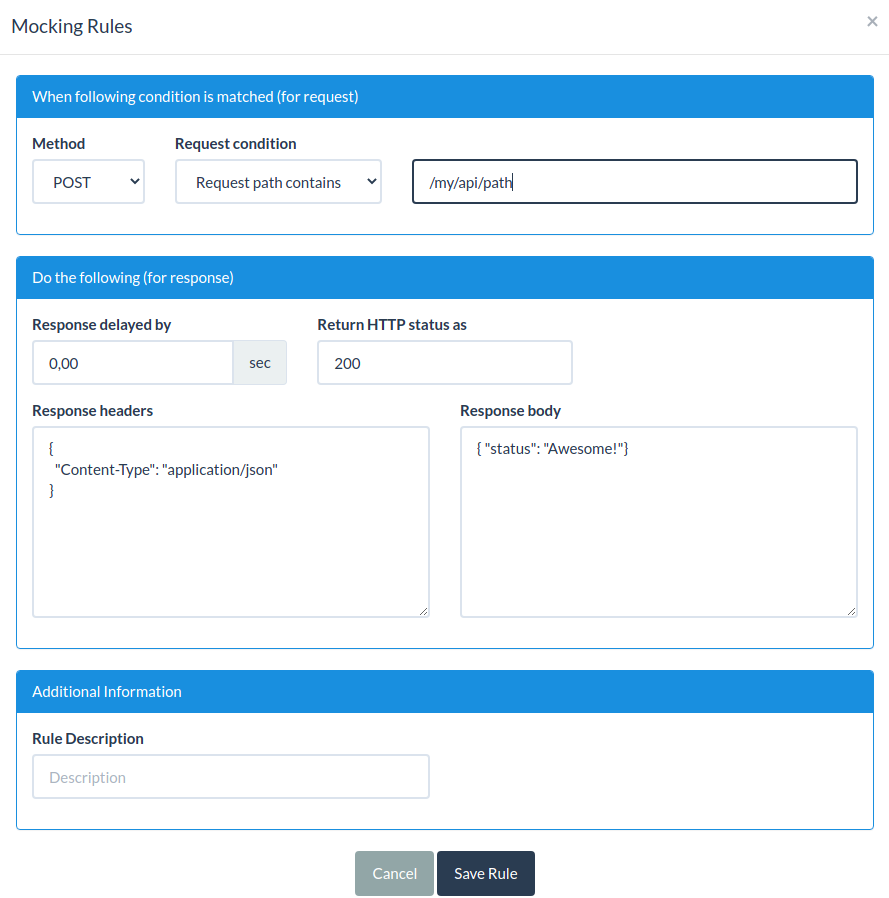
In the Mocking Rules dialog select POST as method and select Request path contains in the Request condition field. As path you can use /my/api/path*.
After this you can push the Save Rule button.
As a result you get displayed your mocking rules.

Configure your application URL to IoT Creators portal
Next you will configure your application URL to the IoT Creators portal. To do so perform the following steps:
- Open your Projects space in the IoT Creators portal.
- Select the tab YOUR APPLICATION SERVER.
- Copy the application URL from the Beecepter main window (see image above) into the input field CALLBACK URL.
- The toggle for enabling your application endpoint needs to be "ON".
- Click the Save button.
If you push the Save button in the YOUR APPLICATION SERVER tab IoT Creators will send an empty request to the URL to test if it is available.
If your application URL doesn't return HTTP code 200 on the first test request the URL can not be saved in the "YOUR APPLICATION SERVER** tab.
To see if the requests has arrived on the Beeceptor side you can go back to the Beceeptor main page. You should see the first POST request on it.
If you click on the POST you will the request and the response content. In your case the request body should be empty.
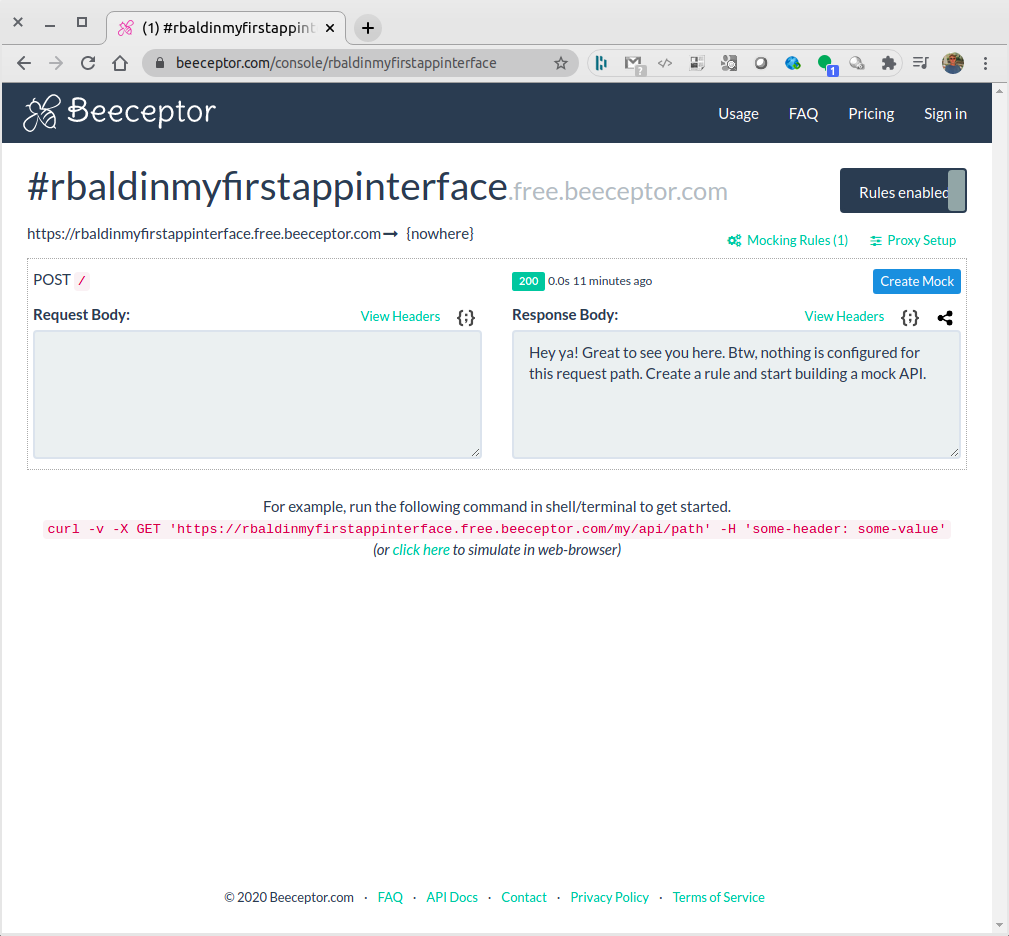
👍 CONGRATULATIONS 👍
If you reached this point you successfully integrated your application mockup with the IoT Creators platform.
This was a quick one, wasn't it 😃 😃
Test your application integration
Of course you need to test if the integration between the IoT Creators portal and your application works.
Just let your device send a message and go back to your Beeceptor main page. You will see in the front table a new POST request. If you open it you should see the message which has been forwarded from IoT Creators.
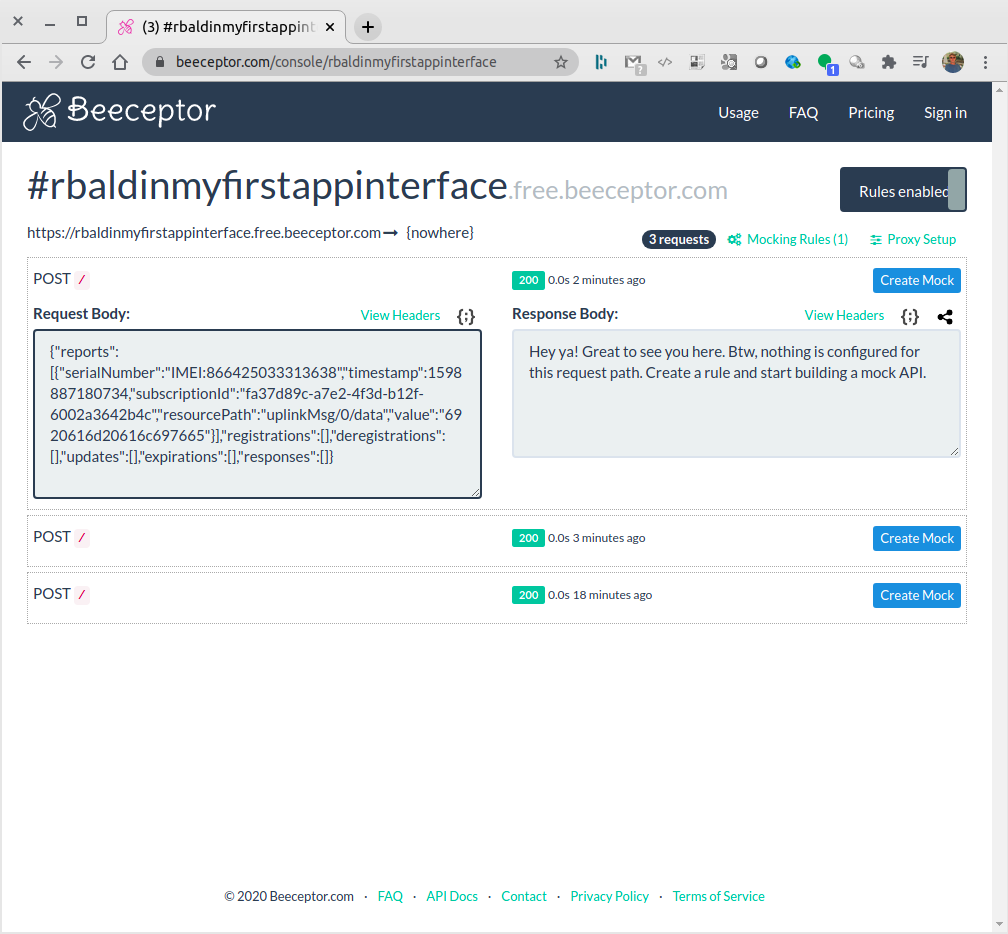
In a normal application integration scenario the integration developers need to know the data format which is used in the payload of the forwarded messages.
The JSON format of the forwarded message is:
{
  	"reports":[{
    	"serialNumber":"IMEI:866425033313638",
    	"timestamp":1598887180734,
    	"subscriptionId":"fa37d89c-a7e2-4f3d-b12f-6002a3642b4c",
    	"resourcePath":"uplinkMsg/0/data",
    	"value":"6920616d20616c697665"
  	}],
  	"registrations":[],
  	"deregistrations":[],
    "updates":[],
    "expirations":[],
    "responses":[]
}
Be aware that not everytime only single messages are forwarded. Sometimes messages are forwarded as a bulk due to performance issues.
Disabling your application endpoint temporarily
You can use this toggle to "disconnect" your backend application from our IoT Creators platform. The uplink from the devices in your project will then not be forwarded to the application endpoint. Please don't forget to push the SAVE button to make this effective.
Updated about 4 years ago
