Nordic Thingy:91
Introduction
The Nordic Thingy:91 is an easy-to-use battery-operated prototyping platform for cellular IoT using LTE-M, NB-IoT and GPS. It is ideal for showcasing a Proof-of-Concept (PoC), creating a demo or working on an initial prototype during your cellular IoT development phase.
The Thingy:91 is built around the nRF9160 cellular module from Nordic Semiconductor which comes in a compact, highly-integrated System-in-Package (SiP) that makes the latest low power LTE technology, advanced processing and security accessible. It is easy to use and fits a wide range of single device low power cellular IoT (cIoT) designs. The SiP even comes equipped with an application controller. Development kits or reference designs like the Thingy:91 come preprogrammed with an asset tracker application.
To test the modem capabilities and send data to the IoT creators portal using AT commands a different application image is however required.
In this article we cover how to reprogram the nRF9160 with the Serial-LTE-Modem software and prepare it for use on LTE-M or NB-IoT networks. You will also learn how to send UDP data from the Thingy:91 or retrieve data on the device coming from the portal.
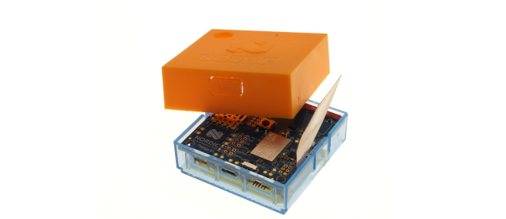
Nordic Thingy:91
Links*
| Titel | URL |
|---|---|
| Where can I get it from? | https://www.nordicsemi.com/Software-and-tools/... |
| Thingy:91 Getting started | https://infocenter.nordicsemi.com/topic/ug_nrf91_dk_gsg/... |
| Serial LTE Modem AT Commands | https://developer.nordicsemi.com/nRF_Connect_SDK/... |
| nRF9160 Datasheet | https://infocenter.nordicsemi.com/topic/ps_nrf9160/... |
| nRF9160 AT Commands | https://infocenter.nordicsemi.com/topic/ref_at_commands/... |
| Sample code | https://github.com/iotcreators/nordic |
Links to the AT command samples:
- Query device information
- Setup network configuration
- Send "Hallo World" via UDP
- Receive "Hallo Device" via UDP
Setup the Device
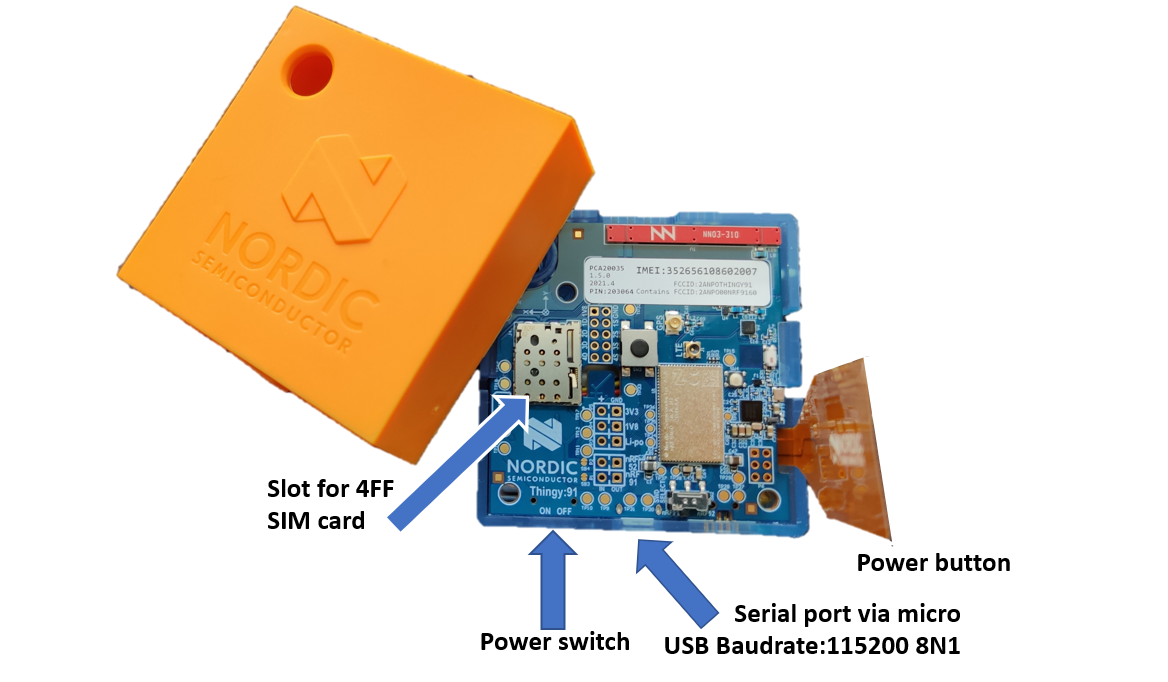
Updating Thingy’s Modem+Application Firmware
Firstly, we will update the nRF9160’s modem firmware to the latest version. Secondly, we will replace the application firmware on the nRF9160 with the precompiled Serial-LTE-Modem image. Using Nordic’s set of desktop tools, this is done as follows:
-
Install nRF Connect for Desktop on your computer.
The installation file is available here. -
nRF Connect for Desktop should start automatically after installation. The tool acts as an umbrella and launcher for several Nordic tools. The Programmer and LTE Monitor are the important tools for us. Please click the INSTALL button for these tools.
-
Next, please download the firmware images from Nordic’s webpage. You find the precompiled application and modem firmware here
Select the latest version and click on the thingy91fw[...] file name. -
Extract the downloaded zip file and perform the following two firmware updates.
-
Modem firmware update:
Please look for the Programming the modem through USB (MCUboot) section on this webpage and follow the steps to update the modem. *Note that the modem firmware is included in the file we have downloaded and extracted in the previous steps. -
Application firmware update:
The next chapter on the website is Programming Applications through USB (MCUboot). Please follow these steps and select the file imgfota_dfu_hex/serial_lte_modem[...] .hex.
Now your Thingy:91 is running the Serial LTE Modem software giving you access to an extended set of AT commands. You can communicate with the modem through a USB virtual COM port.
Send AT Commands
Please put in the SIM card before switching on the Thingy:91. Connect your Thingy:91 via USB to your computer and turn it on.
We could now use a any terminal program for serial communication. The COM port settings are 115200 baudrate, 8 data bits, 1 stop bit, no parity, no flow control.
However, an easier way is to use the LTE Monitor tool that is available in nRF Connect for Desktop.
Select the Thingy:91 device to open a COM port connection. This is done by choosing the PCA20035 board in the dropdown list, as shown in this picture:
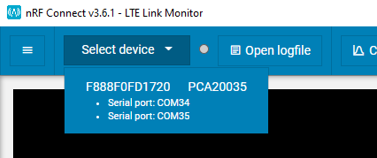
LTE Monitor: dropdown list
Enter in the text box that states: "Type AT command here…" the command AT and press enter. The terminal program shows the message you have sent and the respective answer from the Thingy:91.
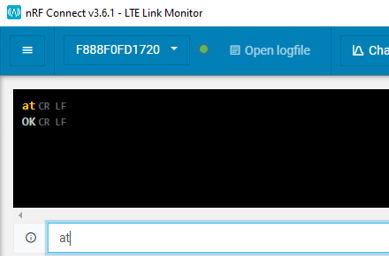
The Thingy:91 board replies with “OK”, which means that the AT command was executed successfully. In this case, it also tells us that the application firmware change was done successfully and the Serial LTE Modem image is now running on the Thingy:91. We can continue to configure the device and get attached to the cellular network.
Attach to NB-IoT Network
This chapter explains how you can attach your Thingy:91 to an NB-IoT network.
Step 1: Start by entering the following command to perform cell search only on NB-IoT.
AT%XSYSTEMMODE=0,1,0,0
OK
You may use the modem's band lock feature to restrict the cell search to specific LTE bands. This will speed up the first time LTE/NB-IoT attach. An example is to restrict the use to LTE band 8 (in use for Telekom in Germany or T-Mobile in the Netherlands). For other countries and mobile operators please refer to: https://docs.iotcreators.com/docs/roaming-mobile-iot-networks.
AT%XBANDLOCK=1,"10000000"
OK
AT%XBANDLOCK=1,"10000000000000000000"
OK
Step 2: Configure the APN for your IoT creators SIM card and (opt). set the network to register to manually.
AT+CGDCONT=0,"IPV4V6","cdp.iot.t-mobile.nl"
OK
The modem is pre-configured to perform an automatic network operator selection based on the SIM card information. This is initiated once you turn on the radio functionality with +CFUN (refer to Step 3). If the SIM card in your region has no preferred mobile network operator listed, it can become necessary to manually select the network operator to connect to.
The AT+COPS command requires the use of the PLMN (Public Land Mobile Network) ID, e.g. 26201 for Telekom Deutschland. The list of all major PLMN IDs can be found at: https://en.wikipedia.org/wiki/Mobile_country_code
# T-Mobile Netherland
AT+COPS=1,2,"20416",9
OK

# Telekom Deutschland
AT+COPS=1,2,"26201",9
OK

# T-Mobile Poland
AT+COPS=1,2,"26002",9
OK
In case you are interested in performing a network scan to see which network operators are visible with your Thingy:91 device, you can use the AT%COPS=? command. The command is blocking and may take multiple minutes in order to complete the full network scan.
Step 3: Finally, it is time to turn on the radio with AT+CFUN=1 and attach your device to the cellular network.
AT+CFUN=1
OK
Connecting
Please note that after entering the CFUN command the Thingy:91 is performing a cell search and network attach. You can use the AT command AT+CEREG=5 to get notified on a successful registration or you may query the status through AT+CGDCONT?. Upon successful LTE registration, your +CGDCONT response will contain the device's IP address.

+CGDCONT Response containing our Thingy:91 IP Address
Send and Receive Data via UDP Sockets
Once you are connected to your NB-IoT network, you may want to send some data to a server backend. The following chapter explains how to send a "Hello World" message from the Thingy:91 to the IoT Creators portal and vice versa, how to receive a "Hello Device" message on your Thingy:91 coming from the IoT Creators portal.
Send "Hello World"
Register your device first!
Make sure that you have registered your device with its IMEI at the IoT Creators portal BEFORE you send your first message to the UDP or CoAP server of IoT Creators.
If you forget, you will have problems to register your device afterwards. In this case please get in contact with IoT Creators support team.
Step 1: Open a UDP socket
AT#XSOCKET=1,2,1
#XSOCKET: 1,2,17
OK
Step 2: Send "Hello World" to the IoT Creators server
Destination IP address is: 172.27.131.100 with destination port: 15683. The data / string is appended as third parameter to the AT command.
AT#XSENDTO="172.27.131.100",15683,"Hello World"
#XSENDTO: 11
OK
Be aware that the nRF9160 modem converts your String message into binary/hex format before sending it to the server. This means your message or data will arrive in hex format at the IoT creators portal and be displayed as such.
Step 3: View the received message in the IoT Creators Portal
For each device the IoT Creators Portal makes the latest received message available by showing it in the Payload column.
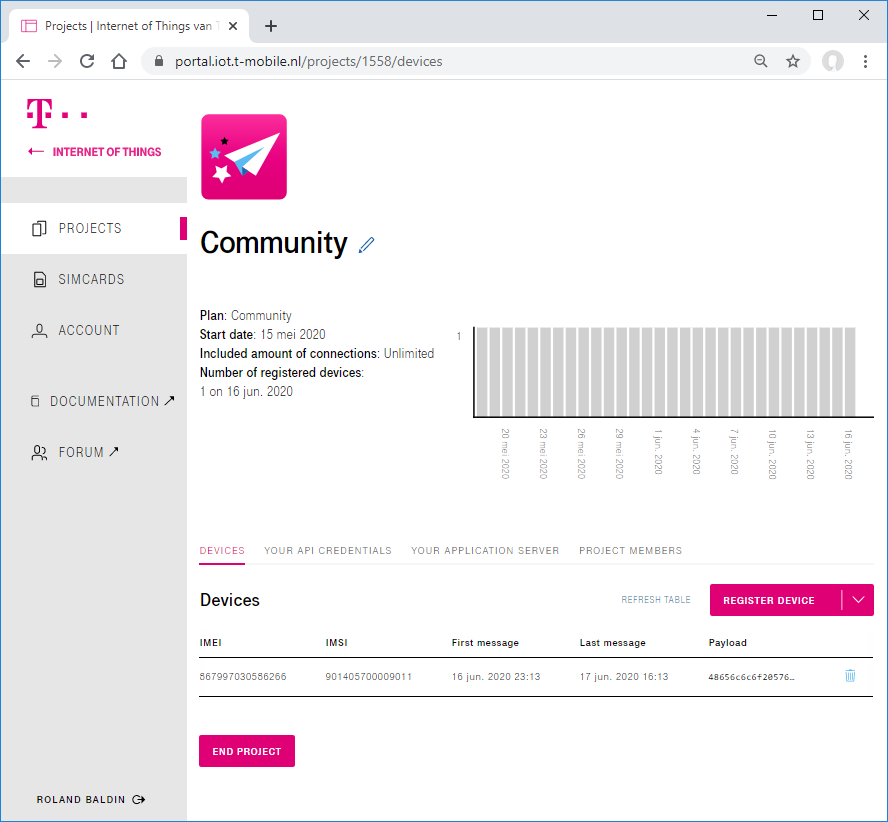
If you click on the payload the value is automatically copied to your clipboard.
Our message/String Hello World will be displayed as 48656c6c6f20576f726c64 in the IoT Creators portal (hex encoded).
You can use an online tool as shown below to decode the received message from hex format to a readable string and check its content. Example Hex To String Converter: http://string-functions.com/hex-string.aspx.
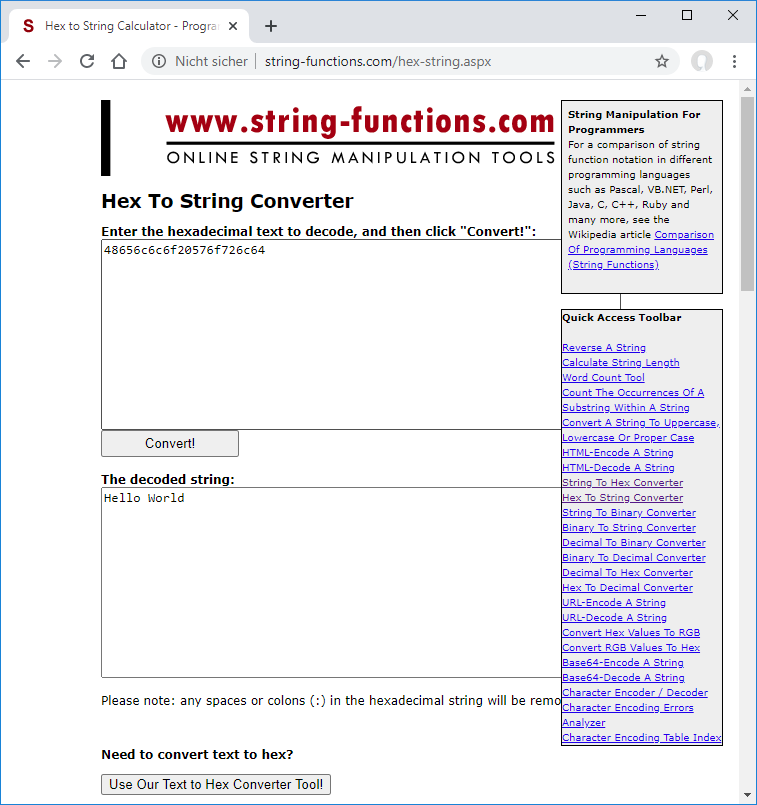
If you can decode your received message to Hello World **CONGRATULATIONS**! You have just successfully sent your first UDP message over NB-IoT.
Receive "Hello Device"
Step 1: Prepare a UDP downlink message to be sent to the Thingy:91
View your registered devices under your IoT Creators project. Next to your respective Thingy:91 device, click on "Actions" -> "Send a downlink message". Enter "Hello Device" as message and click on send. Please note that your message is queued for transmission and not directly transmitted to the Thingy:91.
Click on Actions -> "Send a downlink message" next to your registered device.
Step 2 (opt.): Open a UDP Socket
This is not required if a UDP socket is already open, e.g. because you have sent a "Hello World" in the previous example.
AT#XSOCKET=1,2,1
#XSOCKET: 1,2,17
OK
You may query the current socket state, or close & re-open the socket if you encounter an "ERROR".
AT#XSOCKET?
#XSOCKET: 1,1,1
OK
AT#XSOCKET=0
#XSOCKET: 0,"closed"
OK
Step 3: Send dummy data to the IoT creators portal
AT#XSENDTO="172.27.131.100",15683,"Dummy"
#XSENDTO: 5
OK
Sending some dummy data to the IoT Creators portal is required in order to trigger the transmission of the downlink message from the server queue to the end device, our Thingy:91.
Step 4: Check if UDP data has been received
Use the following AT command to check for incoming UDP data, with a command timeout of 10s.
AT#XRECVFROM=10
You should now see your UDP message from the IoT creators portal in the AT command response.
Hello Device Response from the IoT Creators Portal
If you can view your sent message in the LTE Link Monitor, e.g. Hello Device, CONGRATULATIONS! You have just successfully received your first UDP message sent from the IoT Creators portal to your Thingy:91 over NB-IoT.
Updated about 3 years ago
