Azure and Power BI
Study guide deploying Azure resources and visualizing data with Power BI
1. Start your Microsoft Azure account
To be able to deploy and use Azure resources, you need an Azure subscription.
There are 2 options.
Option 1
Request your Azure subscription via the official Microsoft Azure website:
https://azure.microsoft.com/nl-nl/ or https://azure.microsoft.com/en-us/
Here you need to use a credit card to sign up. You can start with a free account.
Option 2
NORISK IT can provision your Azure environment and if you like, deploy the resources as described below, so you can start sending data right away! There are no costs for provisioning the Azure environment. Resource pricing is mentioned at the end of this study guide. The advantage is that you do not need a credit card to set this up.
Please contact NORISK IT Groep regarding your own Azure environment:
Sales - Email: [email protected] Phone: +31 88 66 747 00
Big Data & IoT, Anne van Bodegom - Email: [email protected] Phone: 06 31 04 80 77
2. Setup of your device
In this manual to setup your Azure environment, a specific data format is used. This data format is a HEX string that contains the following bytes/characters for the following sensor data (this is an example):
0A5A101C03F9004F42F400097E8E
| Temperature | Humidity | Pressure | Latitude | Longitude |
|---|---|---|---|---|
| 0A5A | 101C | 03F9 | 004F42F4 | 00097E8E |
This format is used as an example and is based on the Sodaq N211 shield reading out these sensors. If you need a different format, please reach out to us or to NORISK IT Group to request a generic parser with which you can configure your own data format.
To test your Azure setup with this data format you can simply follow the “Getting started” topic in our online documentation and instead of sending a “Hello World”, e.g. send “48656c6c6f20576f726c64” in HEX. You can send a message using the message in this data format shared here. So, for example:
AT+NSOST=0,"172.27.131.100",15683,14," 0A5A101C03F9004F42F400097E8E"
3. Setup your Azure account
Sign in to the Azure portal at http://portal.azure.com with your Azure account.
Create a function app
You must have a function app to host the execution of your functions. A function app lets you group functions as a logic unit for easier management, deployment, and sharing of resources.
Select the New button found on the upper left-hand corner of the Azure portal, then select Compute > Function App.
- Use the function app settings as specified in the table below the image.
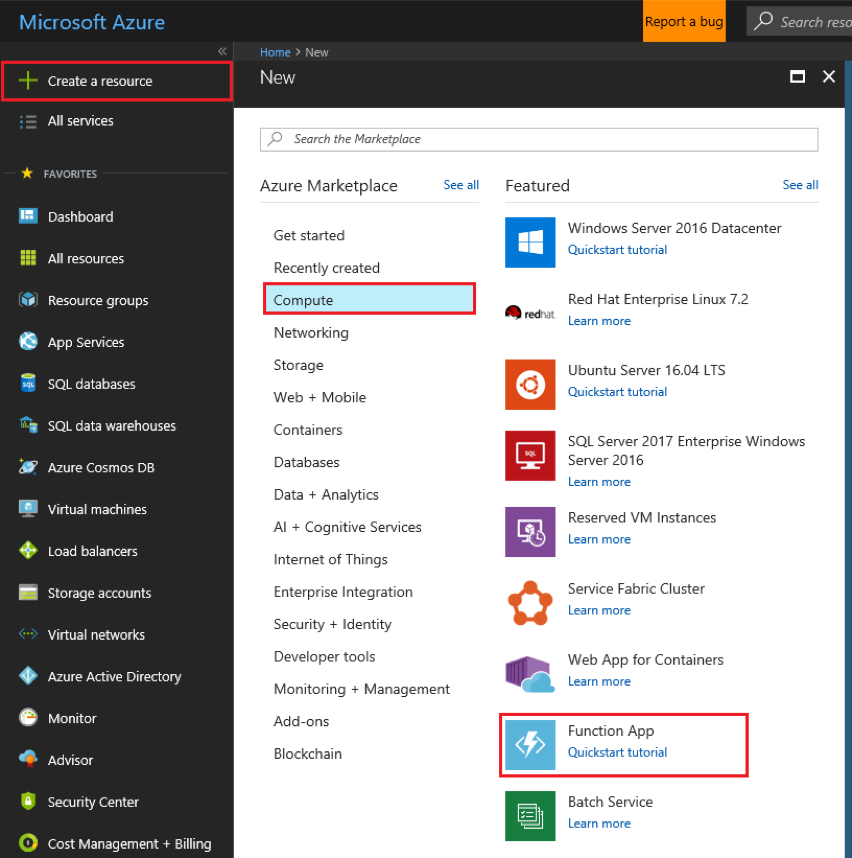
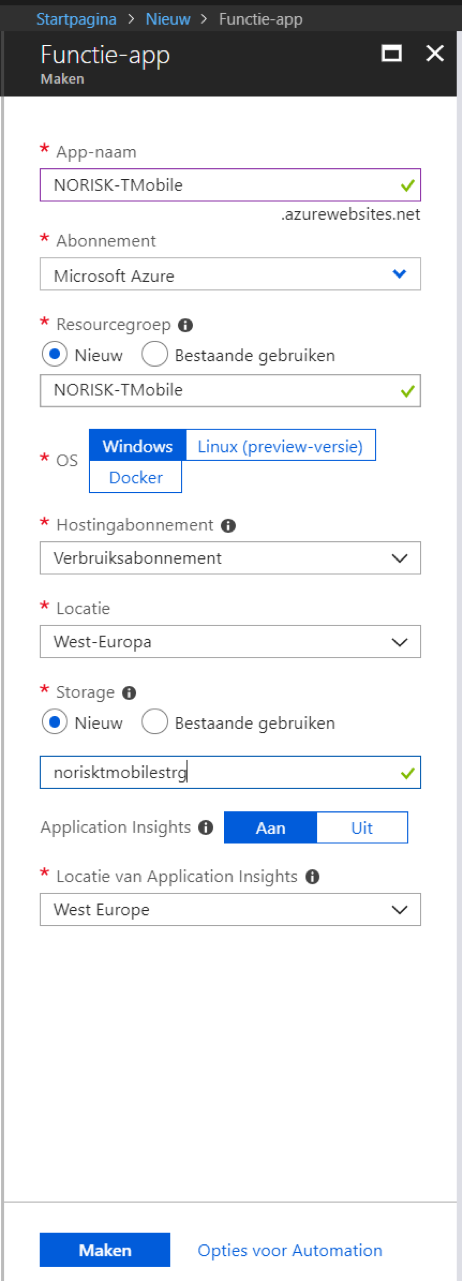
*Make sure you deploy the app in location: “West Europe”
- Select Create/Maken to provision and deploy the function app.
- Select the Notification icon in the upper-right corner of the portal and watch for the Deployment succeeded message.
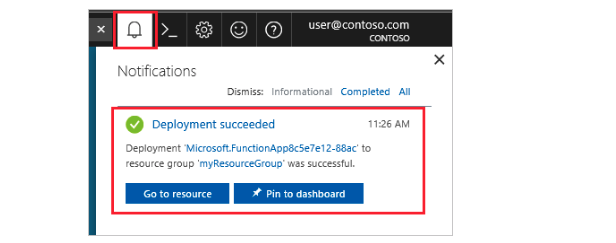
- Select Go to resource to view your new function app.
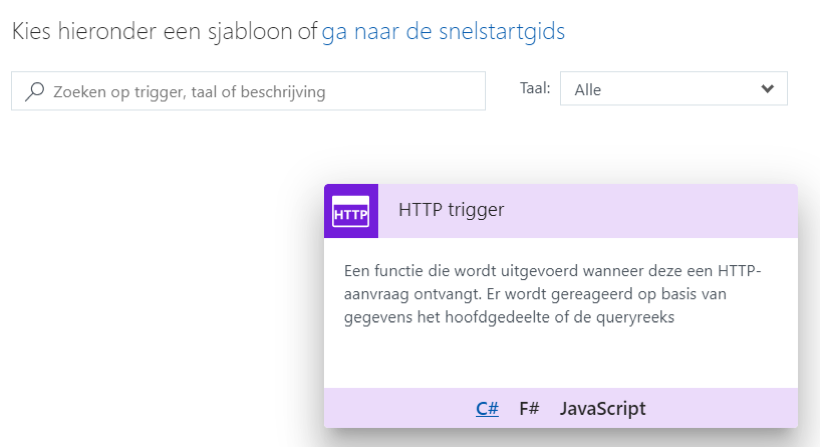
- Expand your function app and click the + button next to Functions. If this function is the first one in your function app, select Custom function/Aangepaste functie. This displays the complete set of function templates.
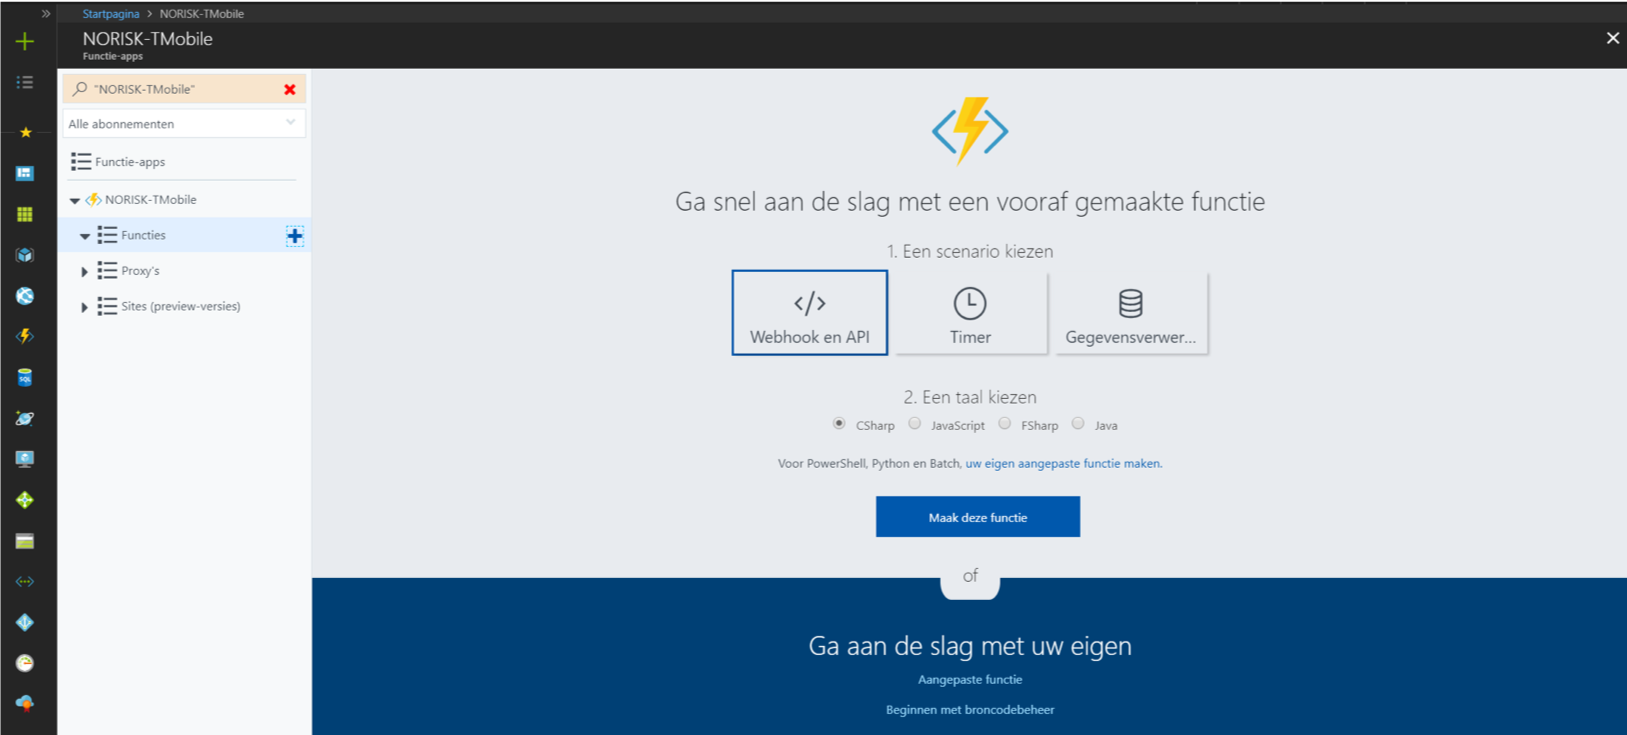
- Select C# in the Quick guide/Snelstartgids for the HTTP webhook trigger template.
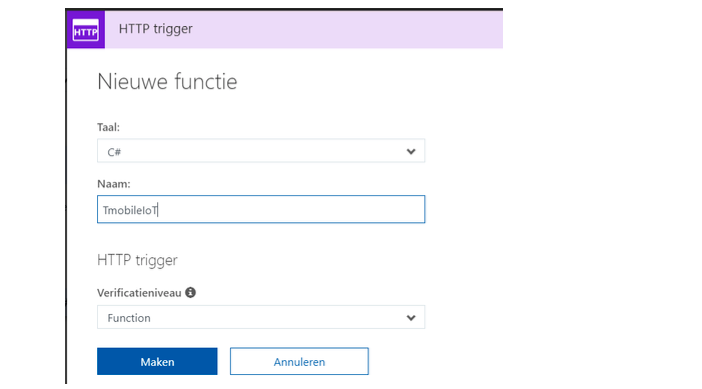
- Type a Name for your function, set the Authorization level/Verificatieniveau to “Function” then select Create/Maken.
Replace the C# script code in the function in the portal with the following code, click Save/Opslaan:
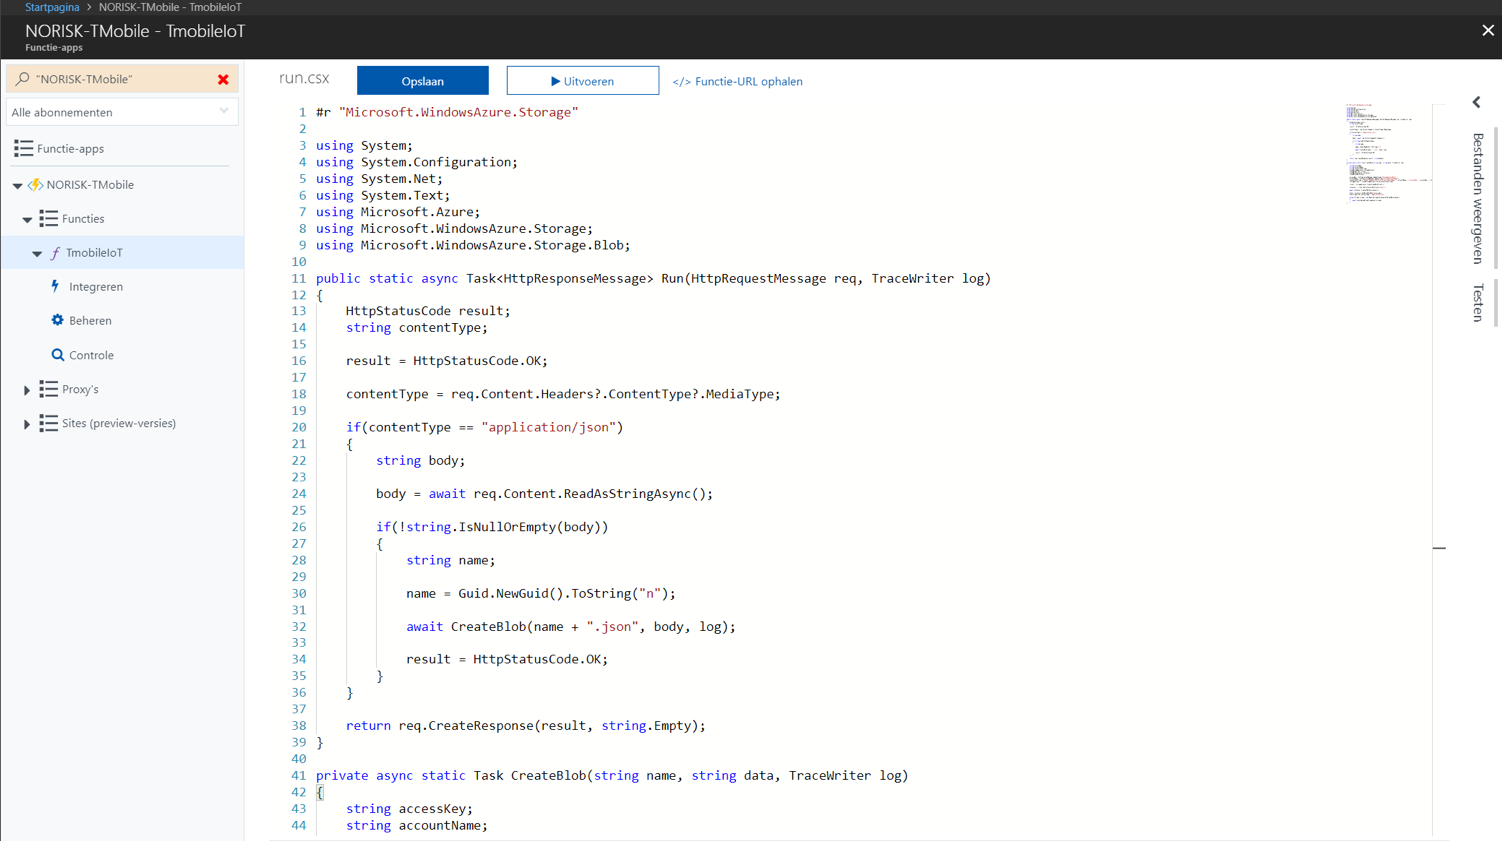
Download the script at: https://norisktmobilestrg.blob.core.windows.net/powerbi/T-Mobile%20script.txt
#r "Microsoft.WindowsAzure.Storage"

using System;
using System.Configuration;
using System.Net;
using System.Text;
using Microsoft.Azure;
using Microsoft.WindowsAzure.Storage;
using Microsoft.WindowsAzure.Storage.Blob;

public static async Task<HttpResponseMessage> Run(HttpRequestMessage req, TraceWriter log)
{
    HttpStatusCode result;
    string contentType;

    result = HttpStatusCode.OK;

    contentType = req.Content.Headers?.ContentType?.MediaType;

    if(contentType == "application/json")
    {
        string body;

        body = await req.Content.ReadAsStringAsync();

        if(!string.IsNullOrEmpty(body))
        {
            string name;

            name = Guid.NewGuid().ToString("n");

            await CreateBlob(name + ".json", body, log);

            result = HttpStatusCode.OK;
        }
    }

    return req.CreateResponse(result, string.Empty);
}

private async static Task CreateBlob(string name, string data, TraceWriter log)
{
    string accessKey;
    string accountName;
    string connectionString;
    CloudStorageAccount storageAccount;
    CloudBlobClient client;
    CloudBlobContainer container;
    CloudBlockBlob blob;

    accessKey = ConfigurationManager.AppSettings["StorageAccessKey"];
    accountName = ConfigurationManager.AppSettings["StorageAccountName"];
    connectionString = "DefaultEndpointsProtocol=https;AccountName=" + accountName + ";AccountKey=" + accessKey + ";EndpointSuffix=core.windows.net";
    storageAccount = CloudStorageAccount.Parse(connectionString);

    client = storageAccount.CreateCloudBlobClient();

    container = client.GetContainerReference("nbiot");

    await container.CreateIfNotExistsAsync();

    blob = container.GetBlockBlobReference(name);
    blob.Properties.ContentType = "application/json";

    using (Stream stream = new MemoryStream(Encoding.UTF8.GetBytes(data)))
    {
        await blob.UploadFromStreamAsync(stream);
    }
}
- You will need to enter the following App-Settings/Toepassingsinstellingen:
a. StorageAccessKey
b. StorageAccountName
These can be found in de recently created storage account. In this case norisktmobilestrg. Navigate from the dashboard, in the left pane, to Storageaccounts/Opslagaccounts and select the storage account.
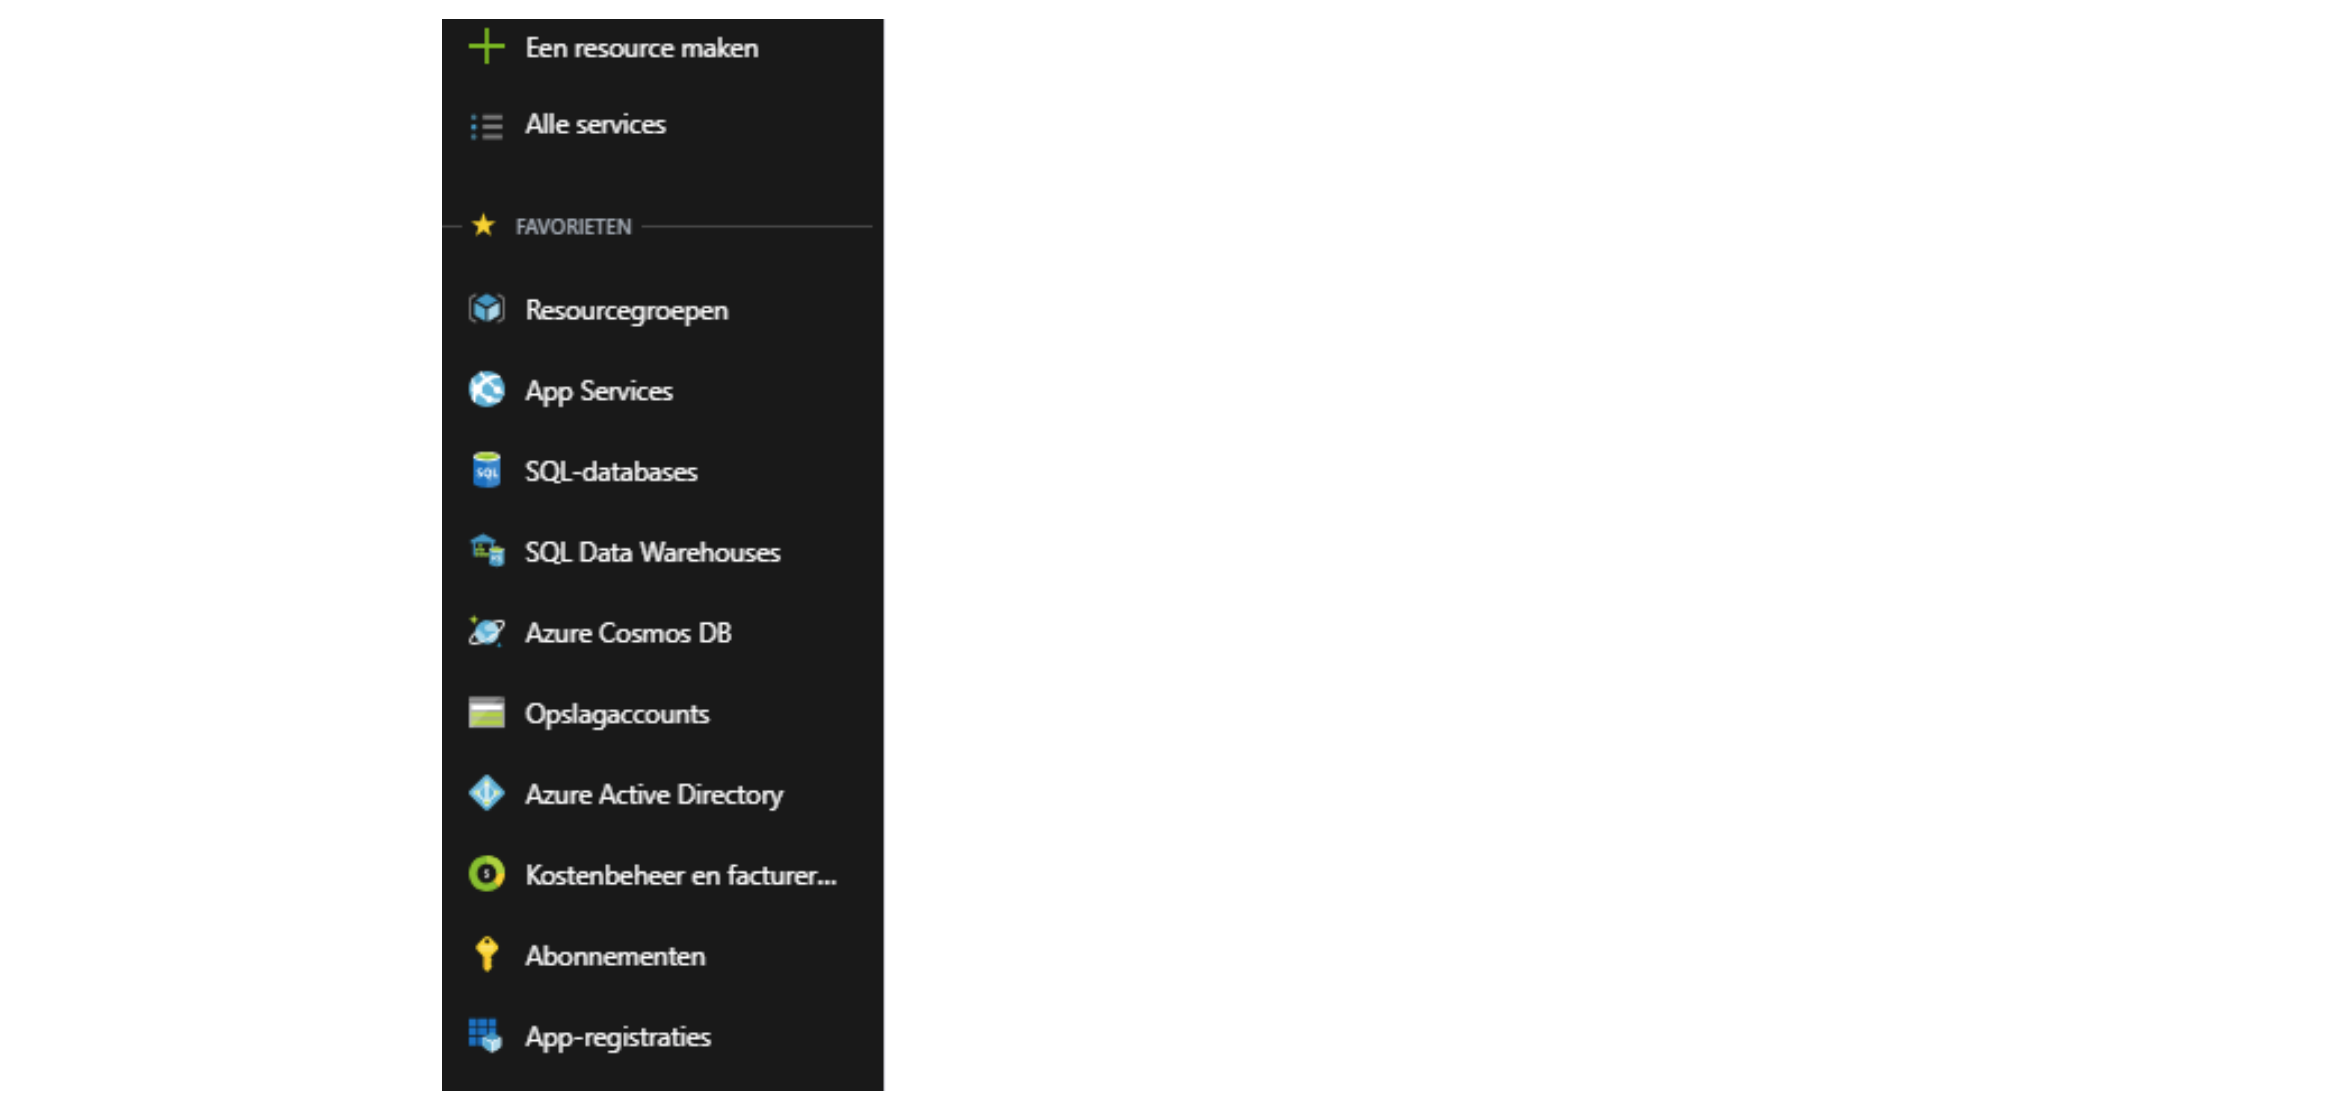
Click on Keys/Toegangsleutels in the unfolded new pane:
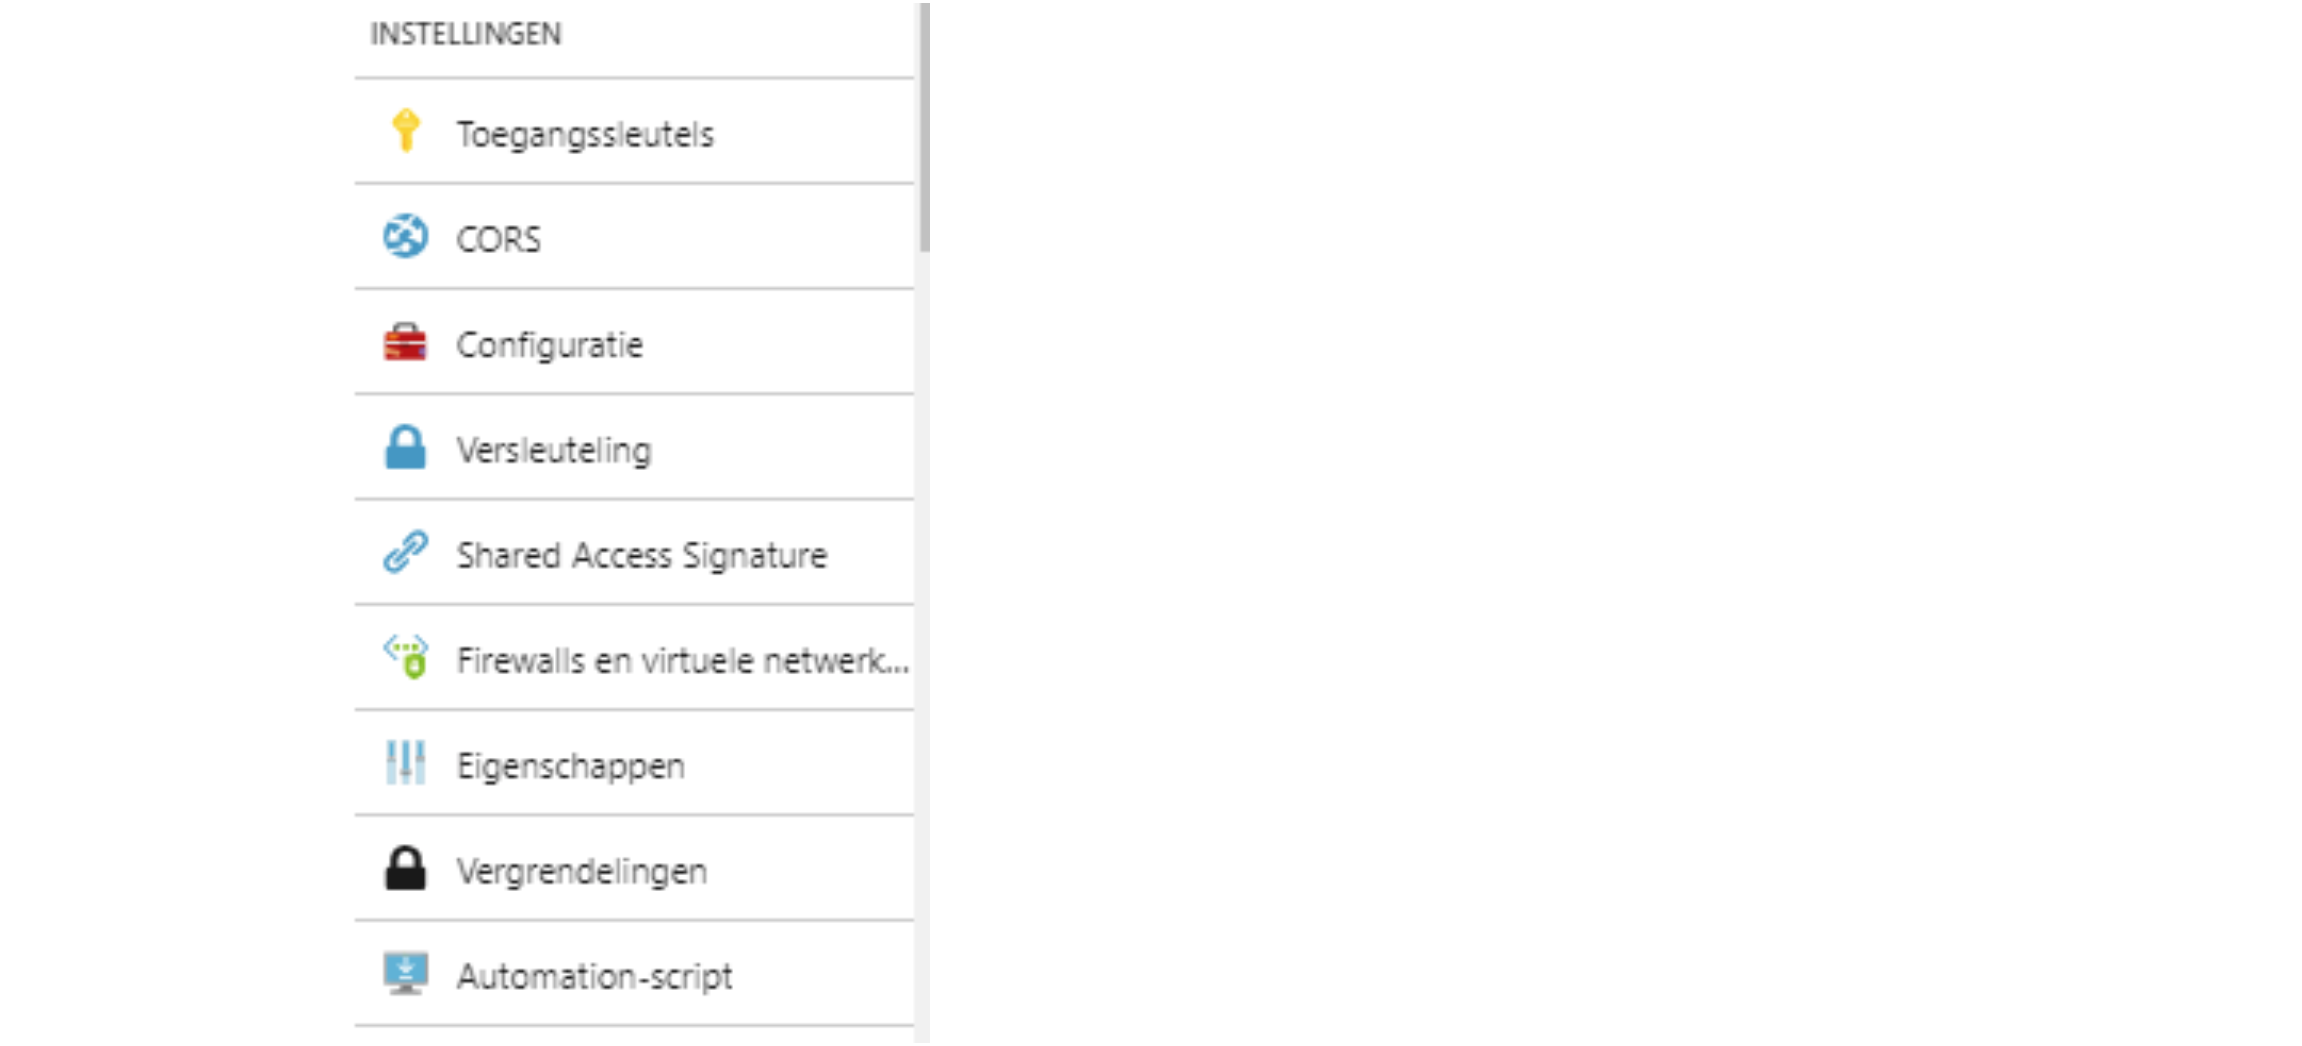
Here you’ll find the account name and key. Copy both to a temporary notepad file:

- Key’s above have been changed. Keep yours private!
Navigate back to the functions app and click on App-Settings/Toepassingsinstellingen

Scroll down to App-Settings/Toepassingsinstellingen, add the values StorageAccessKey and StorageAccountName.

Click Save/Opslaan at the top of the page. The app reloads and is ready for usage.
* do not delete your temporary notepad file with storage name and key, you need it again.
- To retrieve the URL of your function, navigate back to the overview/overzicht tab and select your function in the left pane. At the top, click on </>Function-URL

A window will pop-up with the URL, select the default (Function key):

Any valid json message will work and will be stored as a blob in the storageaccount you created. The blobs can be found in container: nbiot.
4. Data visualisation in Power BI
After completing previous steps, you are ready to connect Power BI (data visualization tool) to your storage account. Again, you will need the name of the storage account and key which you kept in a notepad file. First you need to download Power BI desktop (free).
Before proceeding it is necessary that there are 2 or more json files in the container of the storage account, which means you will have to send two valid messages to your webhook, with the following format:
0A5A101C03F9004F42F400097E8E
| Temperature | Humidity | Pressure | Latitude | Longitude |
|---|---|---|---|---|
| 0A5A | 101C | 03F9 | 004F42F4 | 00097E8E |
The above format is mandatory for sole purpose of the demo. We created a parser in which you are able to set different data formats for individual- or groups of sensors. Contact us or NORISK IT Group regarding the data parser.
- Go to https://powerbi.microsoft.com/nl-nl/desktop/
- Download and install;
- Go to: https://norisktmobilestrg.blob.core.windows.net/powerbi/T-Mobile%20Template.pbix
to download the T-Mobile Power BI template; - Open the template and navigate to Edit query’s/Query’s bewerken and select
Datasource settings/Instellingen voor gegevensbron:

- Select Edit source/Bron wijzigen:
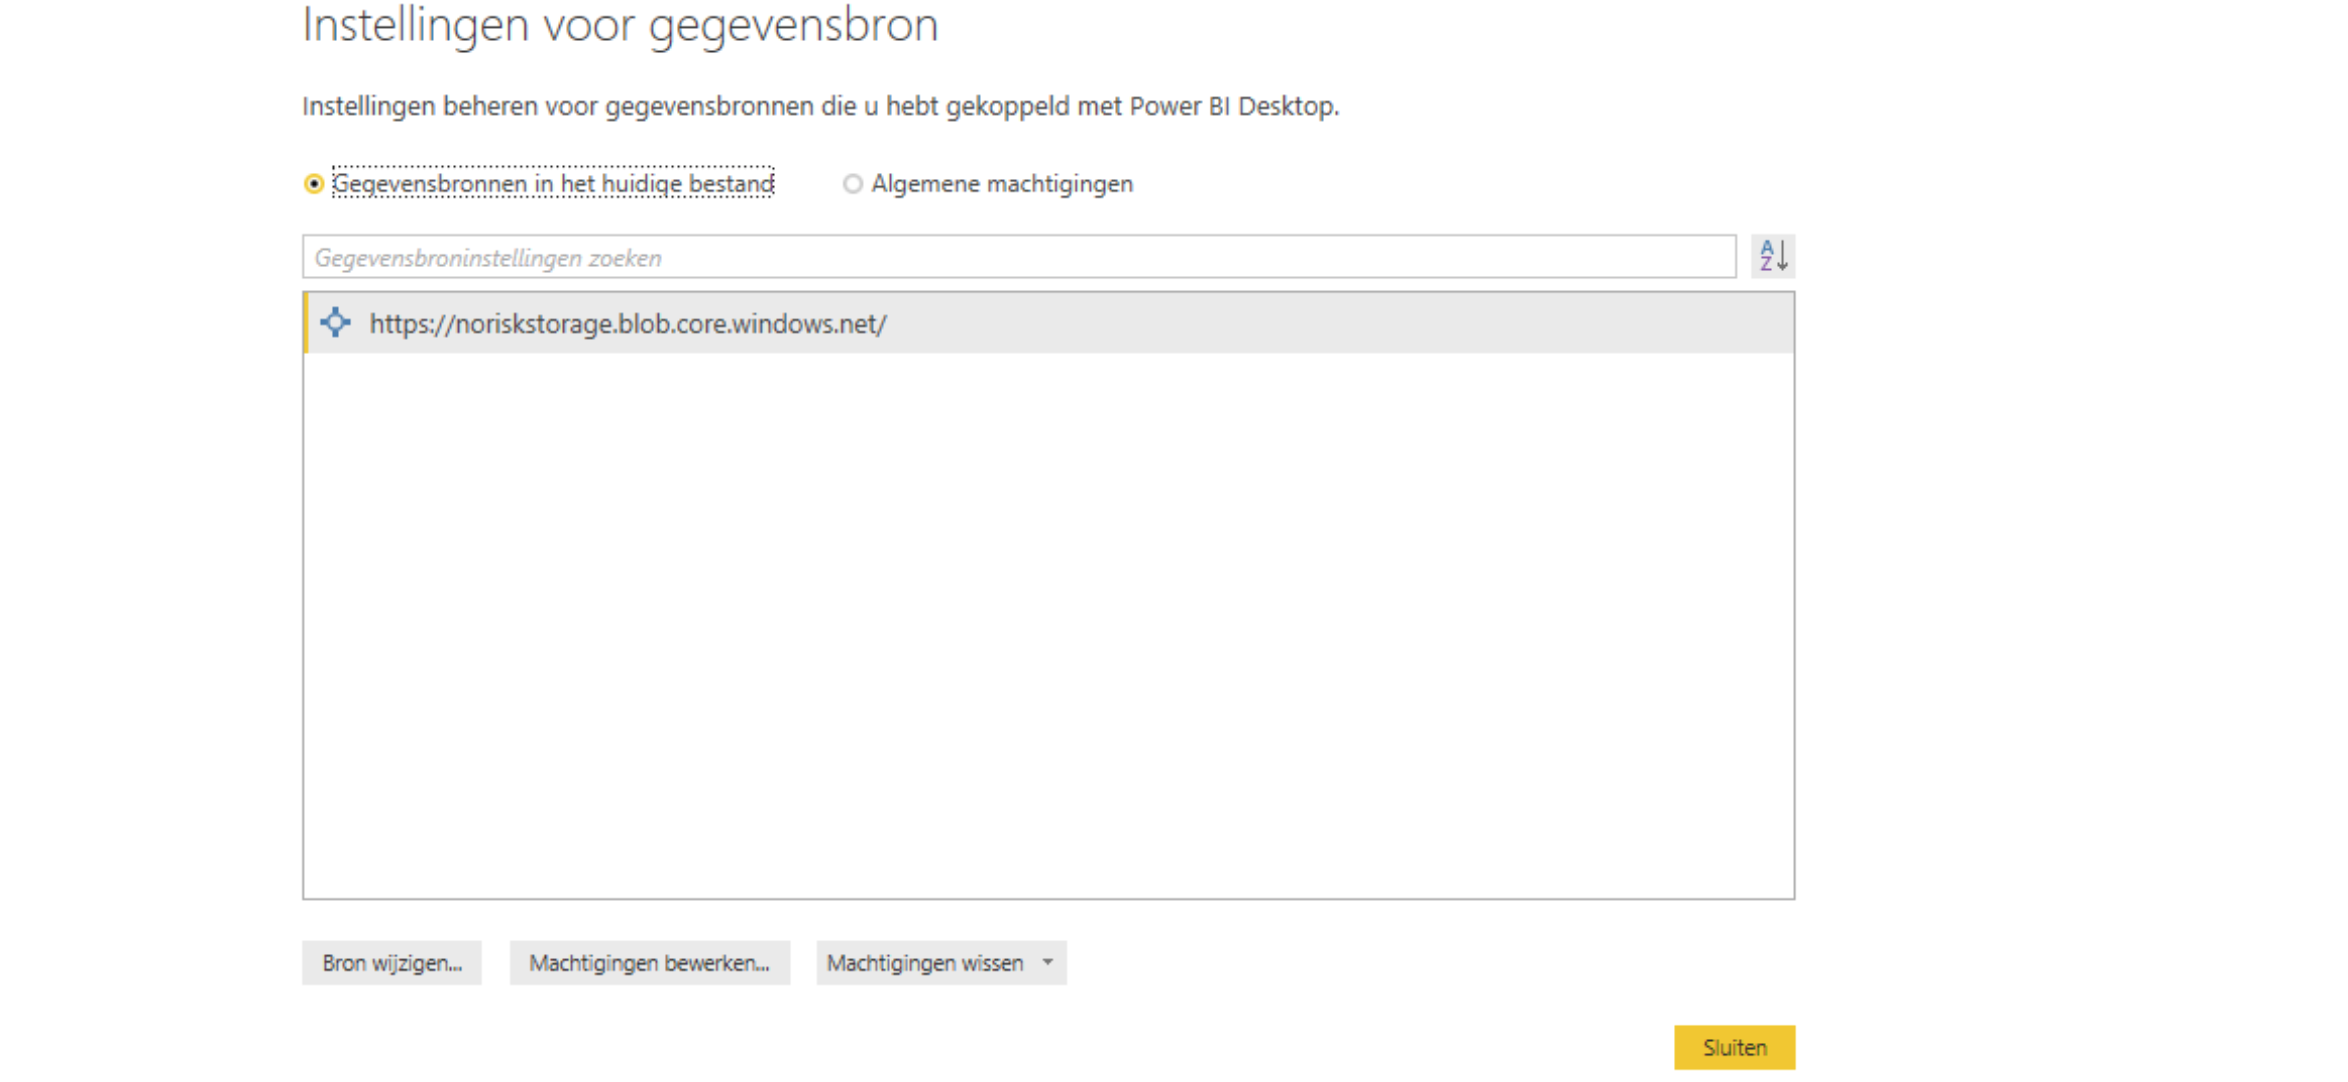
- Enter your storage account name and click “OK”, you will be prompted to enter the storage key afterwards:

-
After you entered the key, Power BI will connect and load the data.
-
To be able to share the dashboard and schedule data refresh you need to upload the template to Powerbi.com. Navigate to Publish/Publiceren:

Sign in with your Microsoft account and publish the dataset to Power BI Service. If you do not have a Power BI license, a 60 day trial starts. When the trial ends, you can upgrade to Power BI Pro. Contact your Microsoft partner regarding licenses.
After publishing a windows popsup:
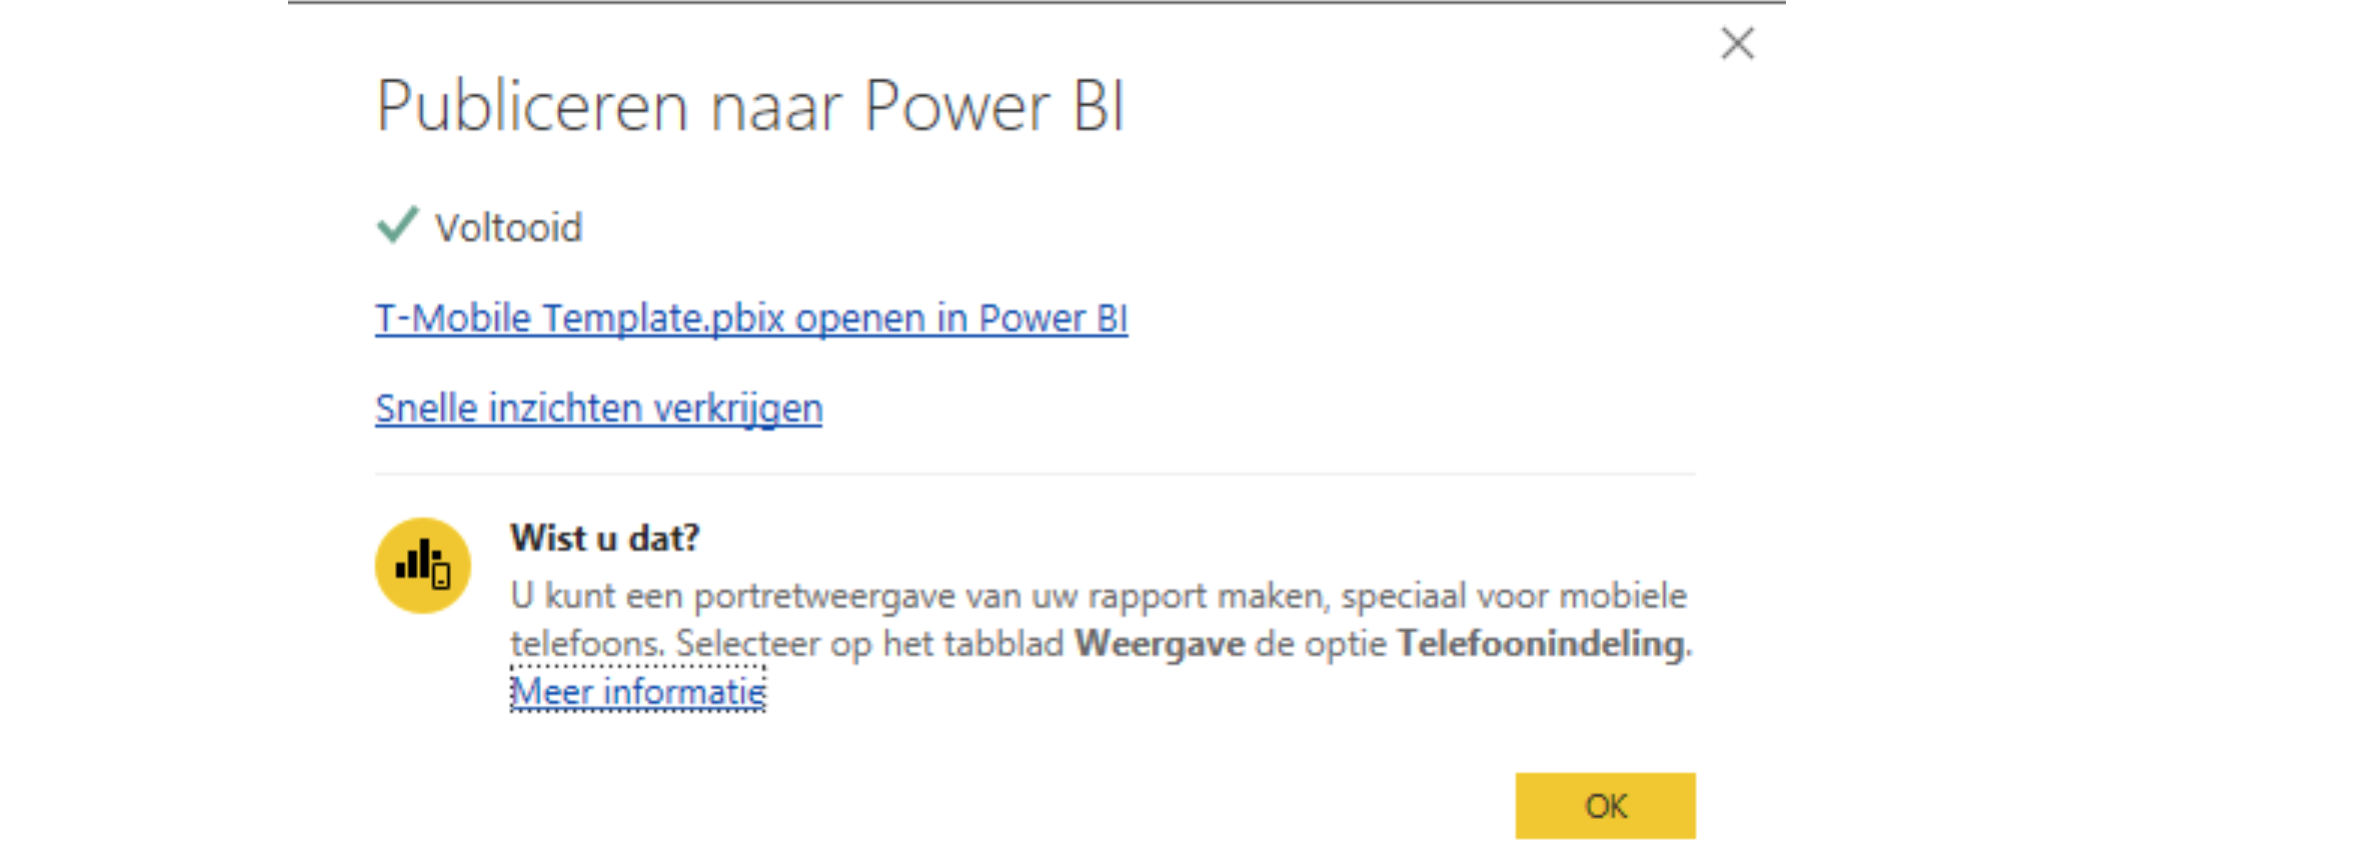
Click on the link: “T-Mobile template.pbix open in Power BI” to open Power BI Service via your browser. If it’s your first time using the Power BI Service you a are prompted some settings, complete these first.
In order to schedule data refresh, navigate to Datasets/Gegevenssets and select Schedule refresh/Vernieuwen plannen (the third action):

For security reasons you might be prompted to enter your Storage key.
Create your own time table on which the data needs to be refreshed, there is a limit of 8. Contact NORISK IT Groep or T-Mobile IoT for real-time streaming data.
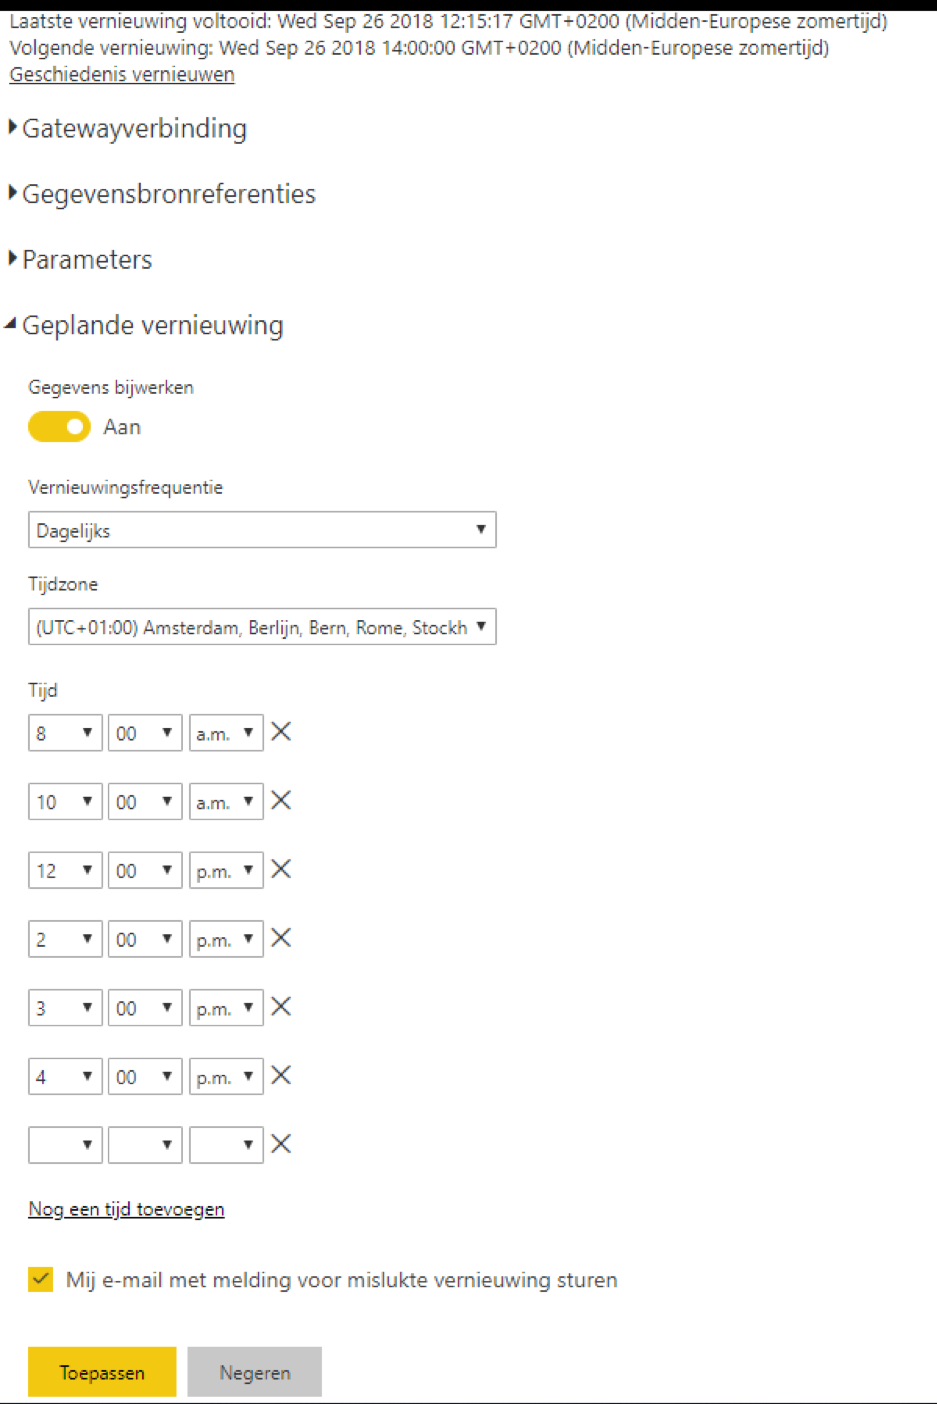
Hit Apply/Toepassen in order to activate the schedule. Your data will now be refreshed on schedule.
9. Next, create a dashboard from you report. Navigate back to Reports/Rapporten and select T-Mobile IoT Template.

Click on the ‘pin’ Pin live-page / Live-pagina vastmaken.

The following window pops up, select New dashboard/Nieuw dashboard enter a name and click Pin live / Live vastmaken.
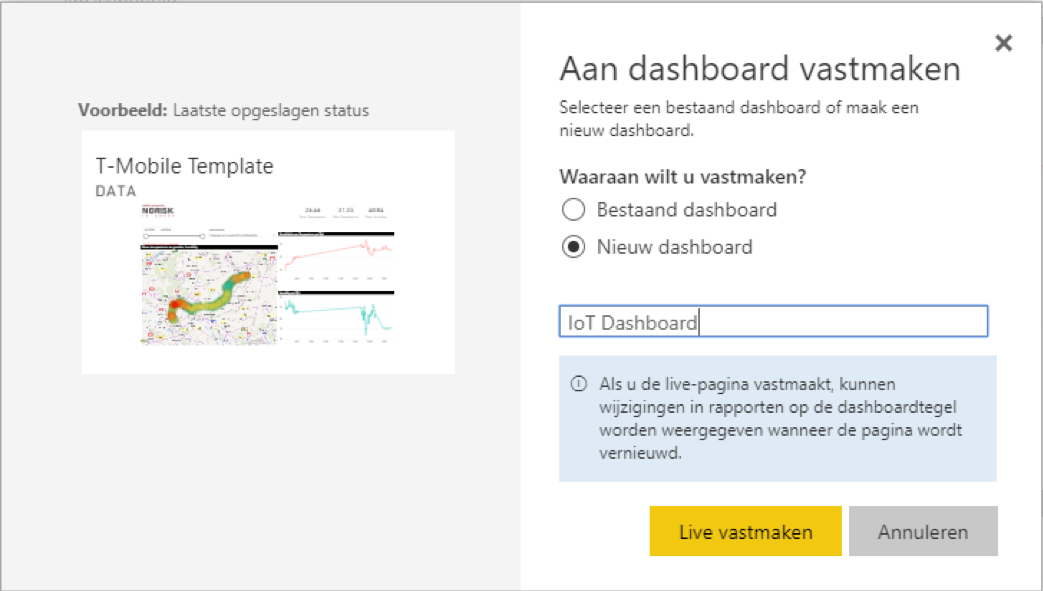
To view the dashboard, navigate to dashboards:

All done! You can now view your data in Power BI. Usage costs for Azure will be minimal because of low usage/storage. See pricing:
Functions App: https://azure.microsoft.com/nl-nl/pricing/details/functions/
Storage: https://azure.microsoft.com/nl-nl/pricing/details/storage/blobs/
Micrisoft Azure Dashboard examples
Updated over 4 years ago
