4: Send message from devkit
In this chapter you learn how to send your first "Hello World" message from your devkit to IoT Creators SCS
CONGRATULATION! If you reached this point it means that you have successfully setup your devkit, attached it to the NB-IoT network and registered it to the IoT Creators.
Register your device first!
Make sure that you have registered your device with its IMEI at the IoT Creators portal BEFORE you send your first message to the UDP or CoAP server of IoT Creators.
If you forget, you will have problems to register your device afterwards. In this case please get in contact with IoT Creators support team.
Your device should be up and running and an IP address should be assigned to it now. This is the basic precondition for exchanging UDP messages between your device and the UDP server of IoT Creators.
In this chapter you will learn first how to establish a UDP connection from your device to the UDP server of IoT Creators and second how to send a "Hello World" message via this connection.
The basic IoT Creators configuration parameter which you need during your journey through this turorial you can find on the page IoT Configuration Parameter.
In the following chapters you find the tutorials for different types of devkits to send a "Hello World" message from your device to IoT Creators via NB-IoT network.
Go for it and enjoy !!
Preliminary Work on your Devkit
Register your device first!
Make sure that you have registered your device with its IMEI at the IoT Creators portal BEFORE you send your first message to the UDP or CoAP server of IoT Creators.
If you forget, you will have problems to register your device afterwards. In this case please get in contact with IoT Creators support team [email protected].
Before you can send a "Hello World" UDP message from your device to the IoT Creators make sure you did the following steps:
- Register your device with the correct IMEI in the IoT Creators Portal.
To insure that you used the correct IMEI you can query it with the AT command directly from the device. For BC66 device this command is: AT+CGSN=1 - Connect the device via USB cable to your laptop.
- Start your terminal program such as putty (Windows) or screen (Linux) with a baudrate of 115200.
- Switch on the device by pressing the "switch on/off" button.
- Deactivate auto-sleep with AT command: AT+QSCLK=0
- Activate echo of console inputs with AT command: ATE1
- Wait until the device display the IP address of the network attachment such as +IP: 10.0.0.239
As the result you should see on your console an output like:
F1: 0000 0000
V0: 0000 0000 [0001]
00: 0006 000C
01: 0000 0000
U0: 0000 0001 [0000]
T0: 0000 00B4
Leaving the BROM

AT+QSCLK=0
OK
ATE1
OK

+IP: 10.128.1.98
You should only continue with the next steps if you have seen the IP address of the network attachment displayed on the console.
If you don't see the IP address unfortunatelly you have to start troubleshooting now 😢
Now you can open a UDP socket to the UDP server of the IoT Creators.
Open UDP socket to UDP server
AT+QIOPEN=1,1,"UDP","172.27.131.100",15683,1001,0,0
OK

+QIOPEN: 1,0
This AT command opens a UDP socket with:
- Context ID = 1,
- Connection ID = 1,
- Service type = UDP,
- Server IP address = 172.27.131.100,
- UDP port of the server = 15683
- UDP port of the device for responses of the server = 1001,
- Buffered access mode = Yes and
- Protocoll type = IPv4
In all other AT commands which are related to this socket connection you should use 1 as connection id.
In case your AT+QIOPEN command doesn't return OK or +QIOPEN: 1,0 something went wrong.
At first you should double check if you can reach the UDP server with the AT+QPING command.
PING Service
Check the ping address here: IoT Configuration Parameter
AT+QPING=1,"172.27.131.100"
OK

+QPING: 0,"172.27.131.100",32,3010,253
The ping result is returned by the first integer parameter of +PING: return. 0 means that every thing was fine. A value different from 0 indicates an error. You can use AT+QIGETERROR to get the error description.
Sending "Hello World" UDP Message to UDP Server
It is recommended not to send plain text or binary data from the device to your backend applications or vice versa. You can for example use a hex or a base64 encoding format of data. In our case we send Hello World as a hex converted string to the IoT Creators.
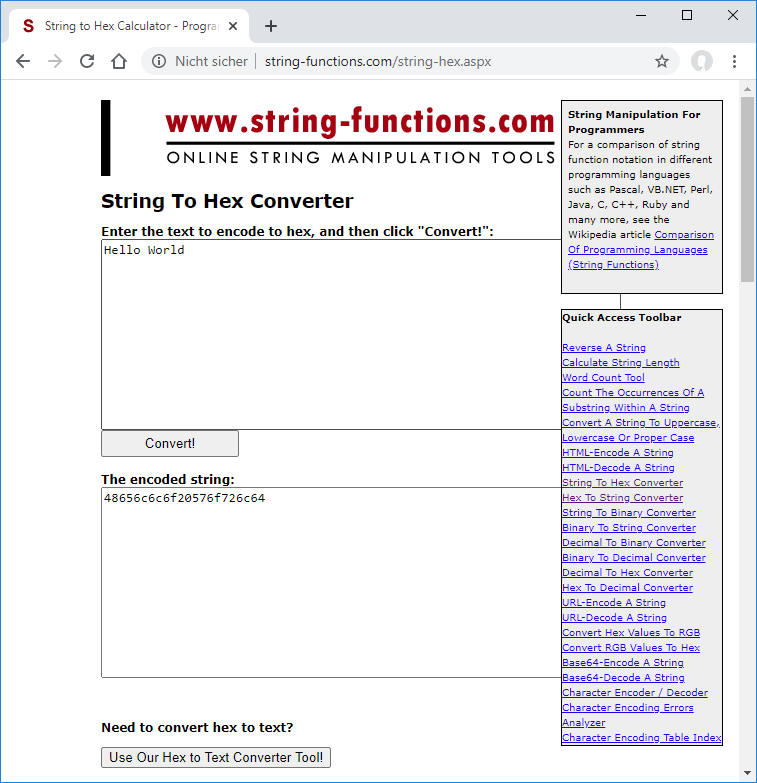
To convert Hello World you can use the online tool http://string-functions.com/string-hex.aspx.

The hex string for Hello World is 48656c6c6f20576f726c64.
To have your device send this message via UDP to the UDP server of IoT Creators you can use the following AT command:
AT+QISENDEX=1,11,48656c6c6f20576f726c64
OK

SEND OK
This AT command sends via the connection with the id 1 the message 48656c6c6f20576f726c64 with a lenght of 11 bytes.
If you see SEND OK on the device console:
CONGRATULATIONS! You just sent your first UDP message from your device to one of IoT Creators' UDP servers.
The message length which is assigned to the command AT+QISENDEX as second parameter describes the length of the original message. It does NOT desribes the length of the hex message which has a length of 22 bytes.
Next we can go back to the project space of the IoT portal to check what has been received.
View the received Messages in IoT Creators Portal
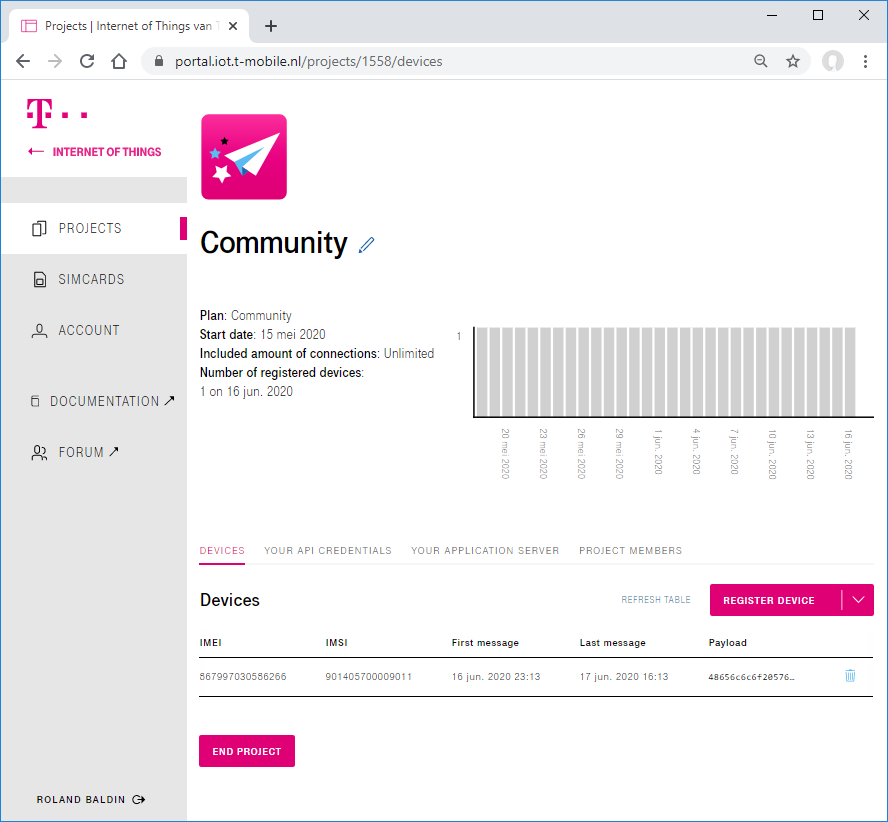
For each device the IoT Creators Portal makes the last received message available by showing it in the Payload column. In case of our Hello World message:

If you click on the payload the value of it is copied to the clipboard.
As already mentioned above it is good behaviour to transfer strings and binary data not as they are. It is better to encode them in hex or base64 for the transfer.
We sent our Hello World as hex encoded string on its way. Out if this reason we see in the IoT Creators Portal the string 48656c6c6f20576f726c64.
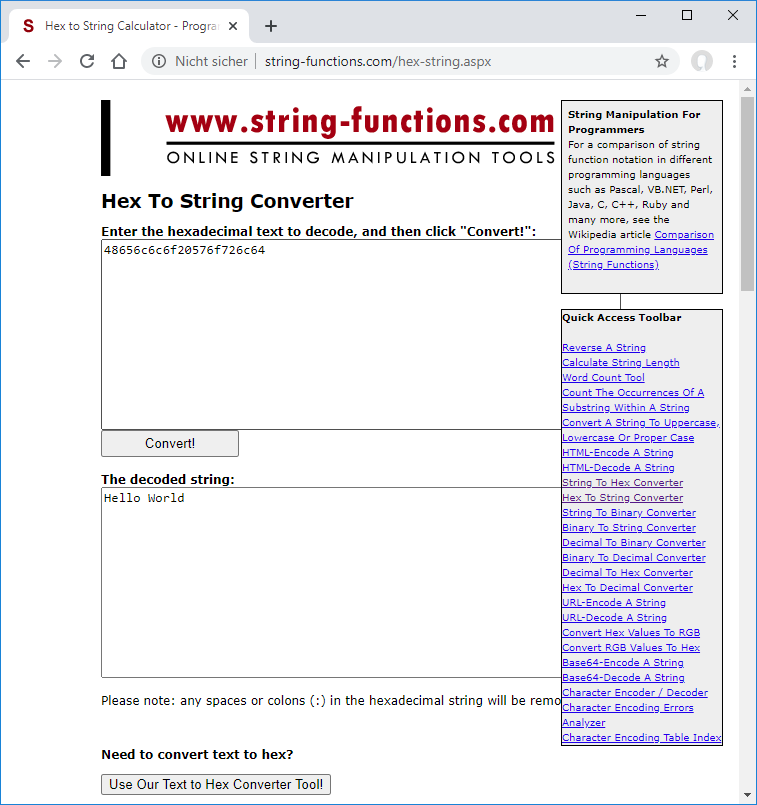
To decode the received message back from hex to a readable string we can use the online tool again http://string-functions.com/hex-string.aspx.

If you can decode your received message to Hello World :
CONGRATULATIONS! You just sent and receceived your first UDP message via NB-IoT.
AT Commands to send Hello World
# Deactivate auto-sleep
AT+QSCLK=0
OK

# Switch on echo mode
ATE1
OK

# Open UDP socket to server
AT+QIOPEN=1,1,"UDP","172.27.131.100",15683,1001,0,0
OK

+QIOPEN: 1,0

# Send Hello World as hex
AT+QISENDEX=1,11,48656c6c6f20576f726c64
OK

SEND OK
Updated over 2 years ago
