Generic MQTT software client
This tutorial describes how to integrate a generic MQTT software client with IoT Creators.
This documentation will guide you through the integration of MQTT clients to the IoT Creators platform. There are countless MQTT software clients you can choose from. In this guide we will use a cross-plattform MQTT desktop client called MQTTx.
Prerequisites
First of all (obviously) you need to install or choose an MQTT client you want to use. If you want to follow with the same client we are using in this tutorial, you can download MQTTx here: https://mqttx.app
Alternative
An alternative would be to use Eclipse Mosquitto which is an open source MQTT broker that comes equipped with the the mosquitto_pub and mosquitto_sub command line utilities for publishing and subscribing (https://github.com/eclipse/mosquitto) or the MQTT CLI package from HiveMQ (https://github.com/hivemq/mqtt-cli).
After you have an MQTT Client ready to go, make sure that you have a callback URL registered in your IoT Creators project. You then need to register an MQTT device in your IoT Creators project. Once you click on Register Device, you can choose MQTT as a protocol. Enter your IMEI and click on Advanced Settings. You can then either type your own password for device authentication or generate a random password by clicking "Generate Password".
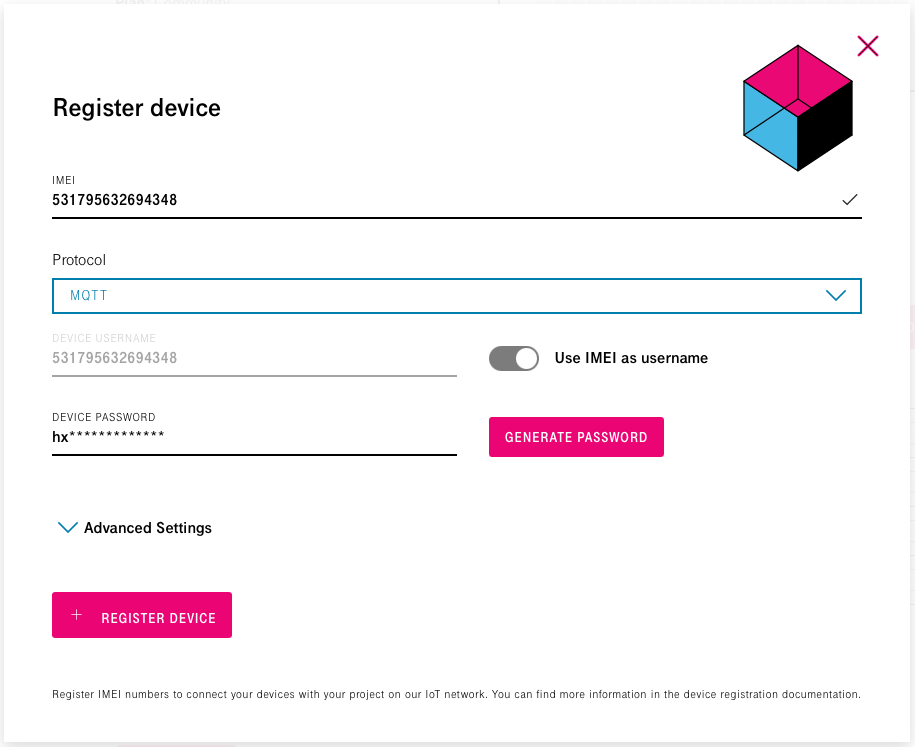
Connect an MQTT client to IoT Creators
Once we have registered the device in IoT Creators, we are ready to connect the MQTT client. In MQTTx click on the '+' sign in the menu bar to create a new connection and specify your device details. In this case ClientID and Username are the IMEI of your device. The Host for connecting an MQTT device through the public internet is mqtts://mqtt.scs.iot.telekom.com. We only allow MQTT secured communication over SSL over the public internet so we have to choose mqtts:// and Port 8883 (see image below). After we click on Connect (on the upper right of the screen) our client should be able to connect.
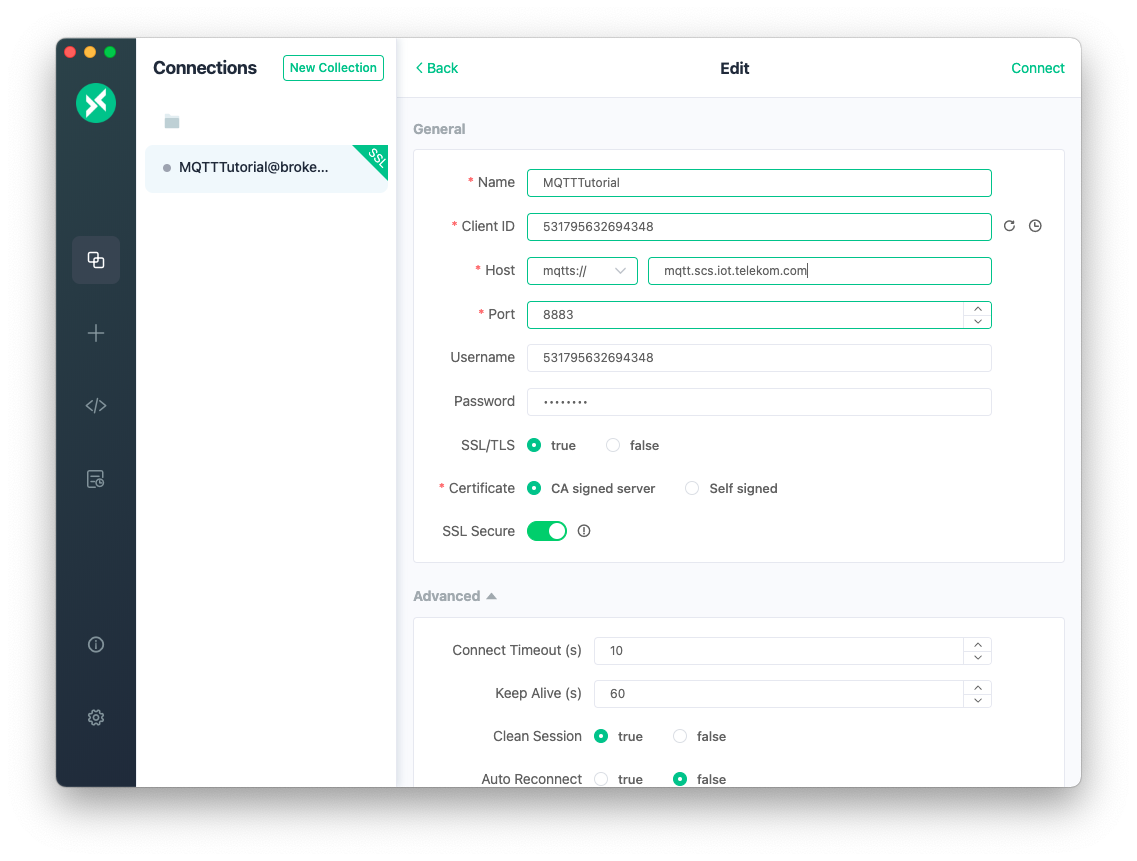
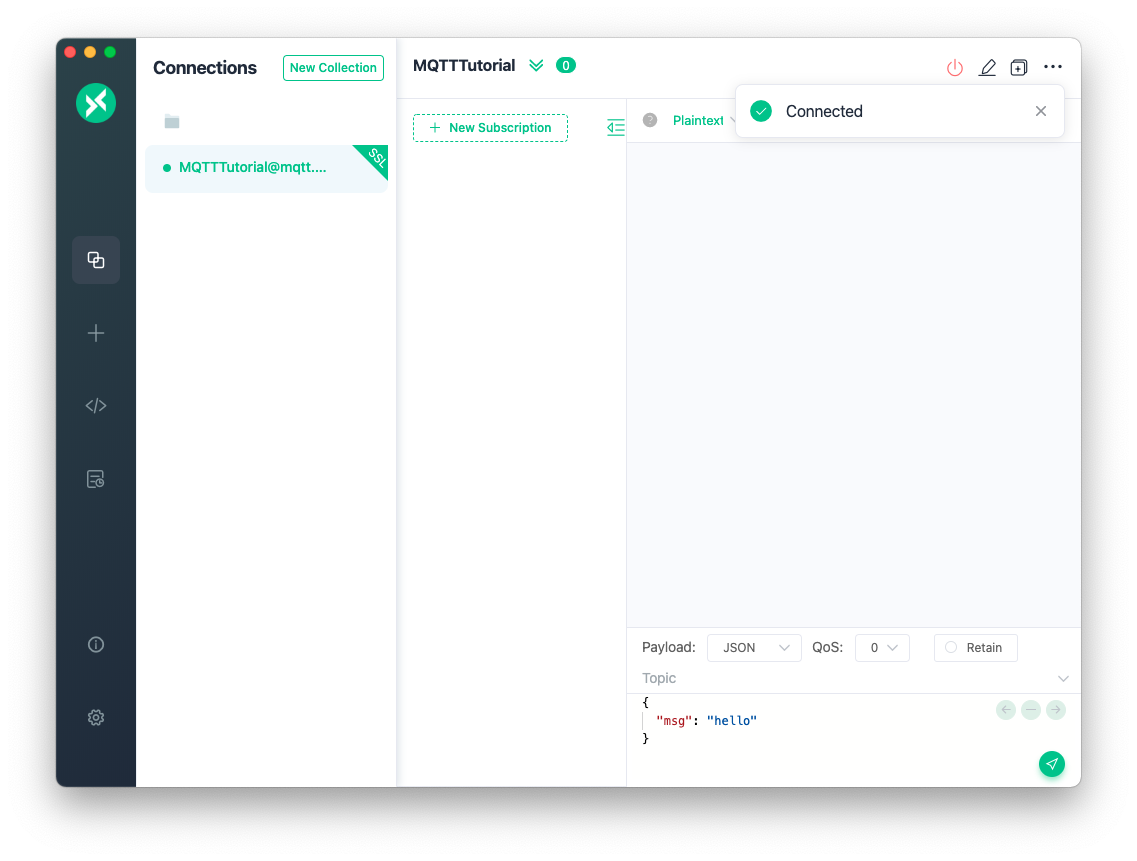
Publishing a message (i.e. uplink communication)
Once your device is connected and you have followed the prerequisites to register your callback URL (e.g. on beeceptor), you are ready to send your uplink message. In MQTT you need to specify a topic on which you want to publish on and a payload. The logic of MQTT for IoTCreators defines an uplink topic as "us/<IMEI>" and the payload as a JSON which contains a so called resource path and a value: {"uplinkMsg/0/data": "<VALUE>"}. In our example the topic is us/531795632694348 and we want to send the payload {"uplinkMsg/0/data": "HelloWorld"}.
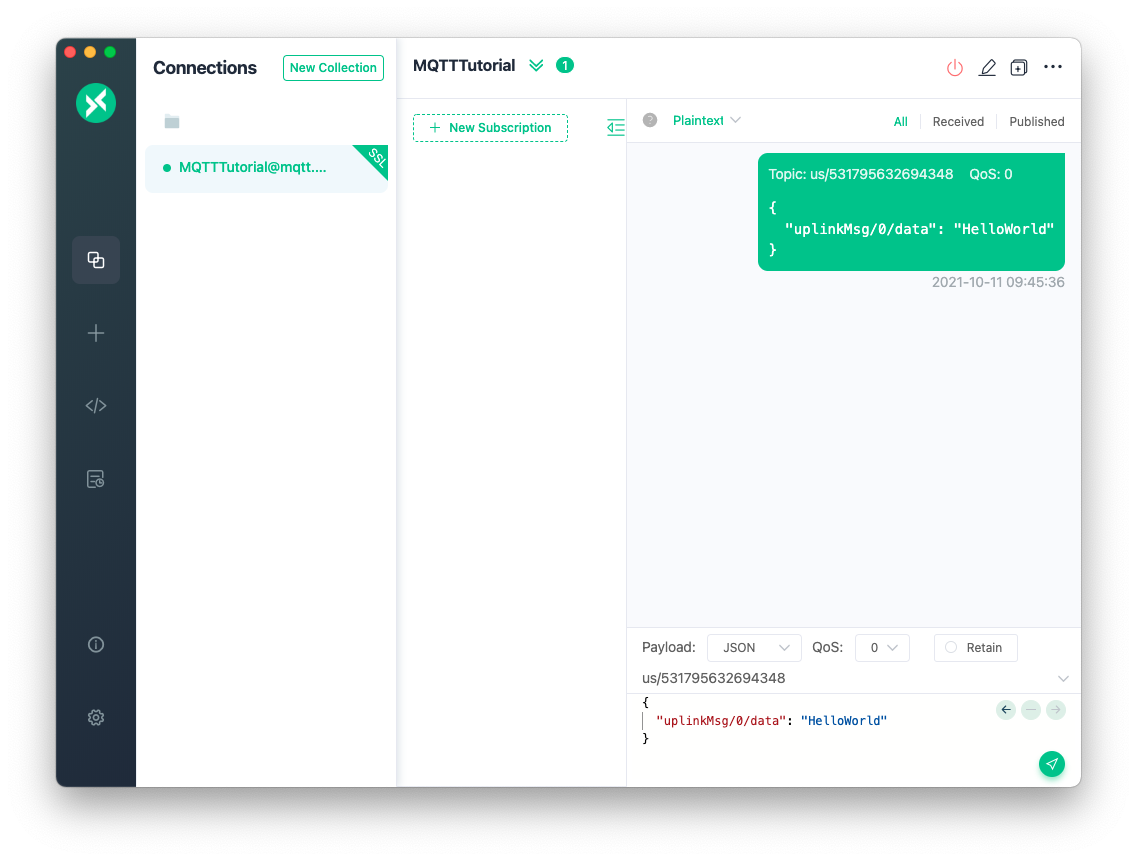
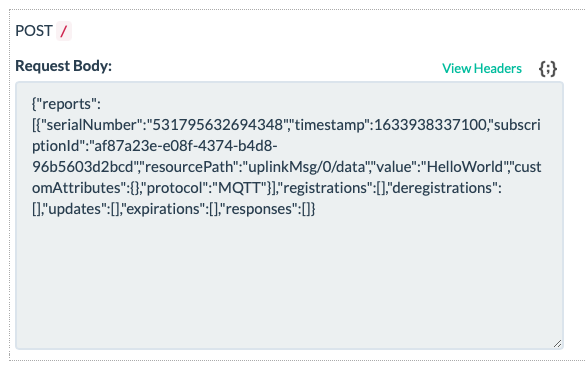
After publishing the message we immediately receive an HTTP POST on our callback URL with the following content:
{
  "reports": [
    {
      "serialNumber": "531795632694348",
      "timestamp": 1633938337100,
      "subscriptionId": "af87a23e-e08f-4374-b4d8-96b5603d2bcd",
      "resourcePath": "uplinkMsg/0/data",
      "value": "HelloWorld",
      "customAttributes": {},
      "protocol": "MQTT"
    }
  ],
  "registrations": [],
  "deregistrations": [],
  "updates": [],
  "expirations": [],
  "responses": []
}
We can see our message under "reports" -> "resourcePath":"uplinkMsg/0/data", "value":"HelloWorld" as we are already used to from sending UDP and CoAP messages.
Subscriptions and Downlink Messages
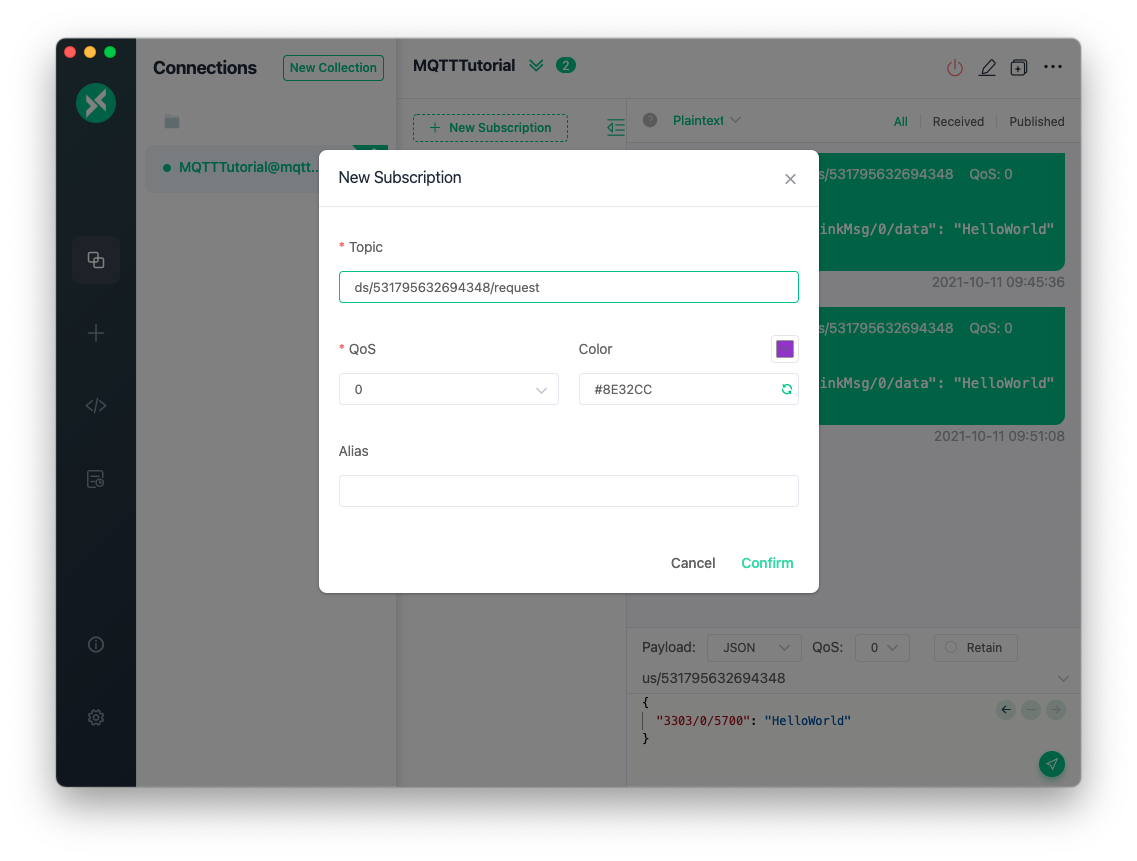
In MQTT, before receiving a downlink message, we need to subscribe to a topic that the client is going to listen on. The structure of the topic is "ds/<IMEI>/request" so in our case we are going to subscribe on ds/531795632694348/request.
Enabling downlinks
Also, before we are able to receive downlink messages on the resourcePath "downlinkMsg/0/data" we need to first tell IoTCreators, that our device is capable of processing downlink messages on that resourcePath.
Enable downlink communication
To enable downlink communication, simply send an uplink message with the payload
{"downlinkMsg/0/data": ""}to the uplink topic us/<IMEI>.
Send downlink to device
Once we have done that we can go to the device in our IoT Creators project and click on Actions -> Send a downlink message. We then specify our payload in the following format: {"resourceValue":<VALUE>}. In our case we are sending the message {"resourceValue":84}.
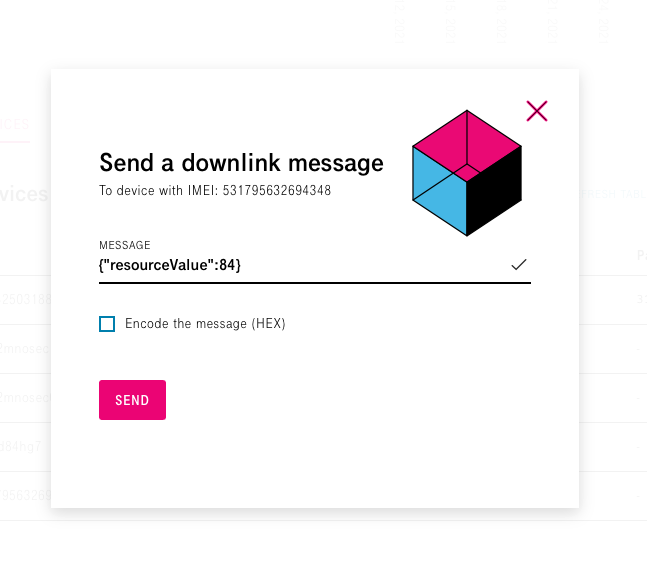
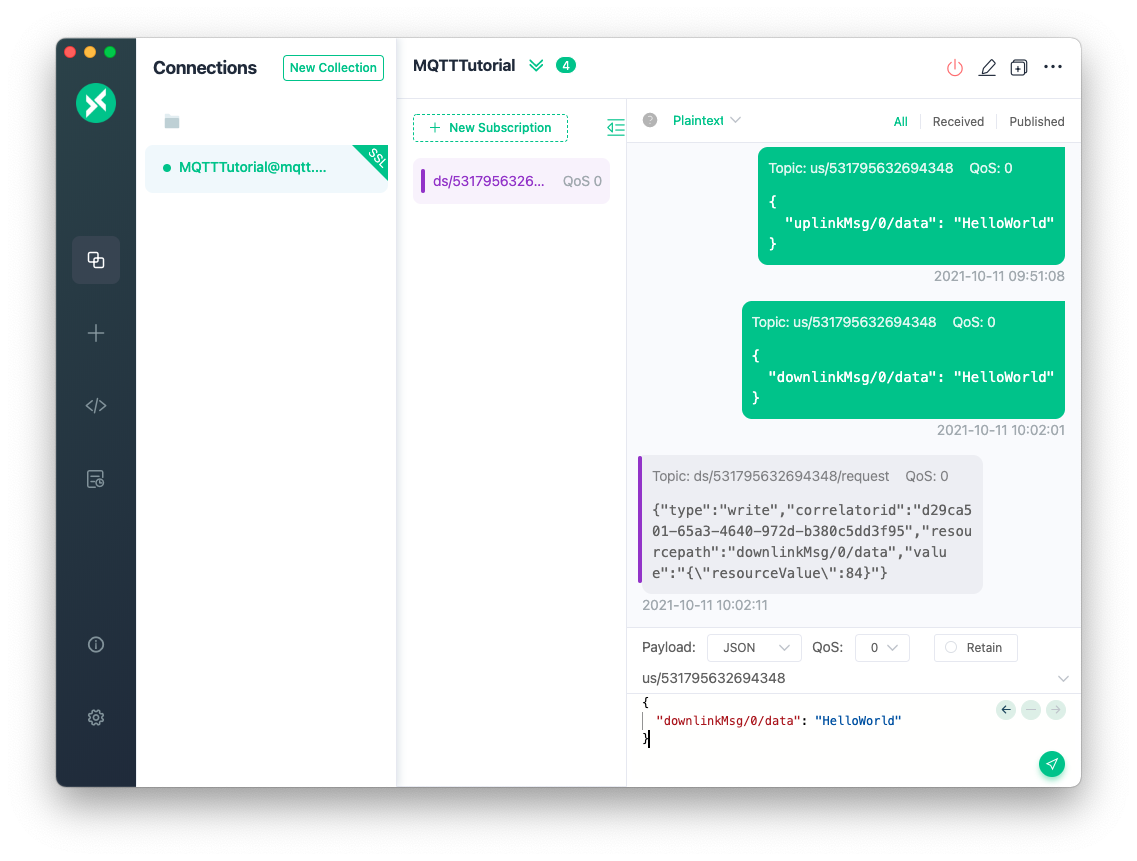
Once we click on SEND we immediately see the message arriving on our client on the topic we have subscribed. The downlink message is formatted as a JSON and looks as follows:
{
  "type": "write",
  "correlatorid": "d29ca501-65a3-4640-972d-b380c5dd3f95",
  "resourcepath": "downlinkMsg/0/data",
  "value": "{\"resourceValue\":84}"
}
Updated over 2 years ago
