Datacake
We describe here how to integrate IoT Creators SCS with Datacake IoT platform
Let us show you how to implement your own end-to-end IoT solution for monitoring sensor data.
Besides the NB-IoT sensor which sends data via UDP or CoAP/Neul to IoT Creators Data Provisioning service, you need to have access to Datacake.
If you don't have an account on the Datacake platform yet, you should create one now. To do this, register for free on the platform
Architecture
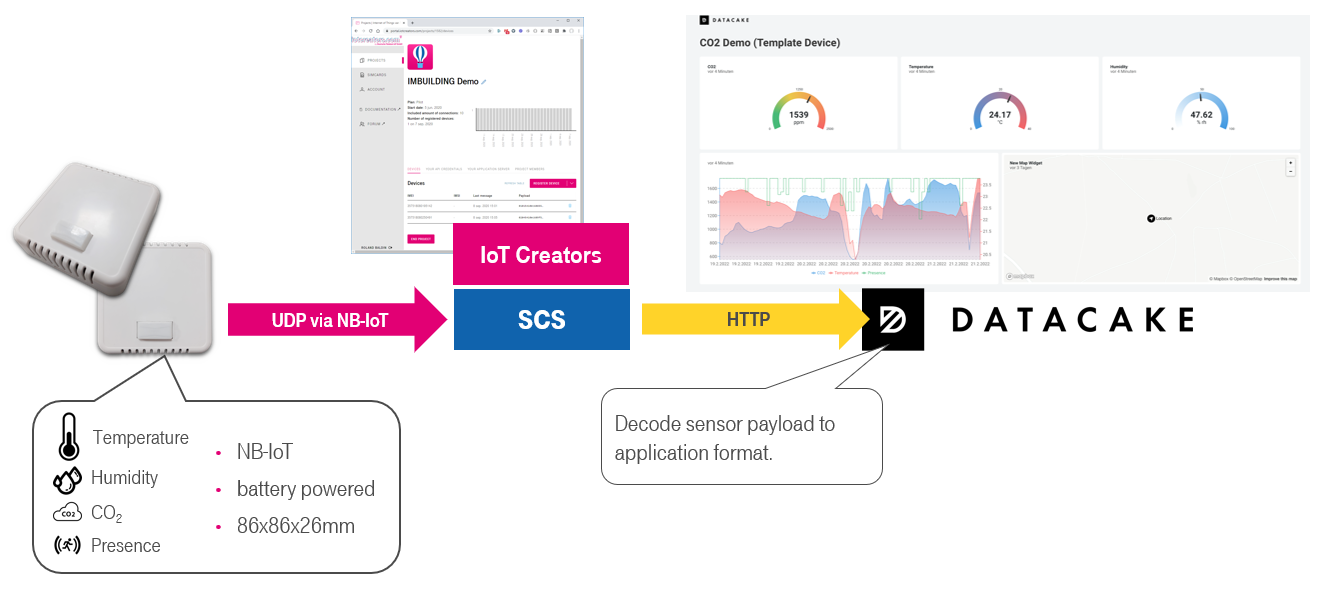
As you can see in the architecture the data from your sensor will be forwarded to Datacake via HTTP. Datacake converts your data so it can be used to monitore your sensor in Datacake.
Need help?
In case you have any problems with the integration you can find help in the forum or write us an email: support [at] iotcreators.com
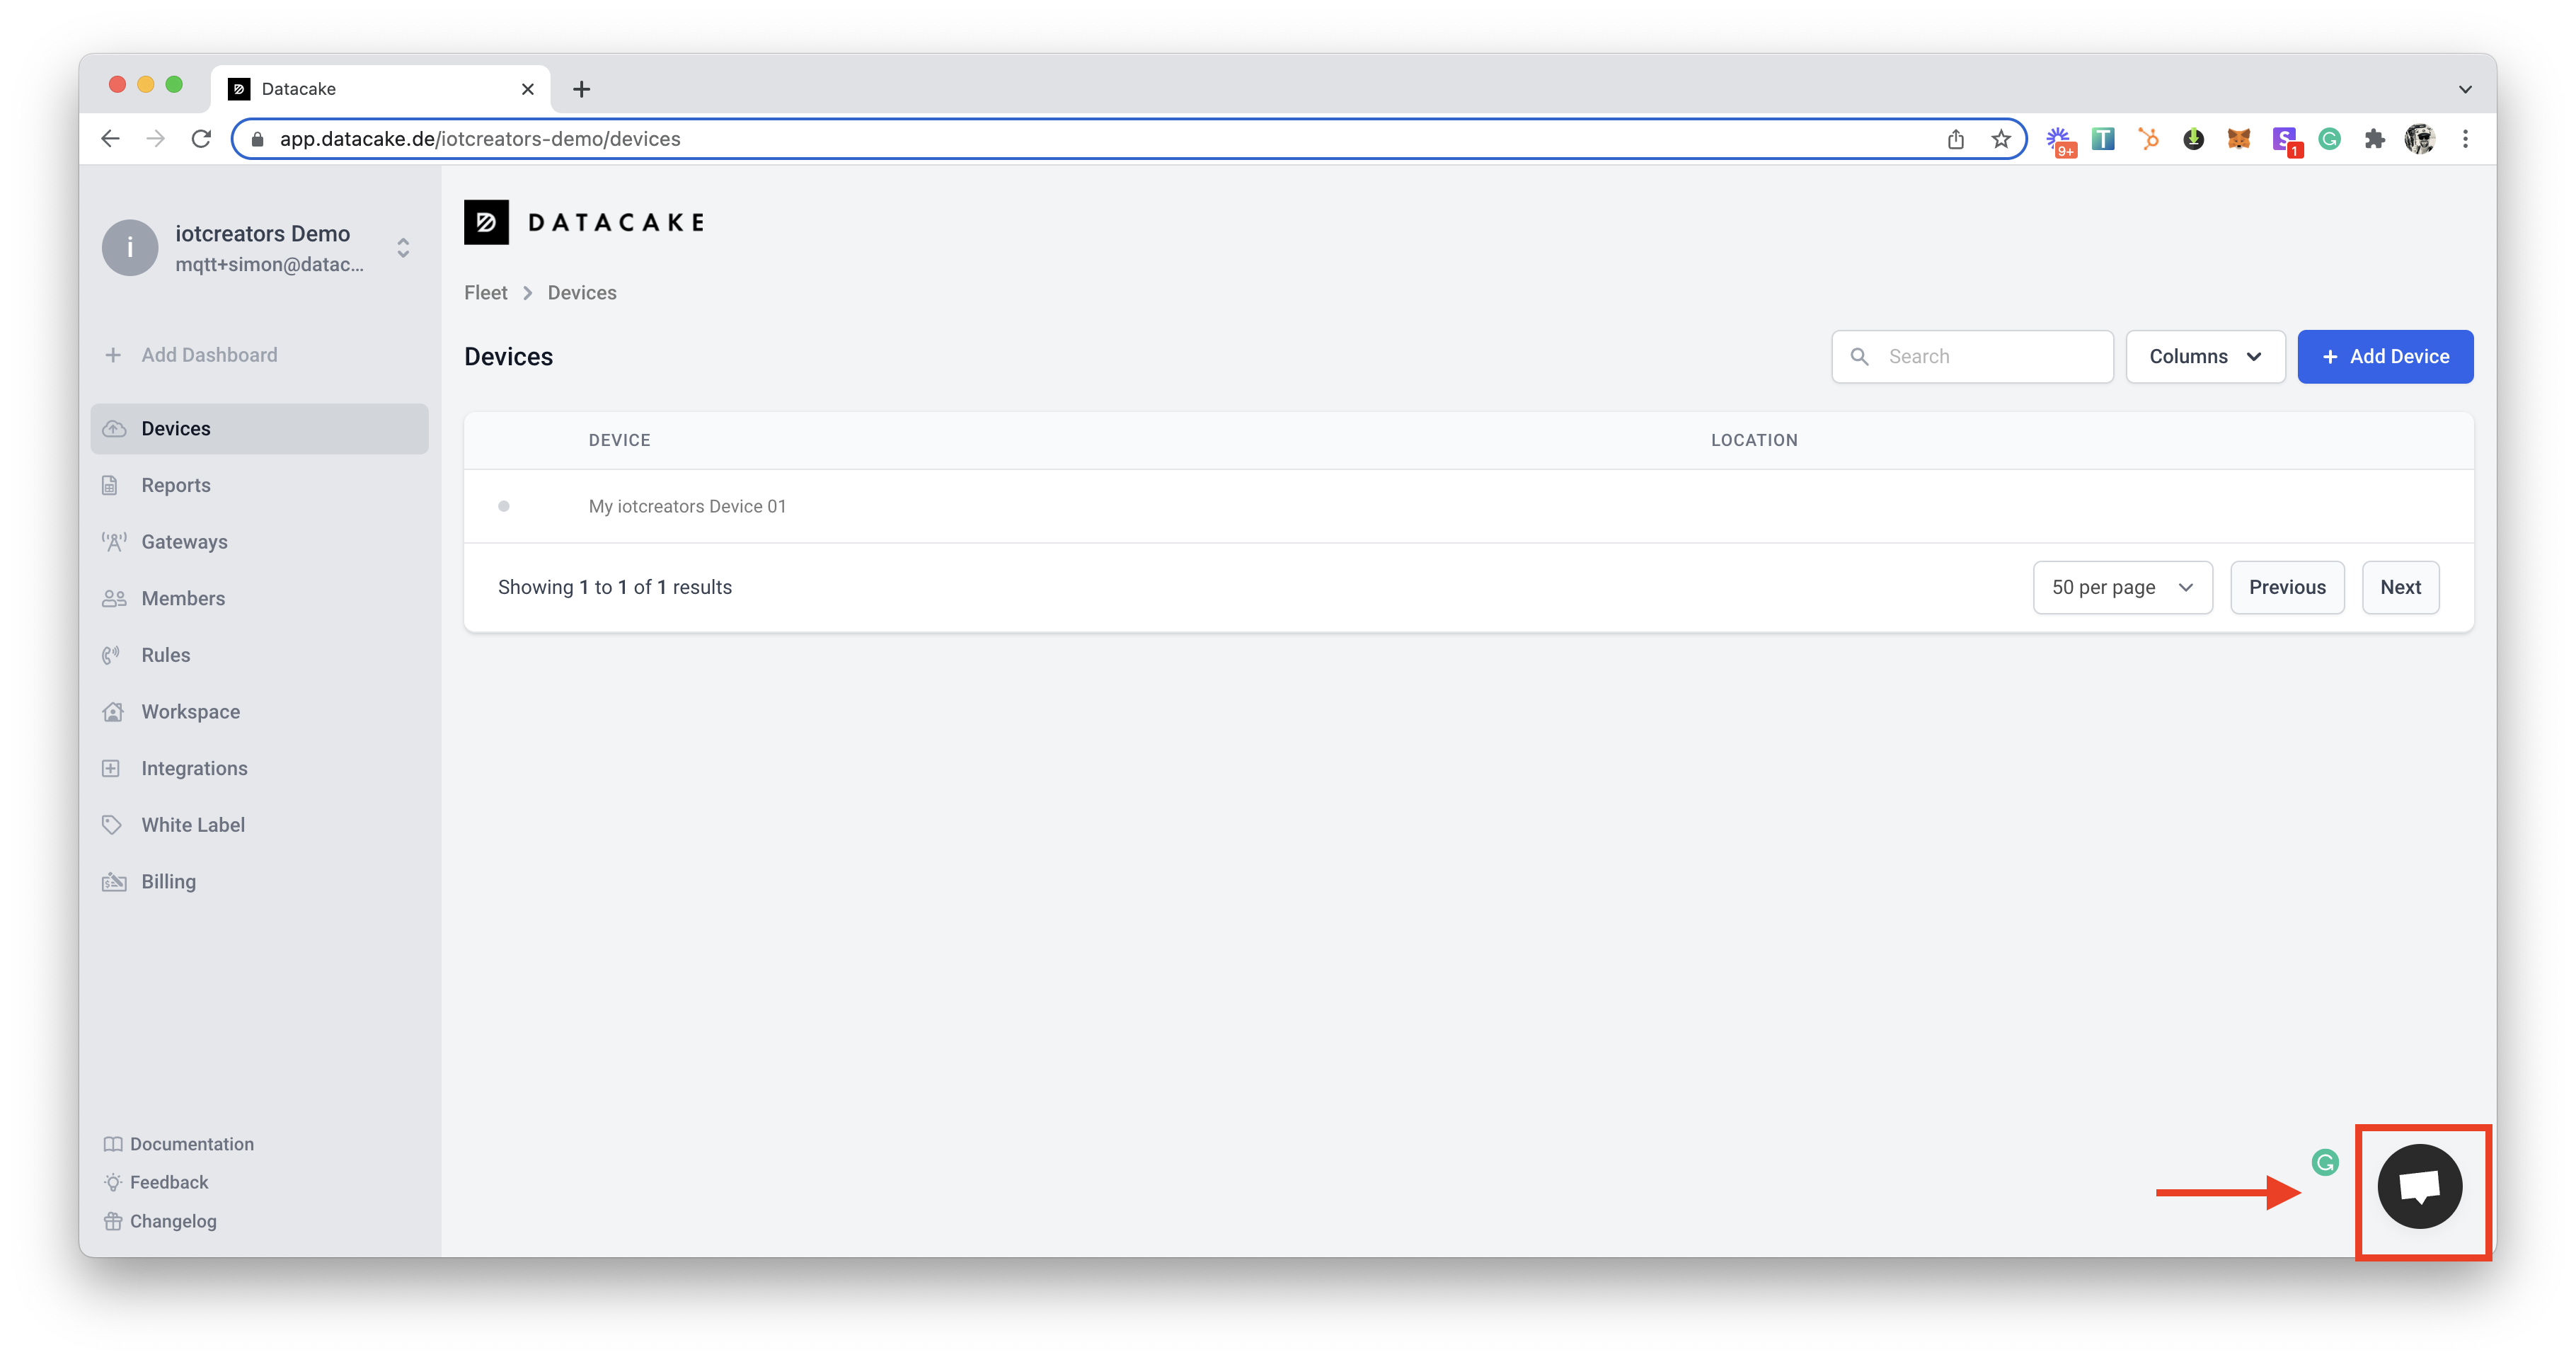
You can also contact Datacake directly. There is a live chat on their website or send an email to support [at] datacake.de.
Prerequisites
To start with this tutorial you need to fulfill the following prerequisites:
- IoT Creators account and at least a Starterkit SIM card.
- NB-IoT IoT Sensor which sends its payload via UDP to IoT Creators' UDP server (e.g. comfortsensor from IMBUILDING (see device catalog or documentation library). Any other NB-IoT devkit such as Quectel BC66 will work as well.
- a free Datacake account
Steps
Based on this prerequisites you will implement the architecture above with the following steps:
- Step 1: Register your device in the IoTCreators Portal
- Step 2: Create new device in Datacake
- Step 3: Configure the Application URL
- Step 4: Configure the decoder
Step 1: Register your device in the IoTCreators Portal
First of all we need to register our device in the IoTCreators Portal.
To do so perform the following steps:
- Login into IoT Creators portal https://portal.iotcreators.com/auth/login
- Select PROJECTS on the left side and click the Details button of the project for which you want to register your device.
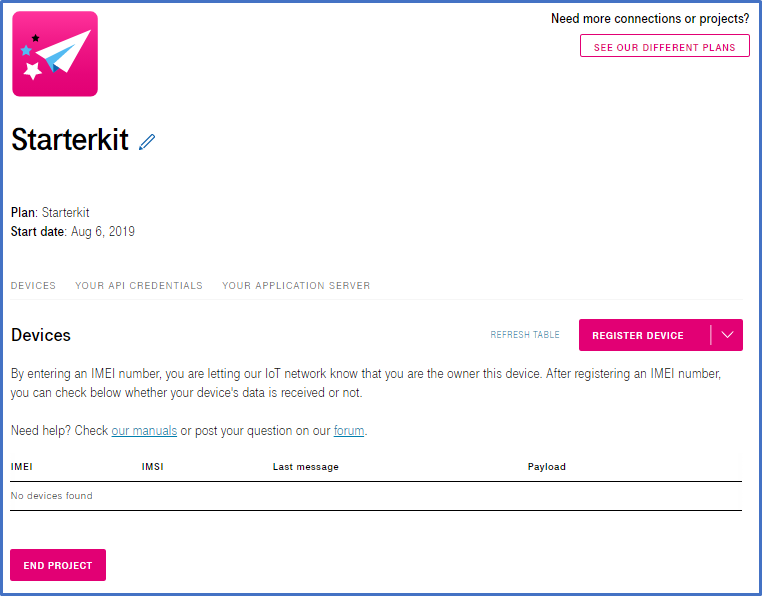
- Click the button REGISTER DEVICE
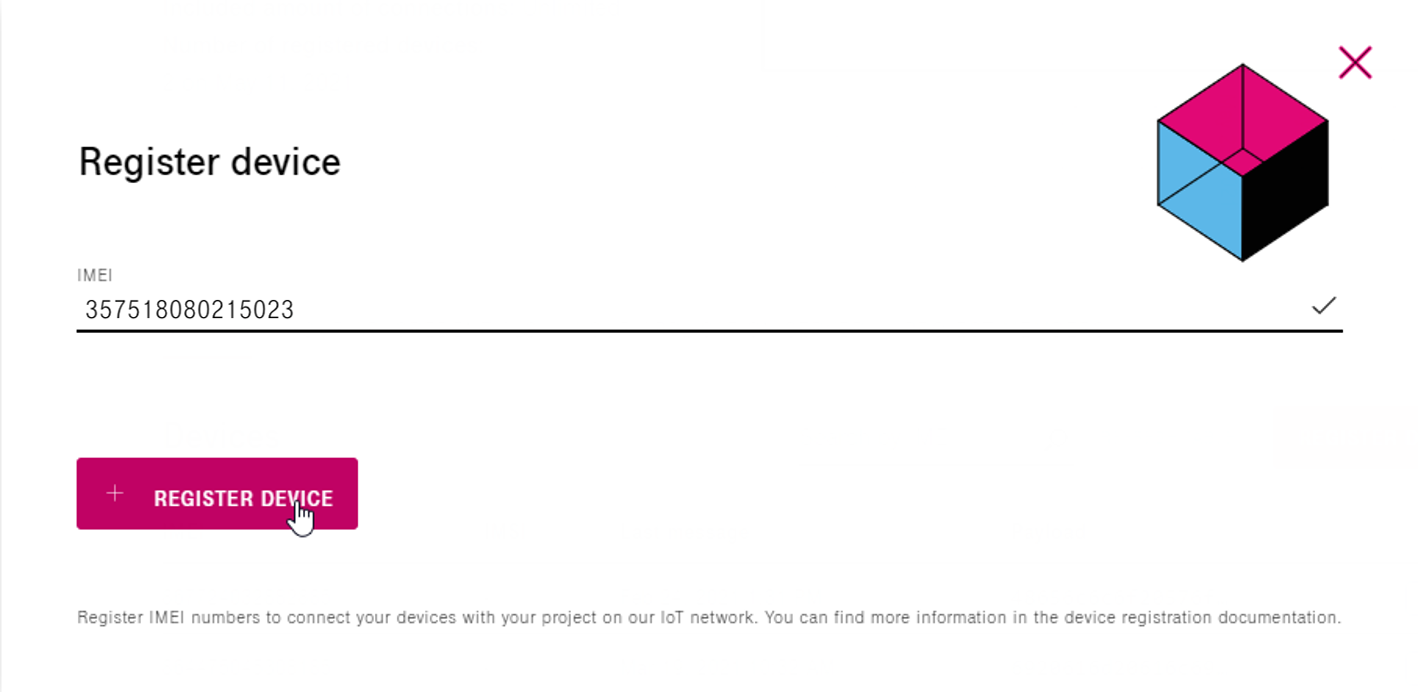
- IMEI: Input the IMEI of your device
- Click button REGISTER DEVICE
Step 2: Create new device in Datacake
Whether you are newly registered or logged in (and optionally created a new workspace) we now need to create a new device.
To do this, please click on the Add Device button, which you can find in the device listing of Datacake.

This will open a window that asks as a first step for the type of device you want to create.
Please select API as the type.

Now you have to select the Datacake product. Here the pre-selection is set to New Datacake Product, but the Datacake platform has a template for the iotcreators platform, which already provides us with a pre-built dashboard and decoder.
So now select "New Product from Template" in the next step.
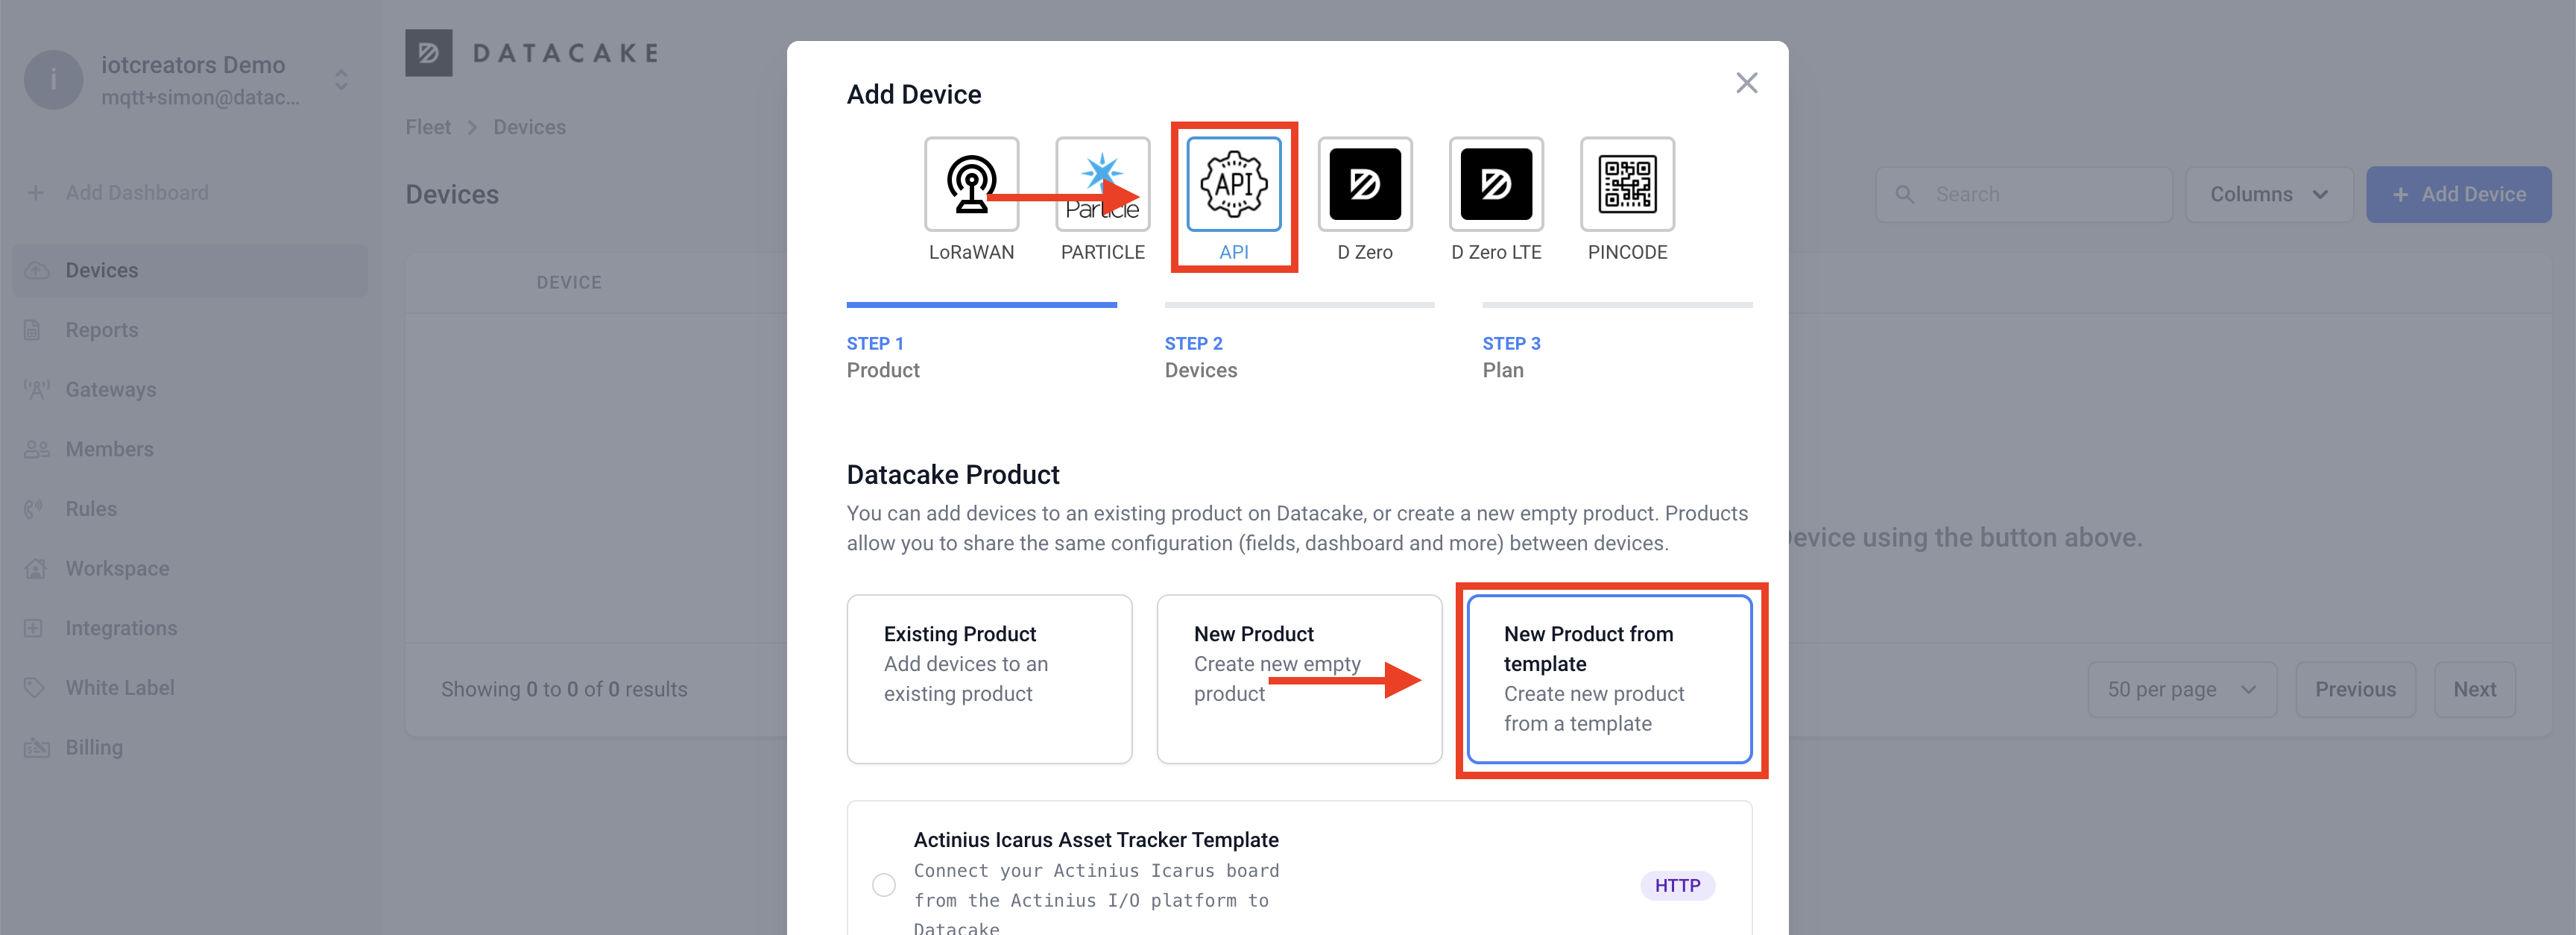
This will now show you a list of available templates and here please select "iotcreators Standard Template".

At this point, the window will ask you for details about the device you want to create, specifically the serial number as well as a name.
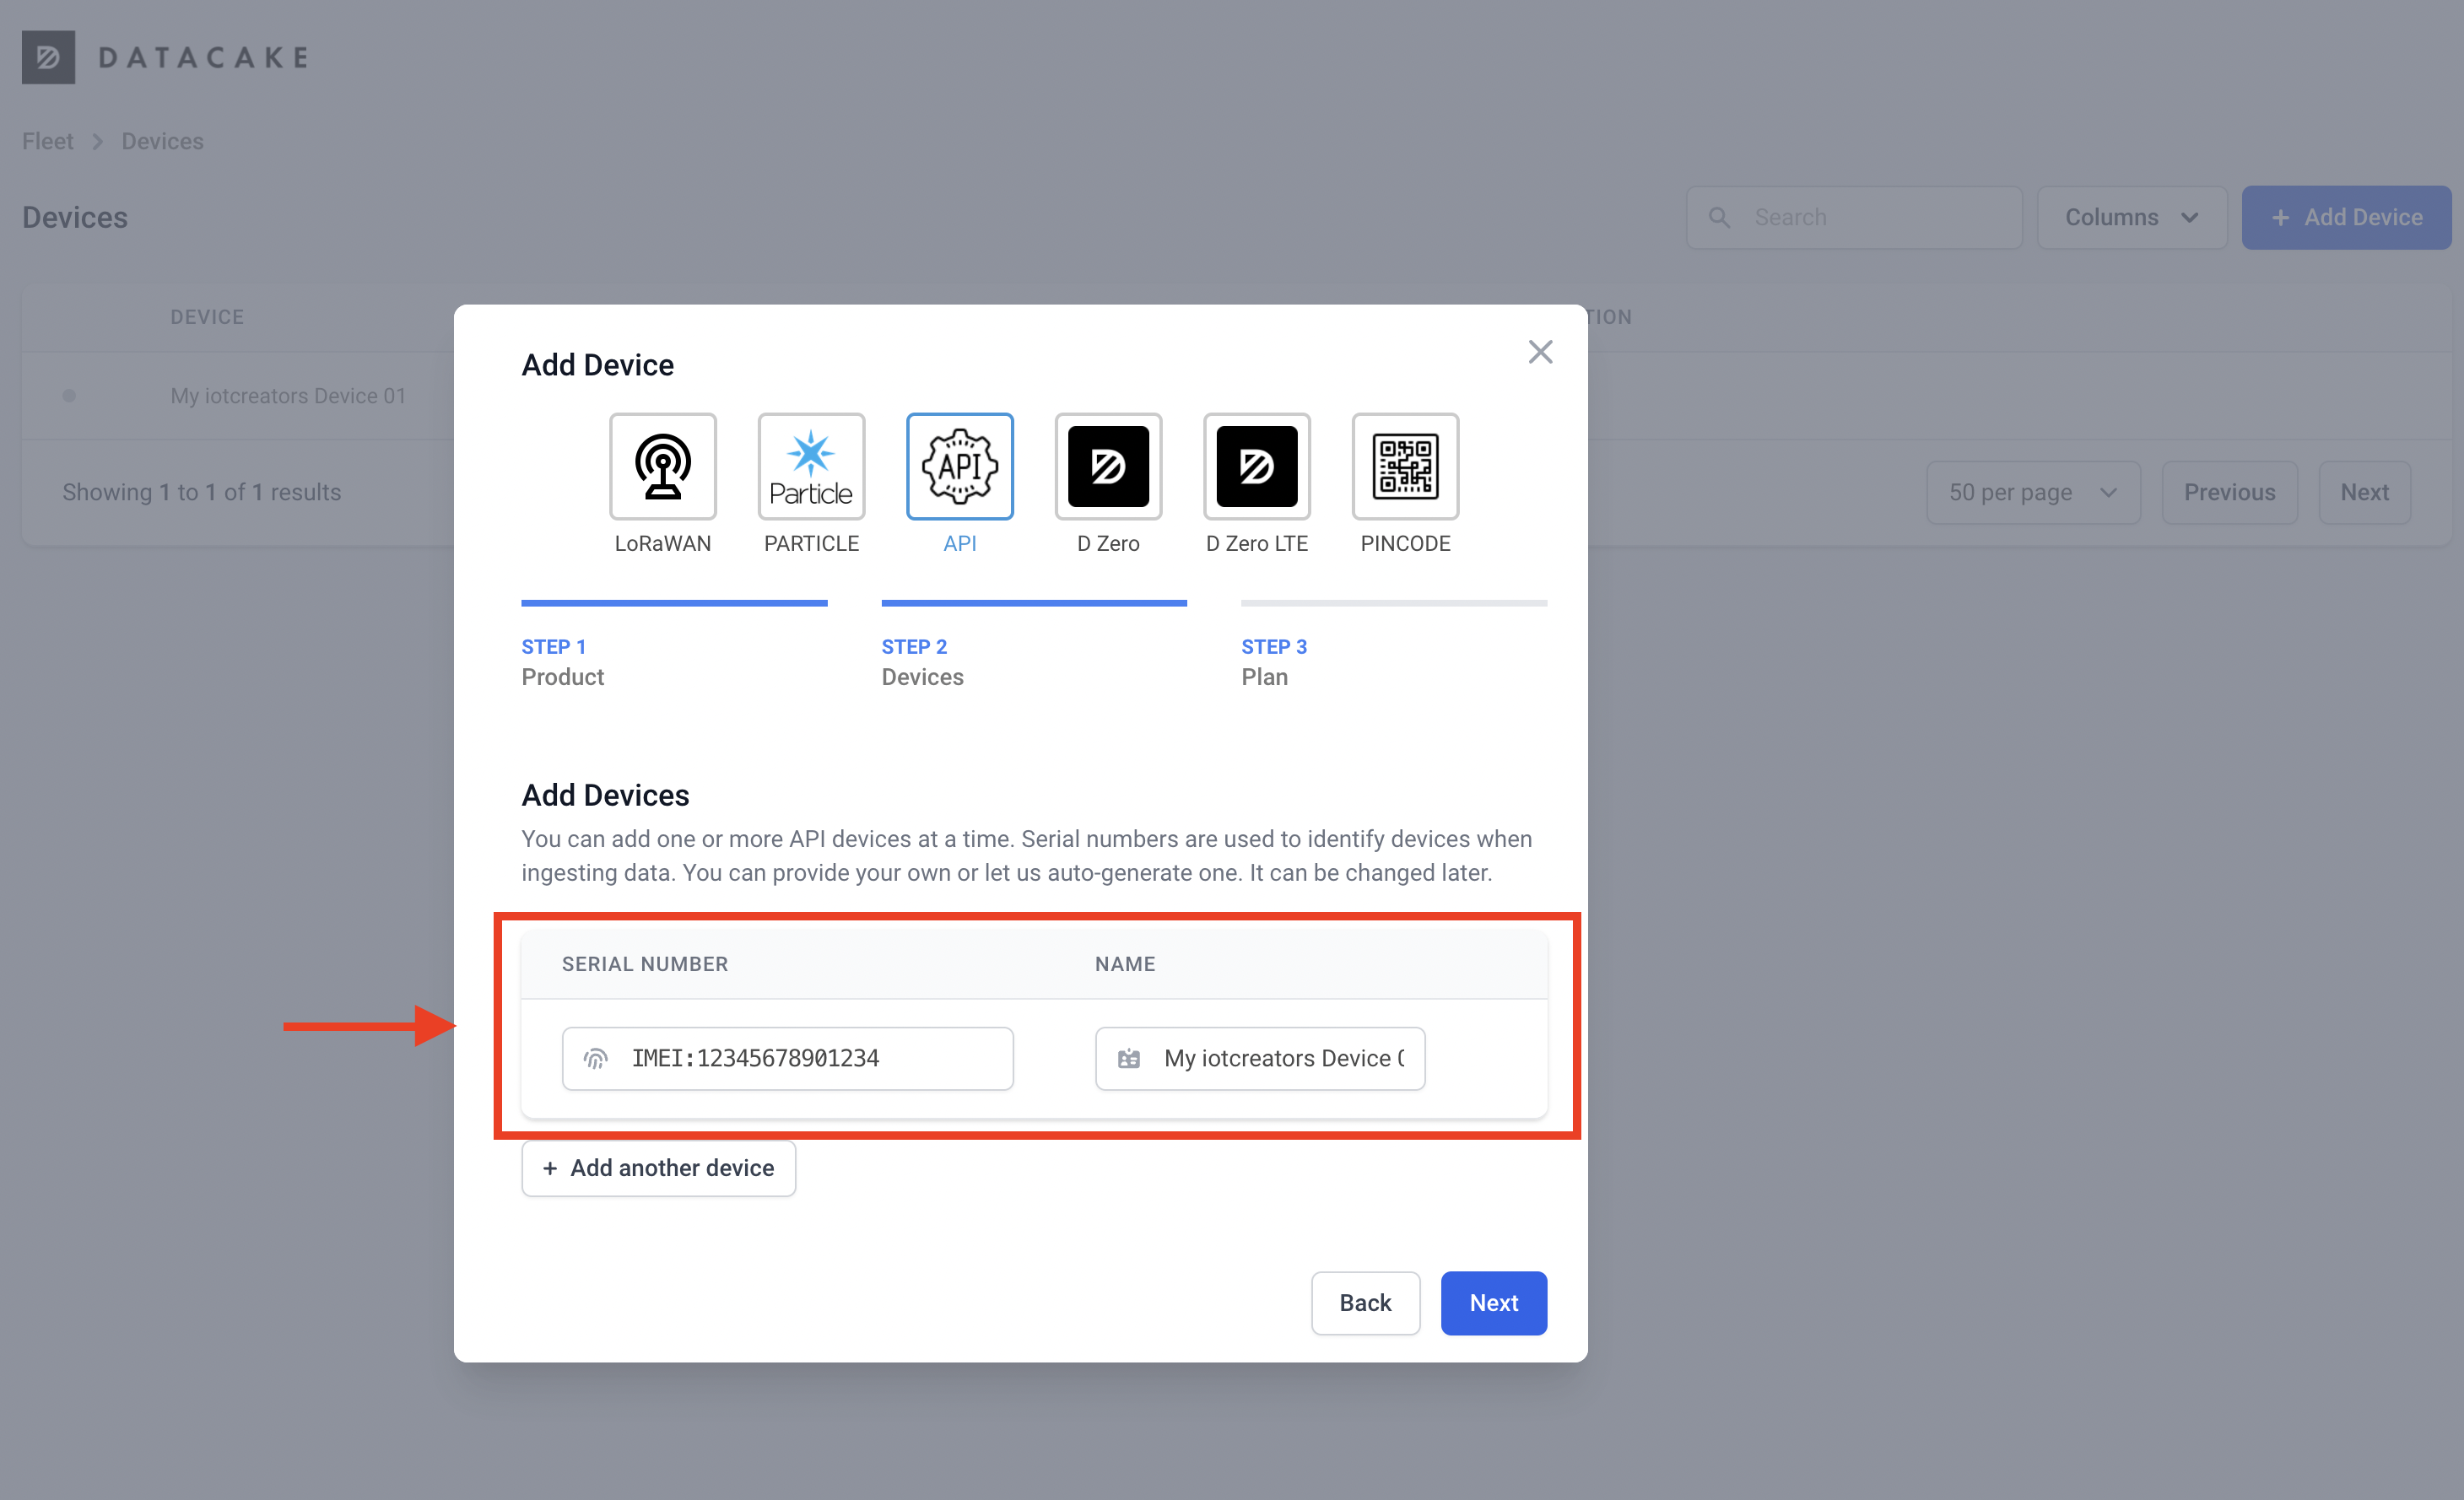
Serial Number
In general, Datacake automatically creates a serial number for your device, which can be changed at any time.
In our case, we will use the IMEI which we have already registered in the IoTCreators Portal.
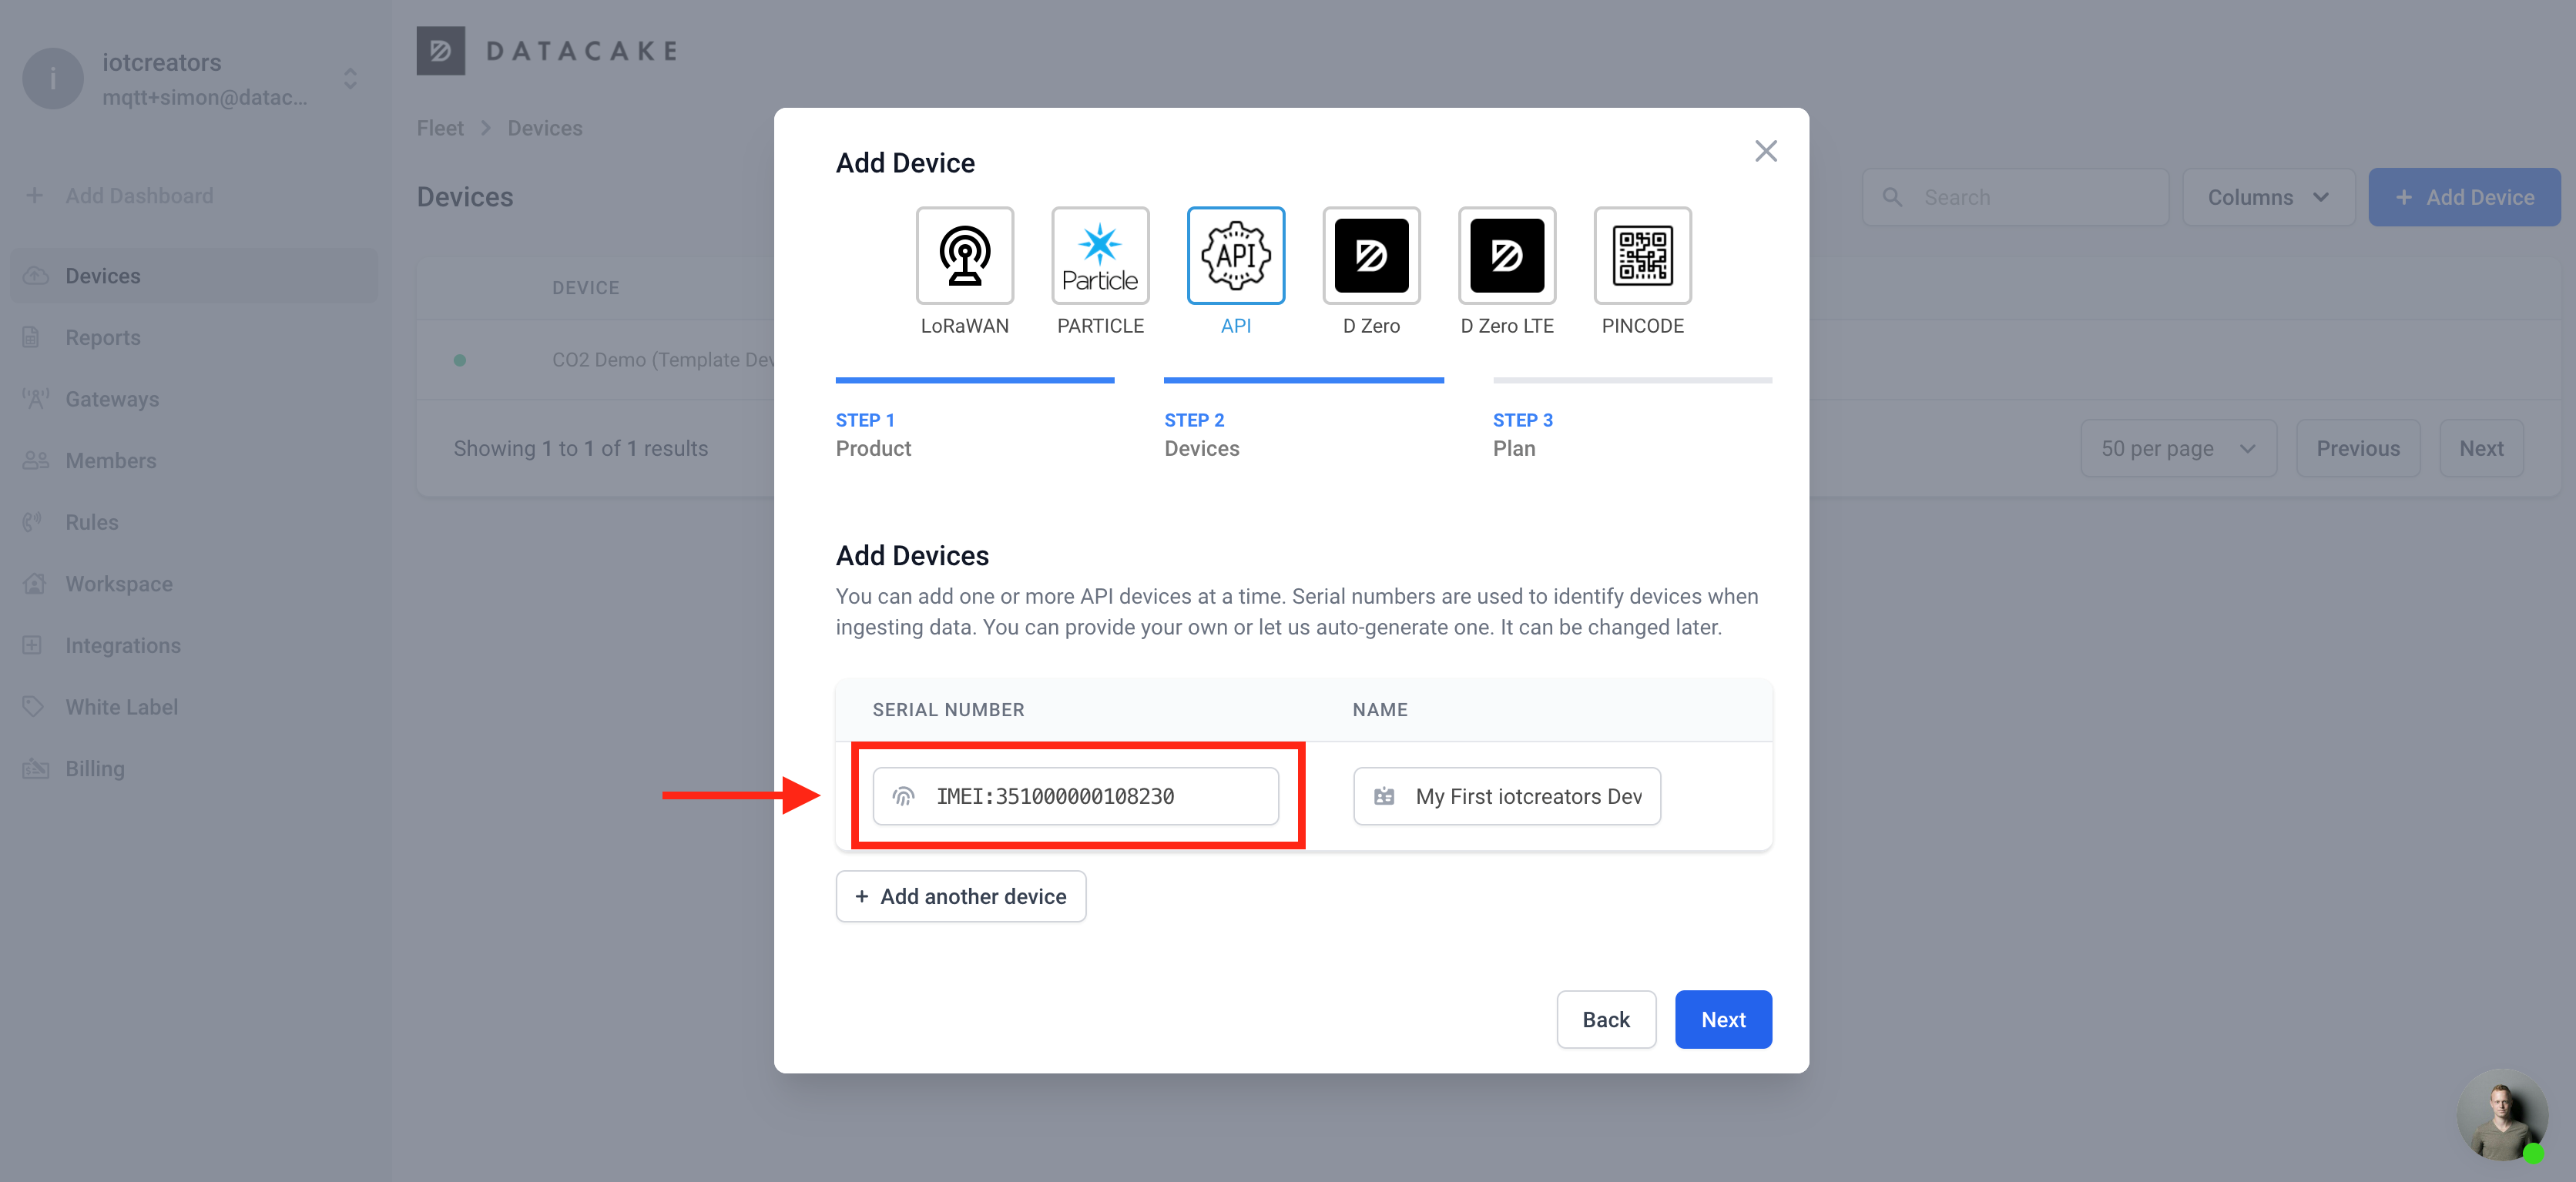
So copy the IMEI and paste it into the Serial Number field on Datacake.
IMEI Prefix
Please make sure that you enter the IMEI of your device in Datacake with the prefix IMEI:, namely like this:
IMEI:2347234723472347This is required because iotcreators will pass the IMEI to Datacake in this form.
Then assign a name (e.g. 'My First iotcreators Device') and confirm the entries by clicking on the Next button.
Device Plan
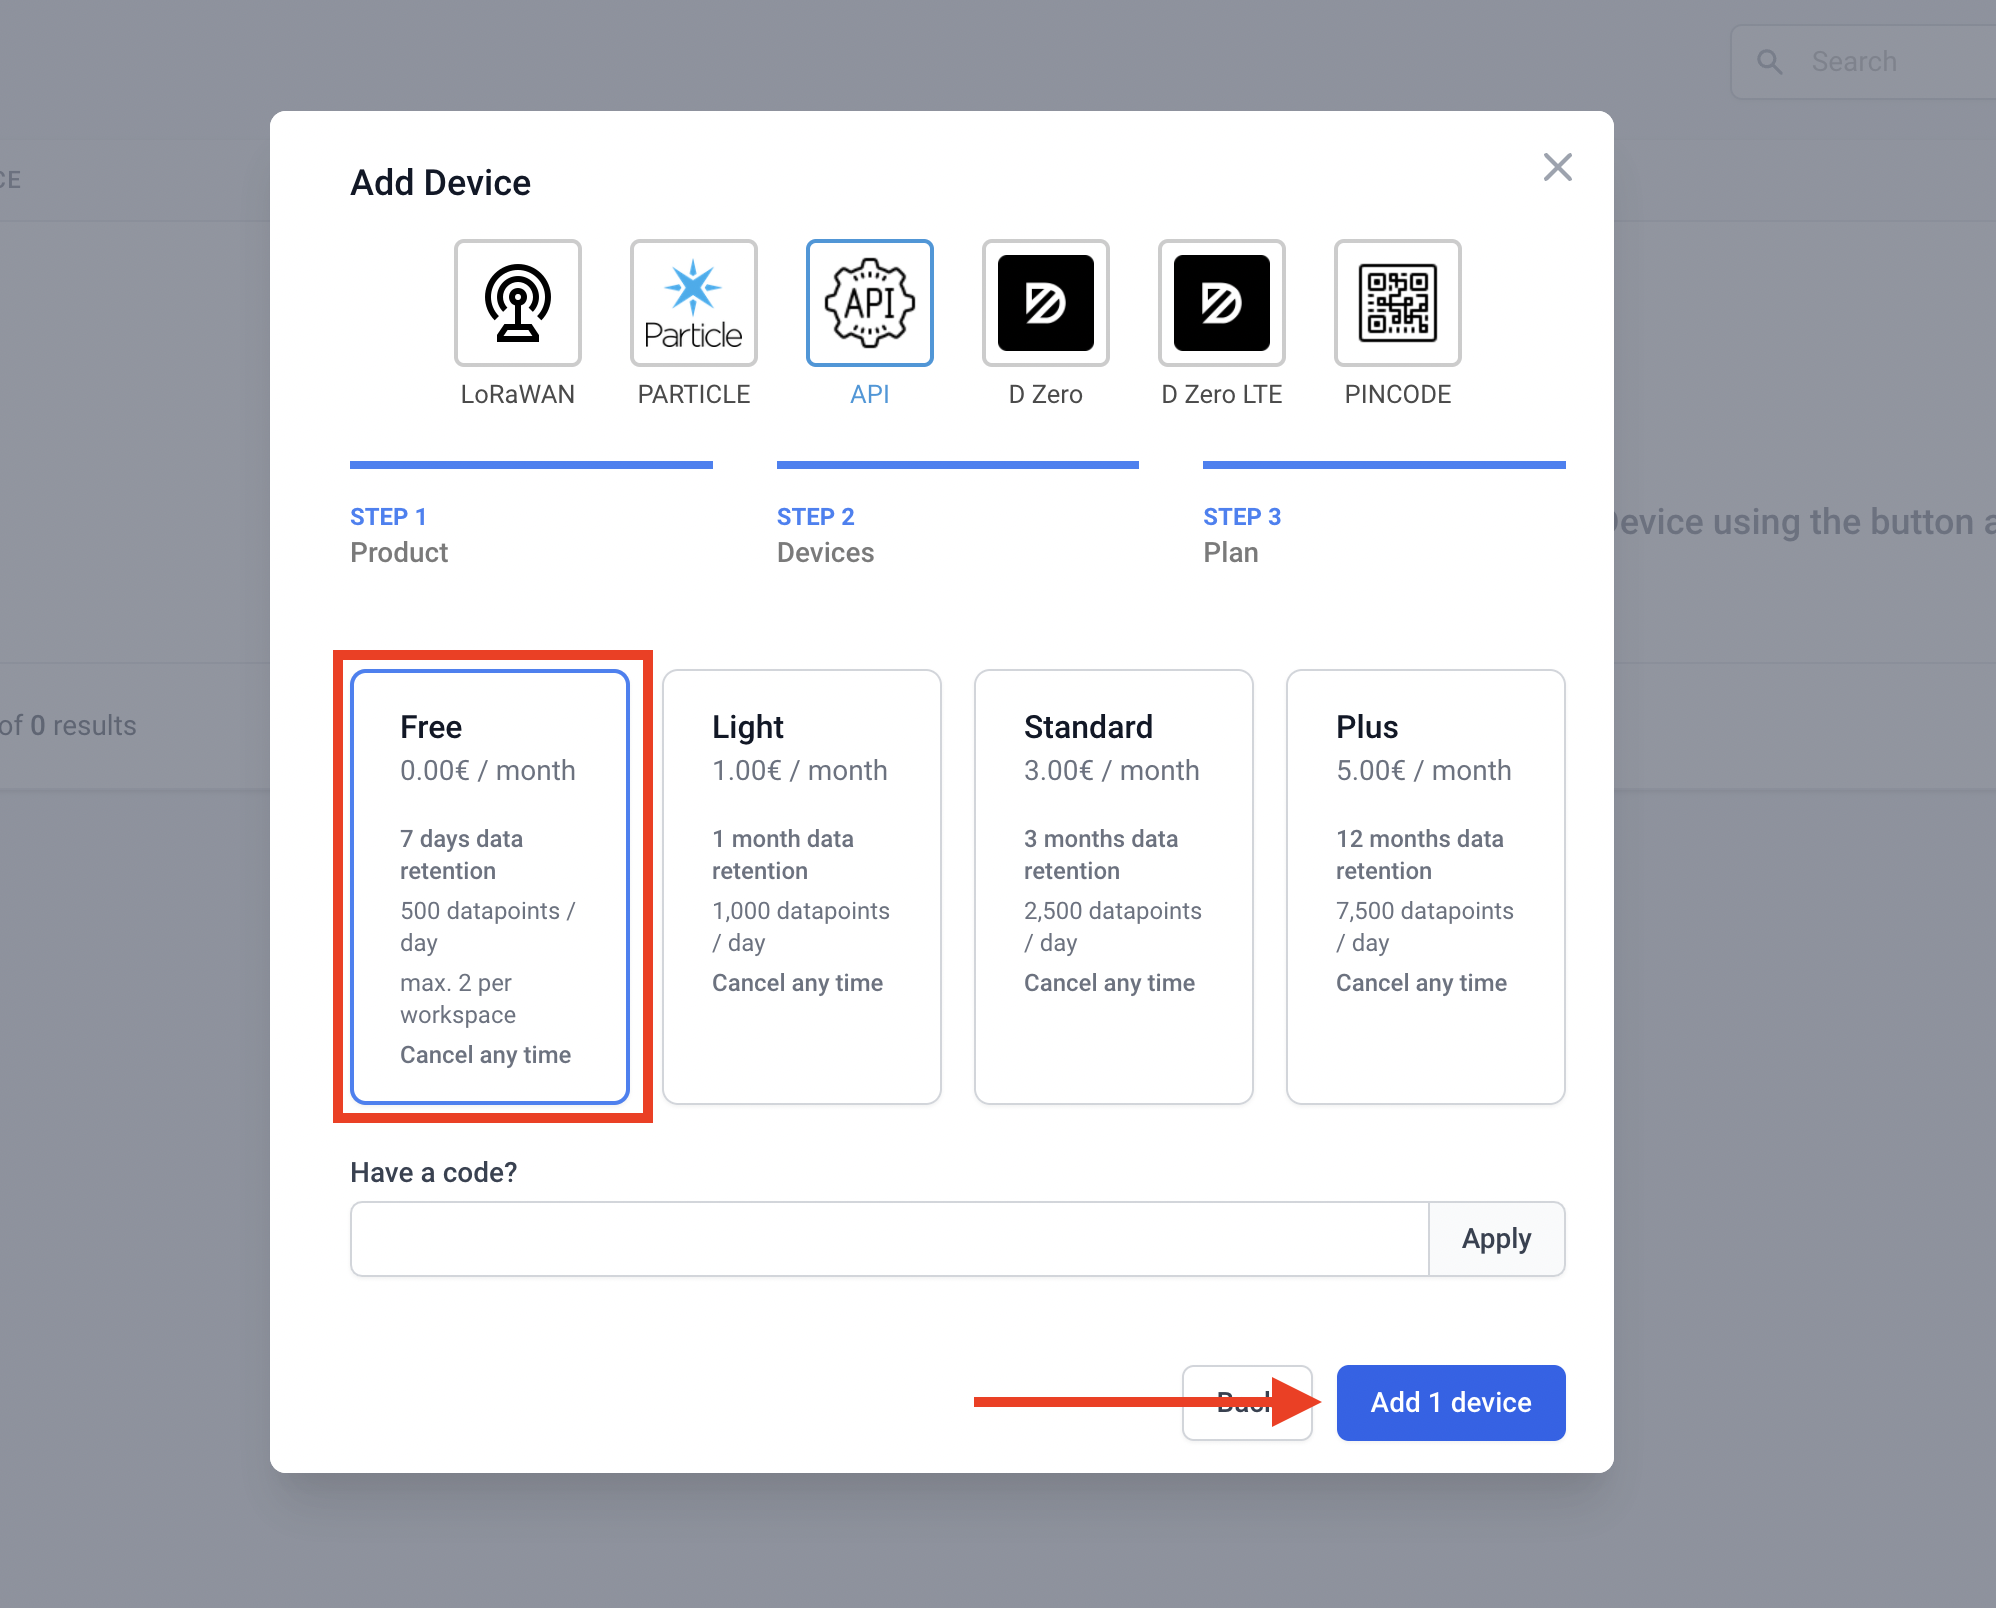
In the next view, you have to choose a subscription plan. Datacake supports the creation of up to 2 free devices. Just select one of the free devices and confirm the selection with the "Add 1 Device" button.
Open Device
If you created your device on Datacake, that will bring you back to the list of devices. Here you will see your device now listed in the respective list. Now click on the entry to open the device view of the device.

First Dashboard
After you have clicked on the entry, the device view opens. Here you can already find a first dashboard, which comes with the template, but has no data yet.
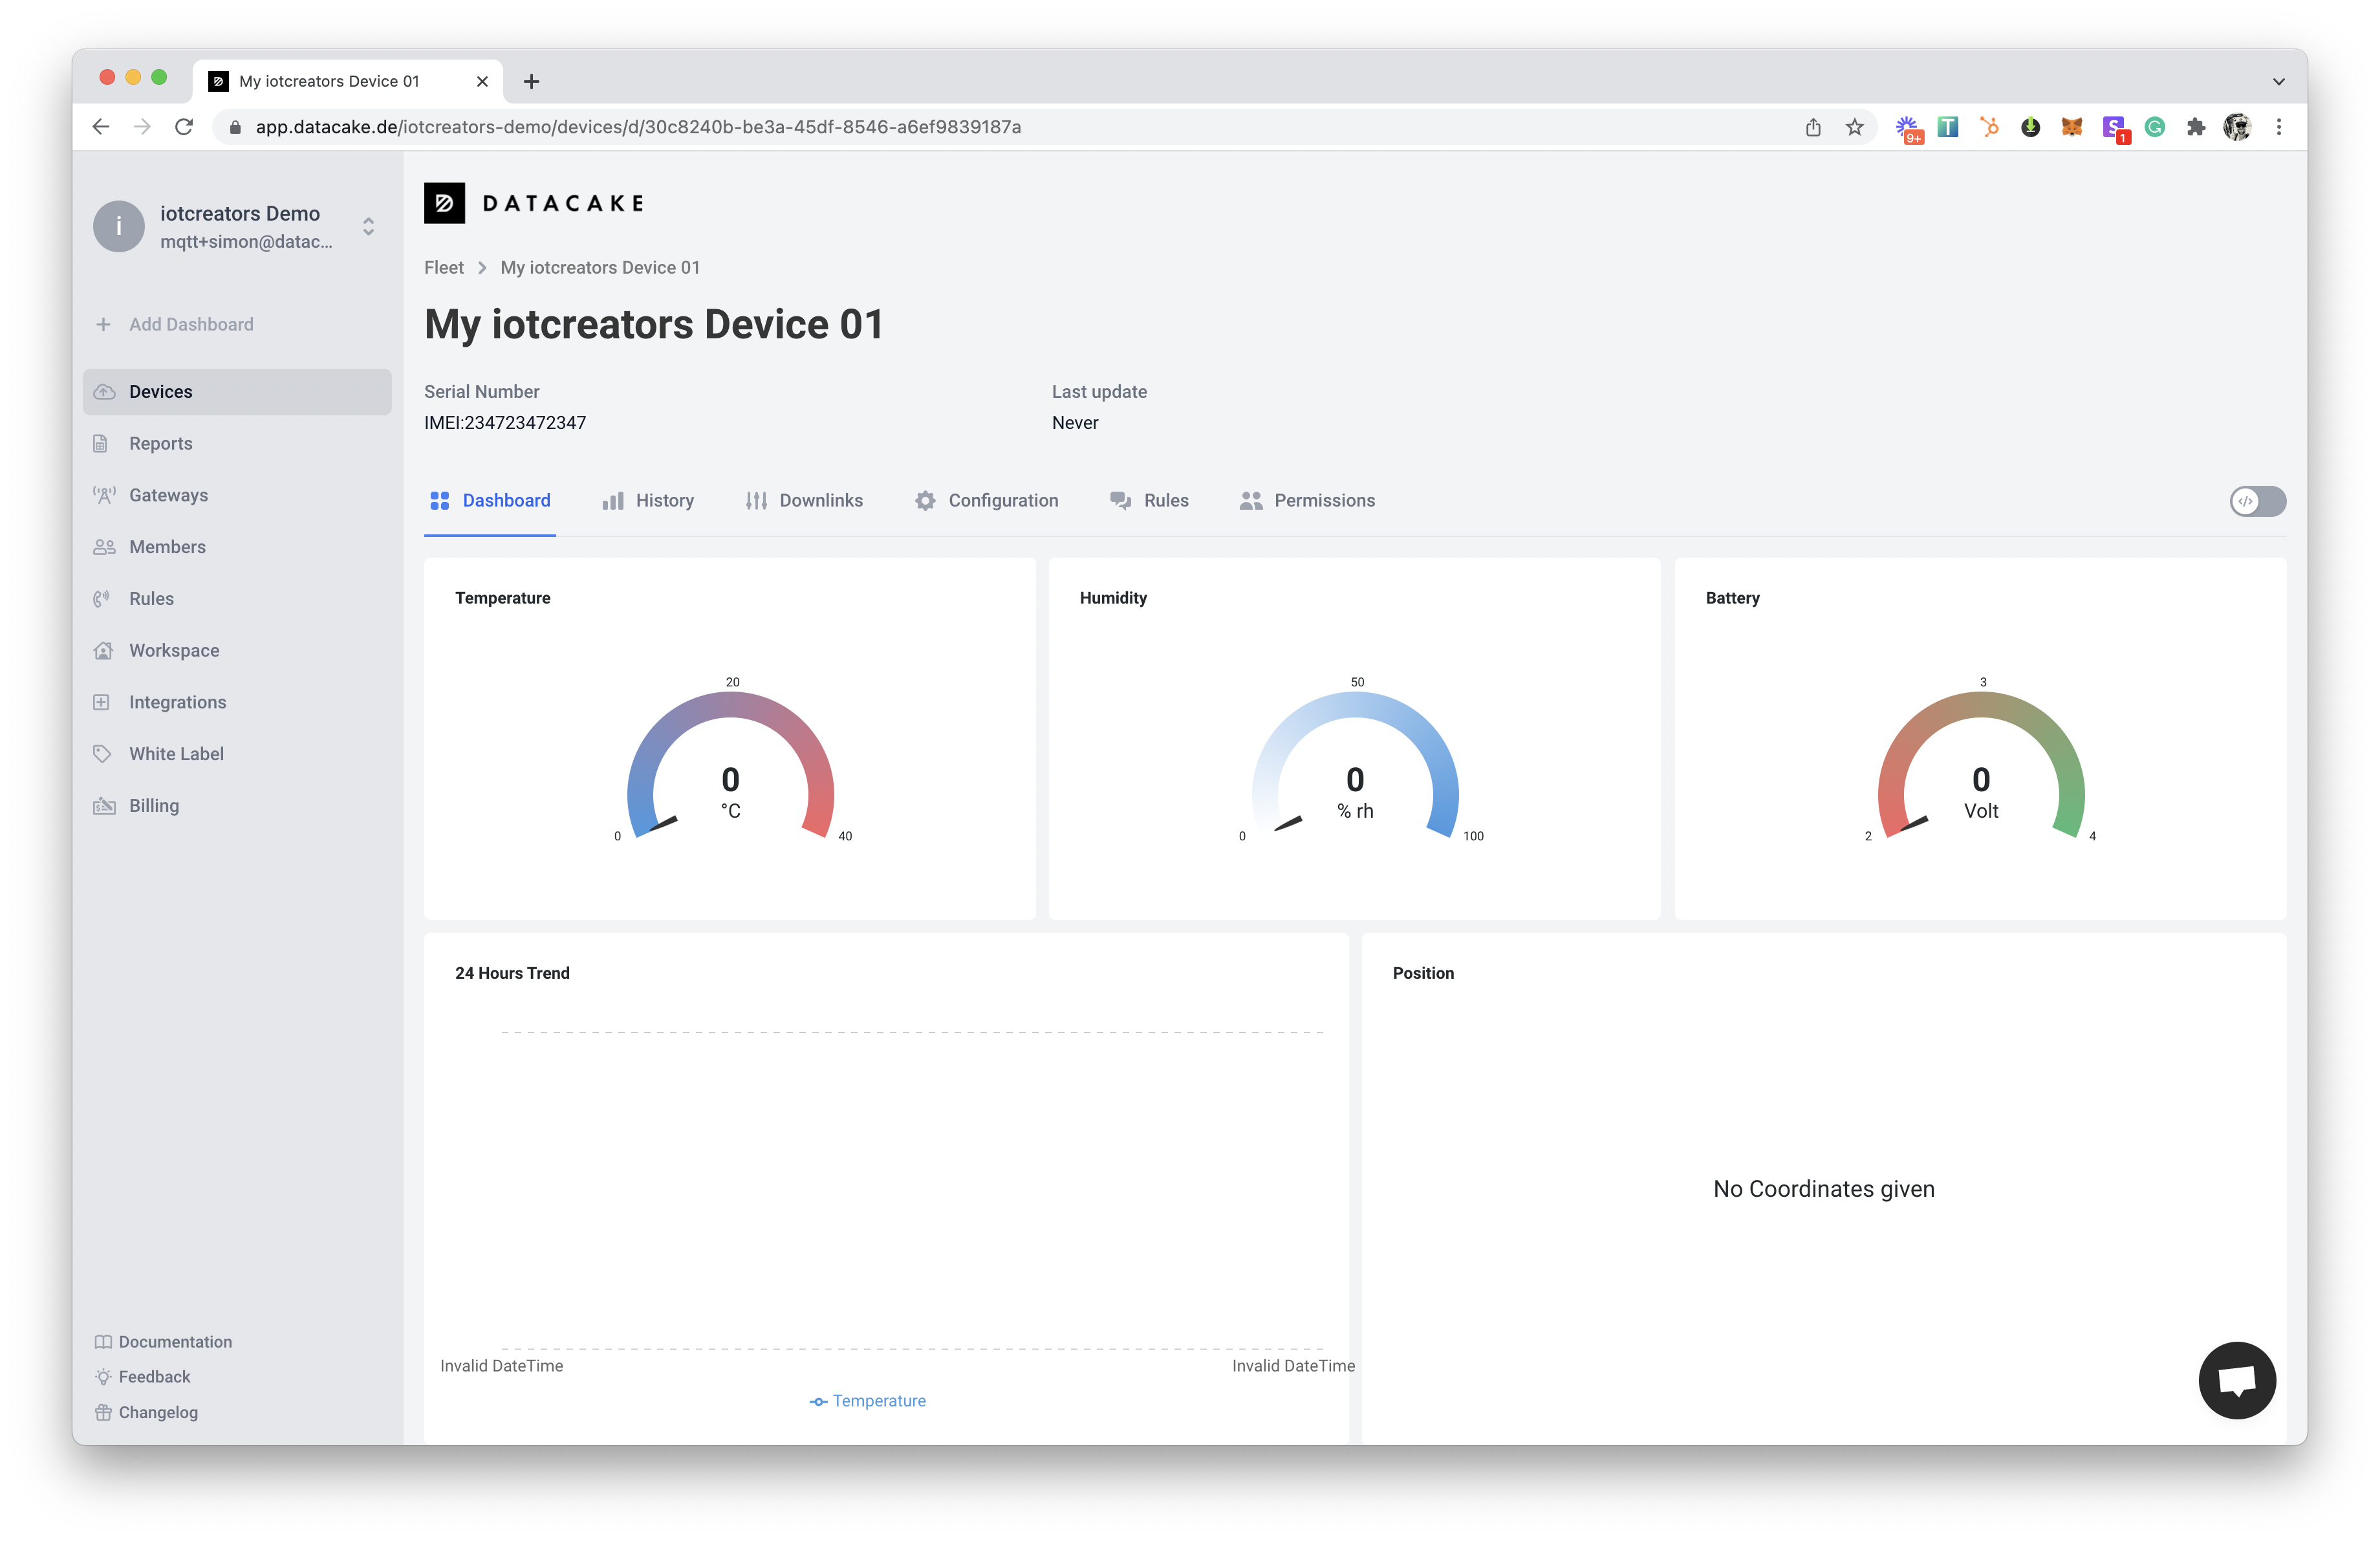
To be able to pass data from iotcreators to Datacake, we need to create a webhook. We will show you how to do that in the next steps.
Step 3: Configure the Application URL
In this step we will connect Datacake to the IoTCreators Portal.
Configure the Webhook URI in Datacake
First of all we need to specify the address that will receive the data from the IoTCreators Portal. This is the so-called webhook.
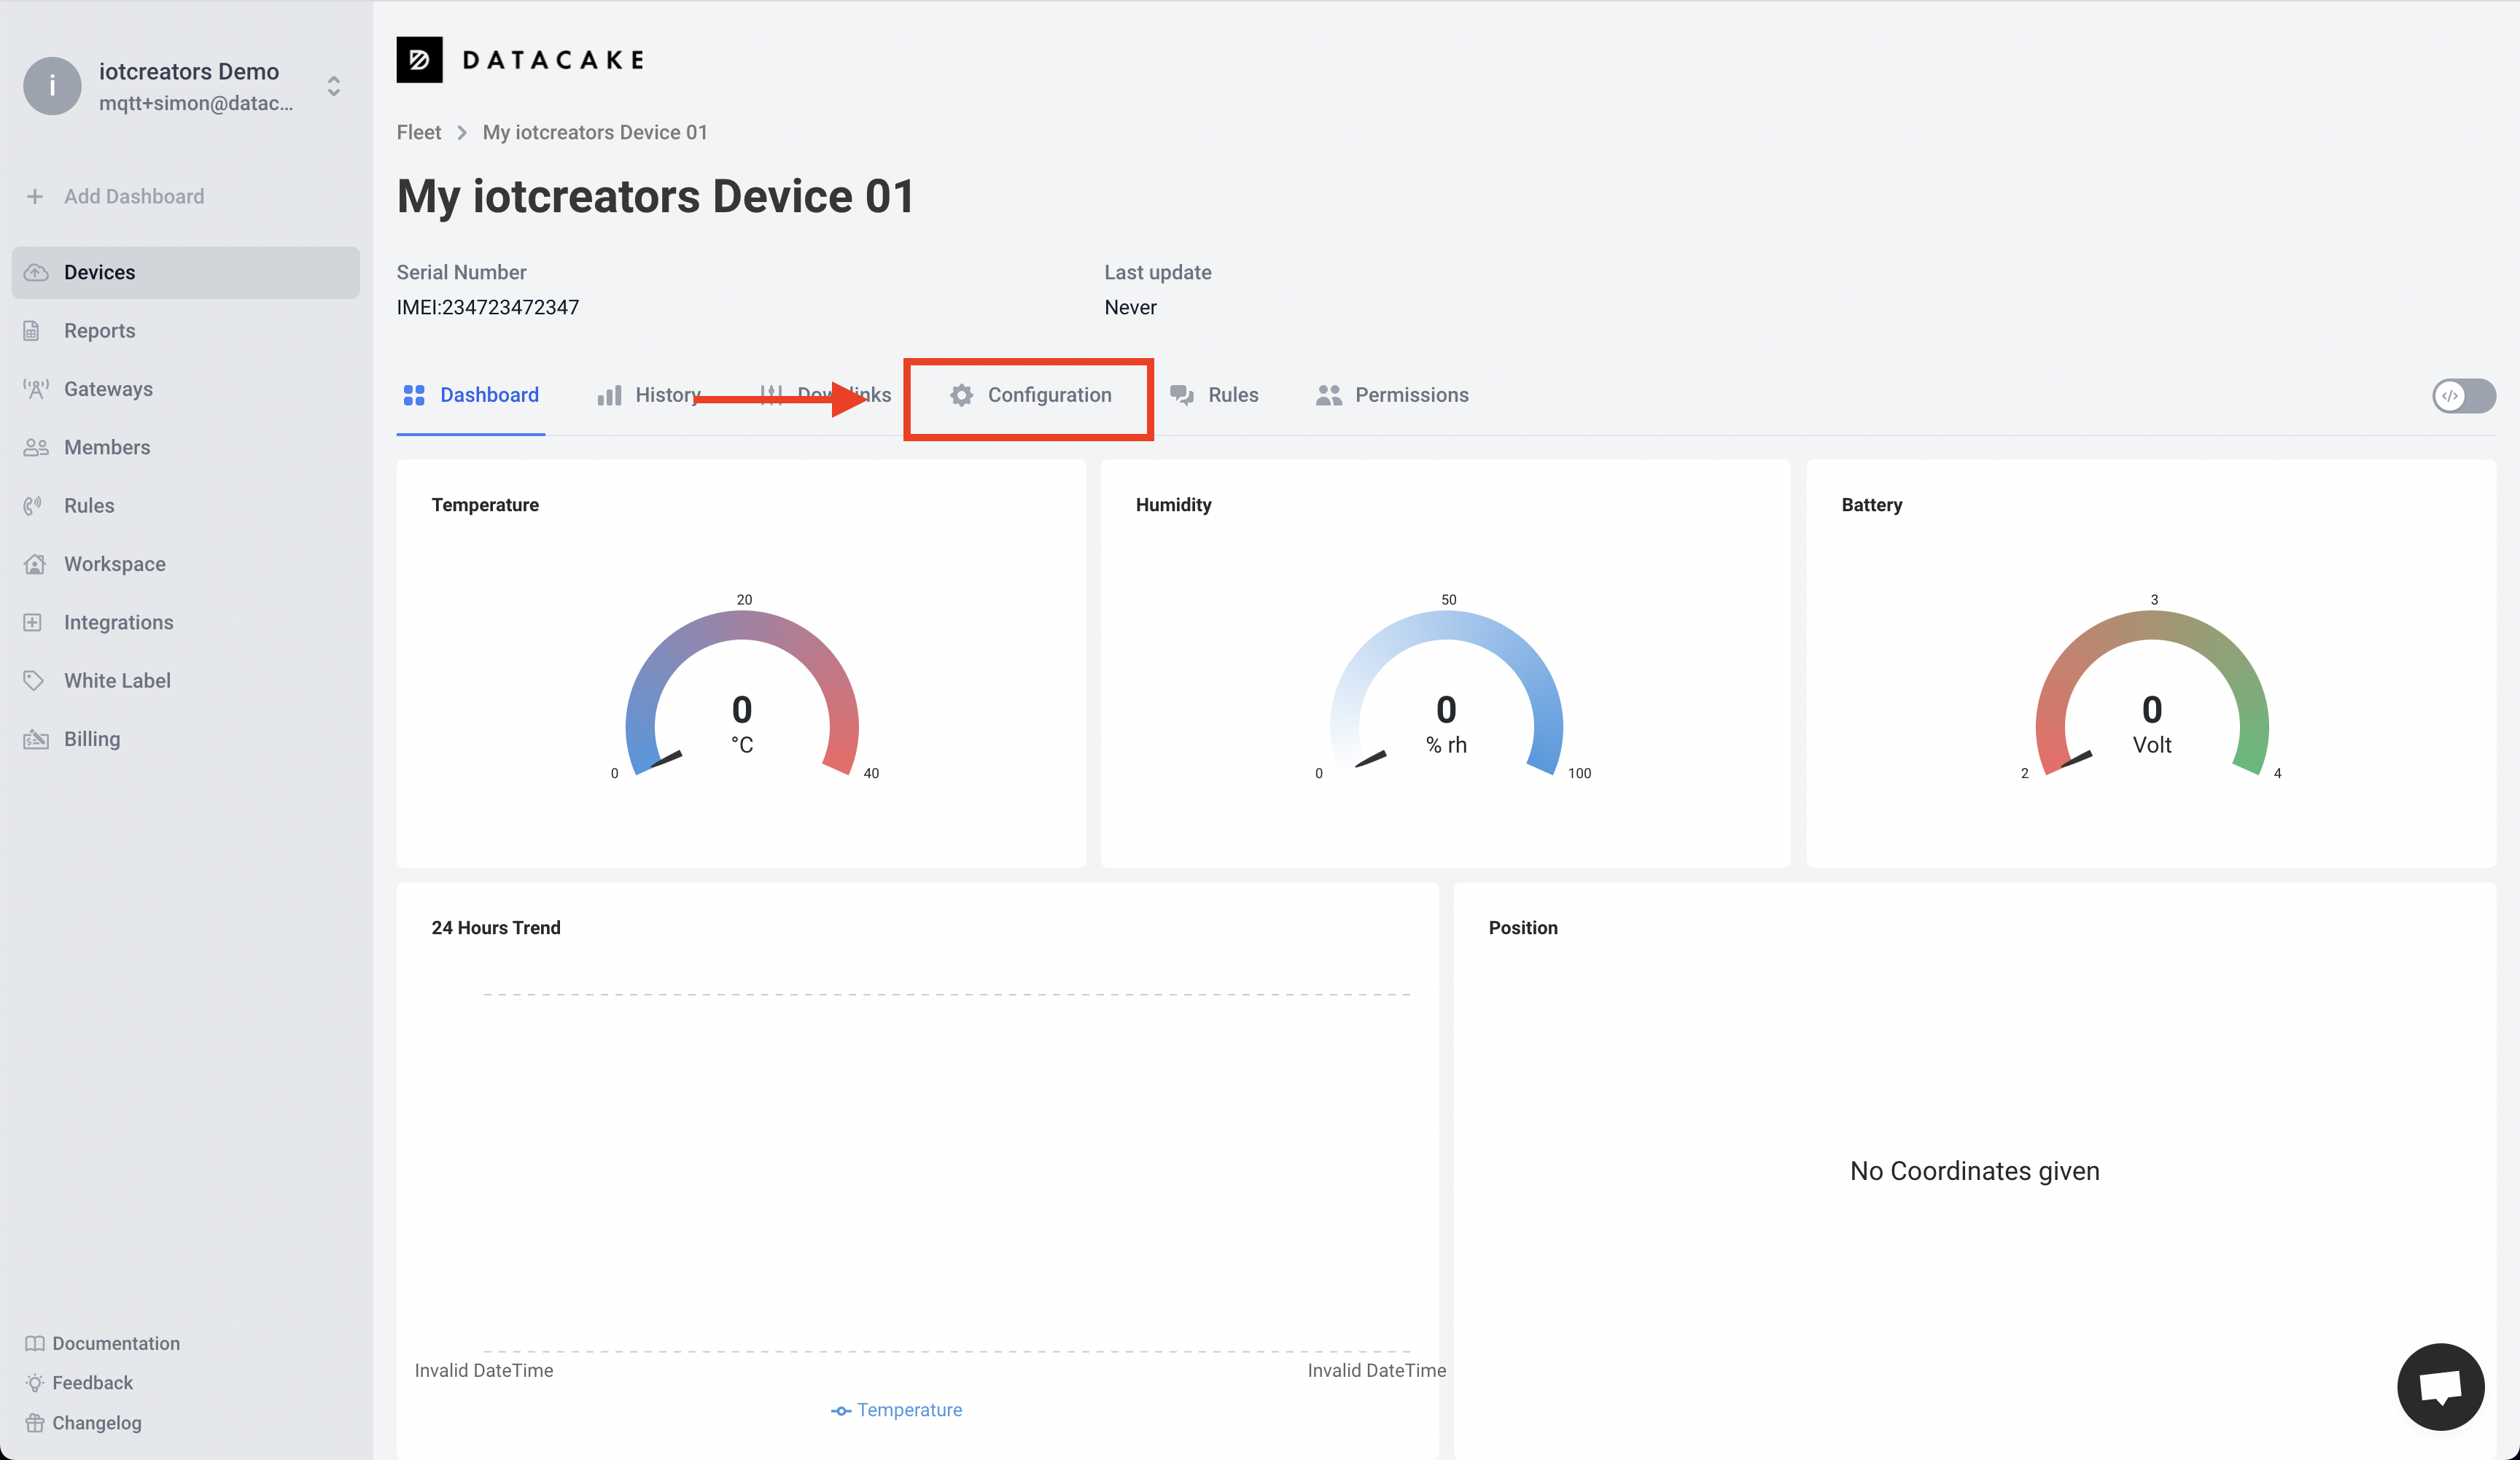
We get this address from Datacake. To do this, switch to the configuration view of your device on Datacake by opening the Configuration tab on the device view.
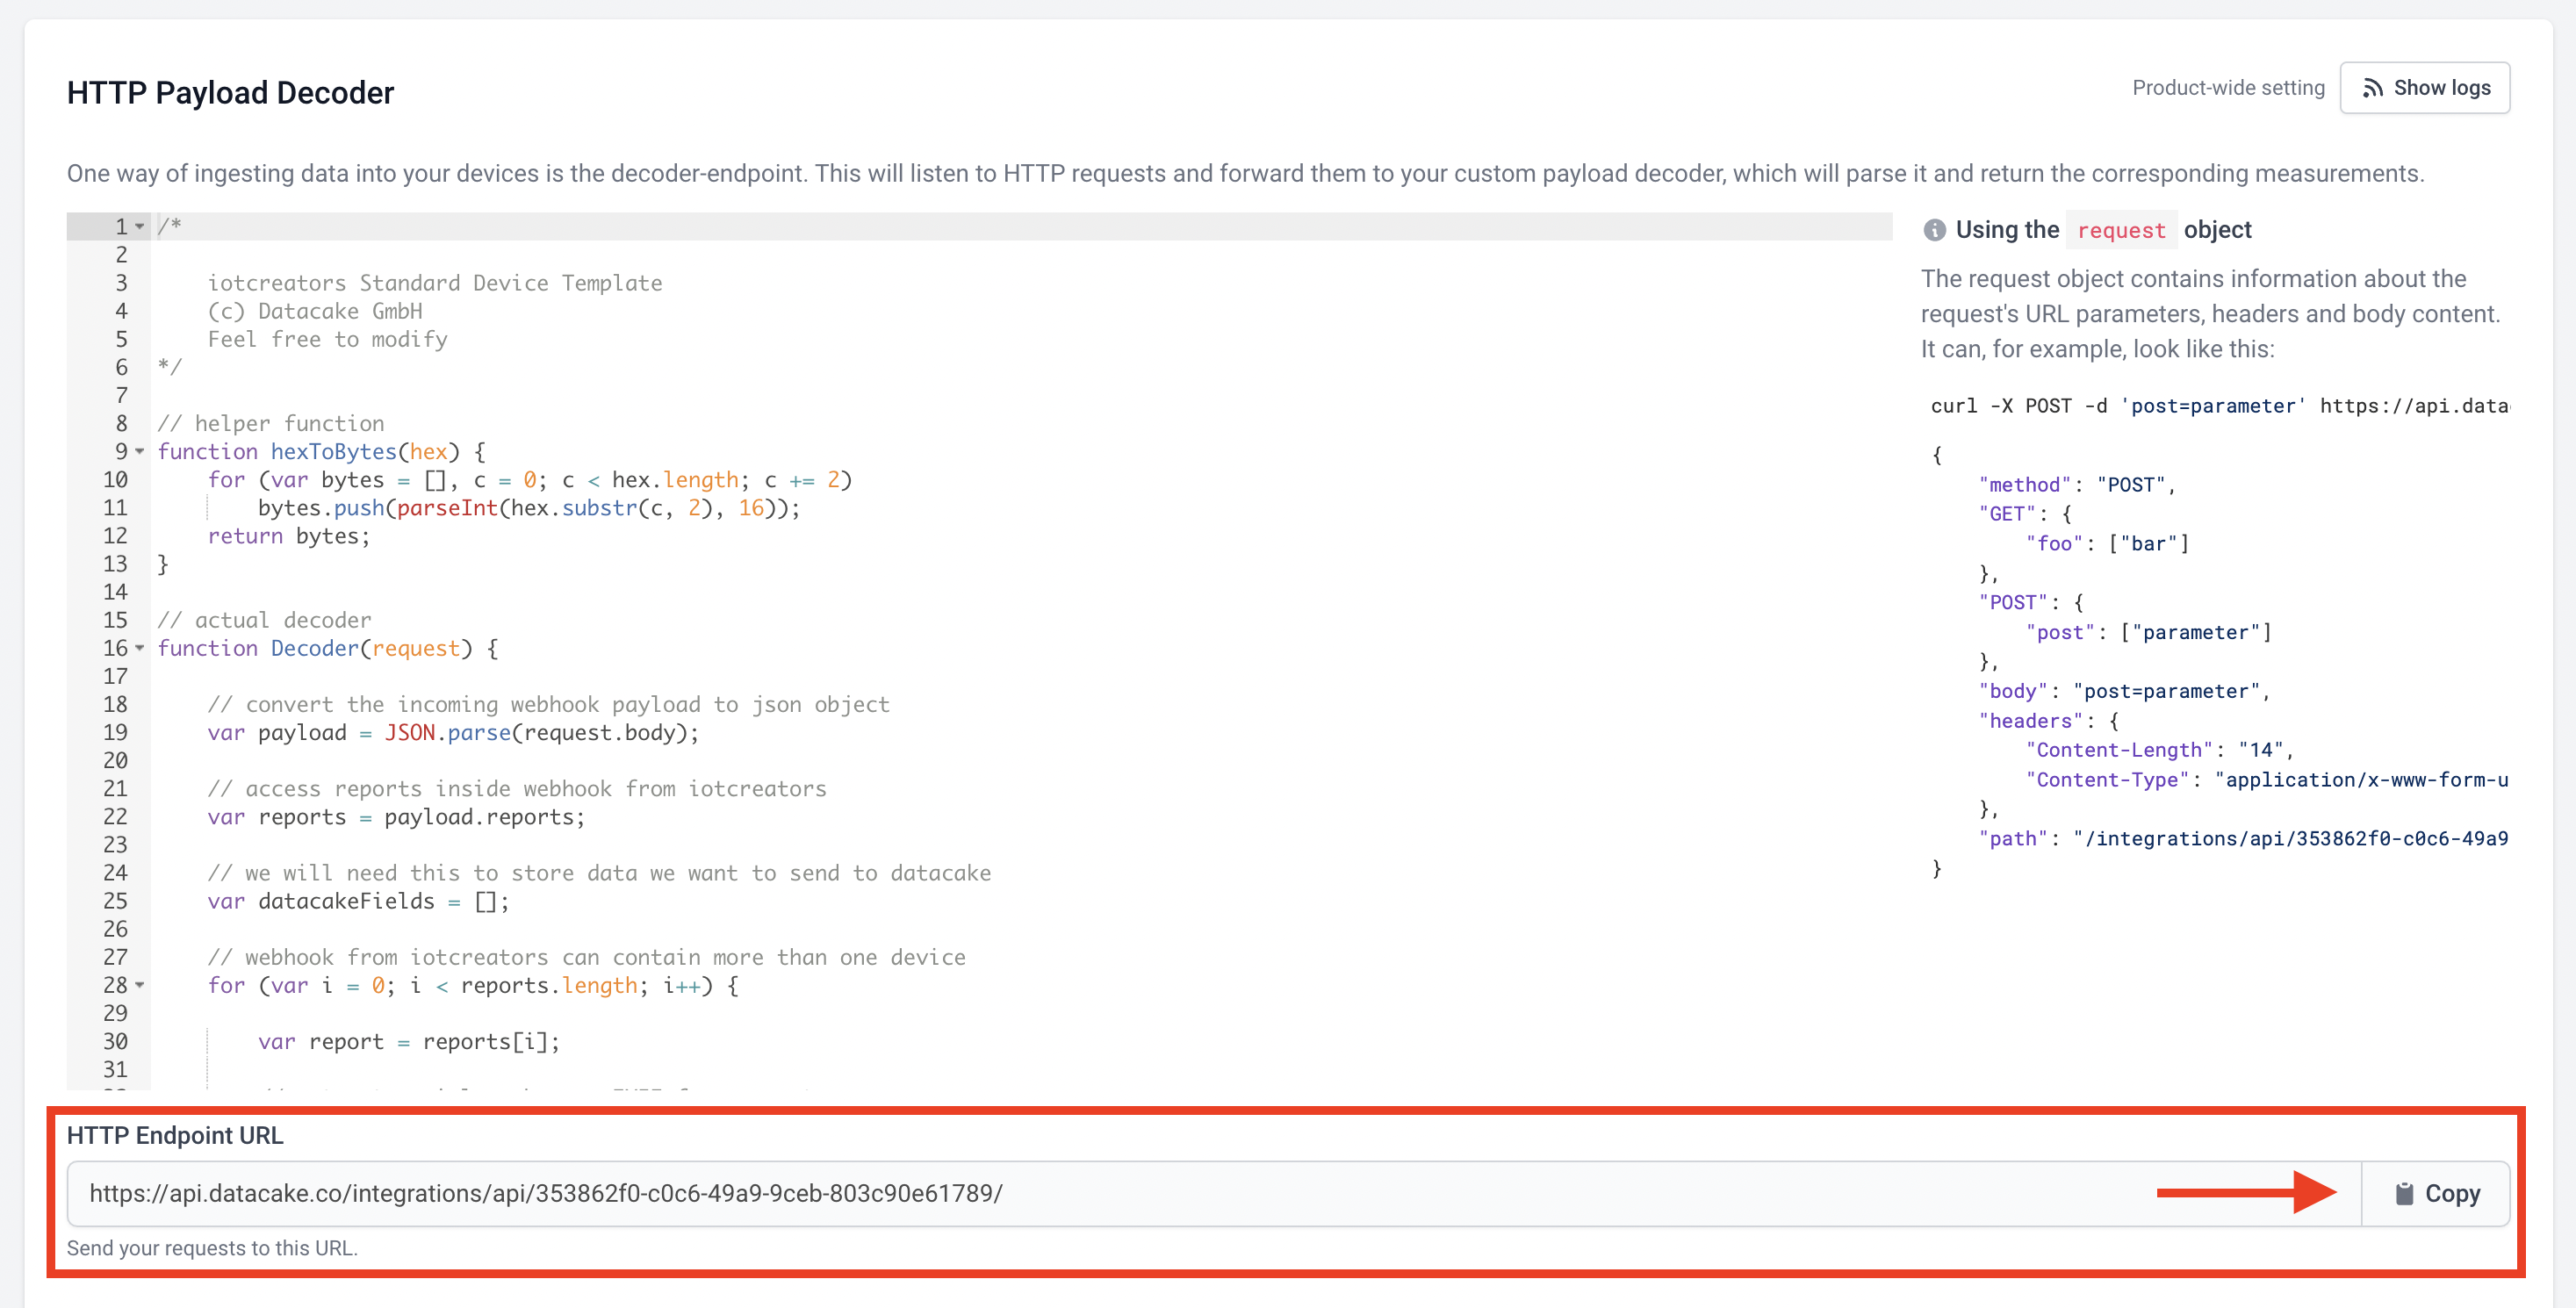
Scroll down a bit in the configuration view until you get to the HTTP Payload Decoder section.
Below the editor for the payload decoder, you will find the webhook URL, which you can copy directly to your clipboard by clicking on the Copy button on the right.
Enter the URL in the IoTCreators Portal
Now you can open the project page in IoT Creators Portal. Then switch to YOUR APPLICATION SERVER
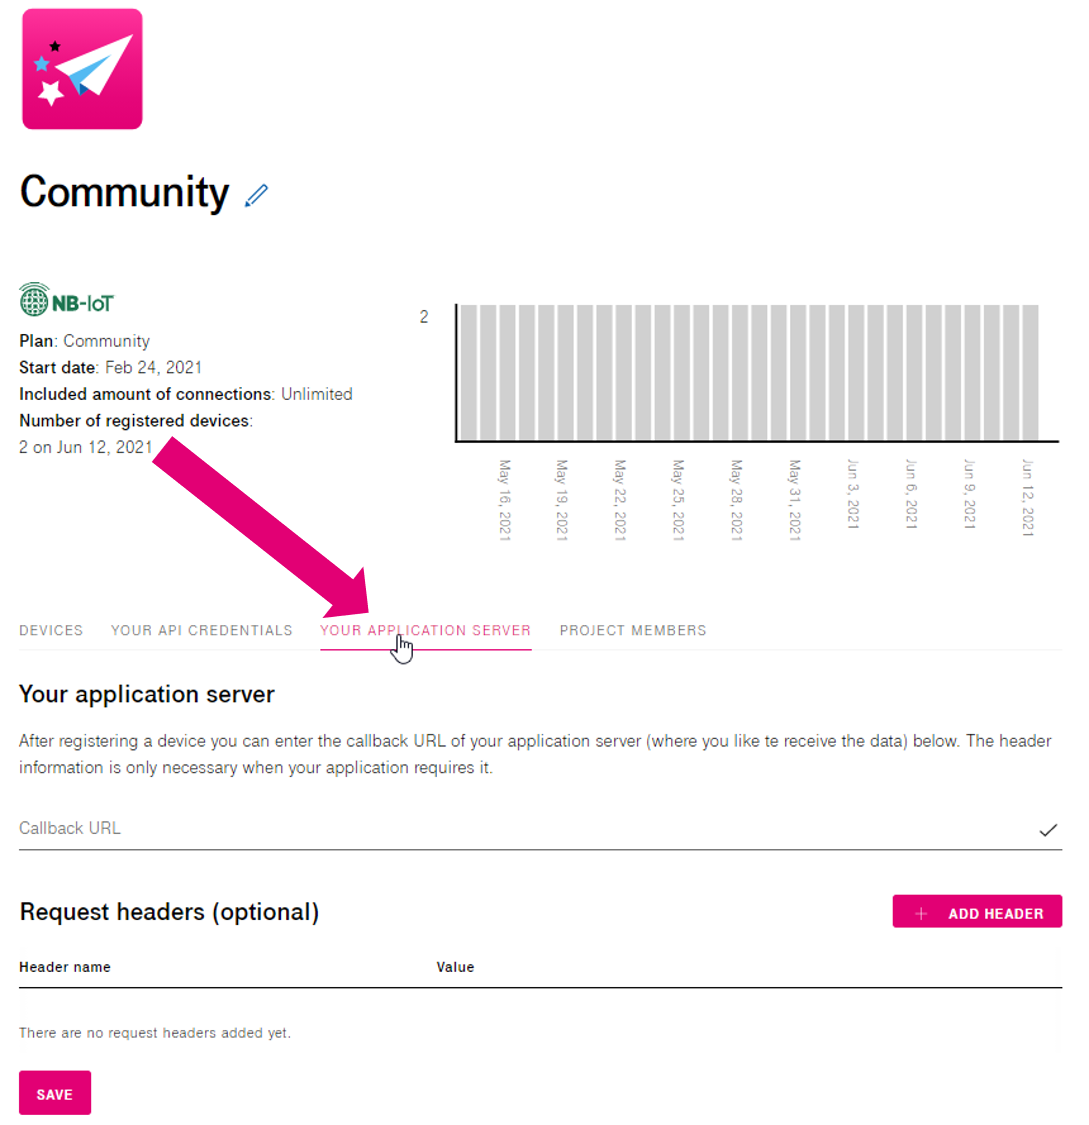
Paste your copied URL from Datacake in the Callback URL line.
Now you can click on SAVE and you should see a confirmation in the upper right corner. No additional settings are required. The Webhook connection between iotcreators and Datacake is now set up.
Check if everything worked
Let us finish this step with a simple way to doublecheck whether the connection was successful.
Like I mentioned you should have already seen a confirmation in IoT Creators Portal, it should look like this:

When you saw an error like in the picture below please check first, whether your Authorization header is correct. If so, further investigations are required.

Troubleshooting
If you don't see a text message please double-check that you have entered the correct Webhook URL and retry.
If your Webhook URL is correct, feel free to contact our support in the forum or directly via email: support [at] iotcreators.com
You can also contact Datacake and request further assistance. Send an email to support [at] datacake.de or use their live chat on the platform or website.
Step 4: Configure the decoder
In order to receive the data from iotcreators via the webhook and convert it into an appropriate format, Datacake has so-called payload decoders.
Thanks to the iotcreators template, this is already pre-filled to receive the data via the webhook.
What is now the task of the user would be to adapt the decoder to the actual data of the sensor. These can be of the following types:
- Binary data
- JSON strings
You can find the decoder in the same configuration view, where we also copied the link for the webhook. There is an editor window for entering a JavaScript snippet for decoding the messages.
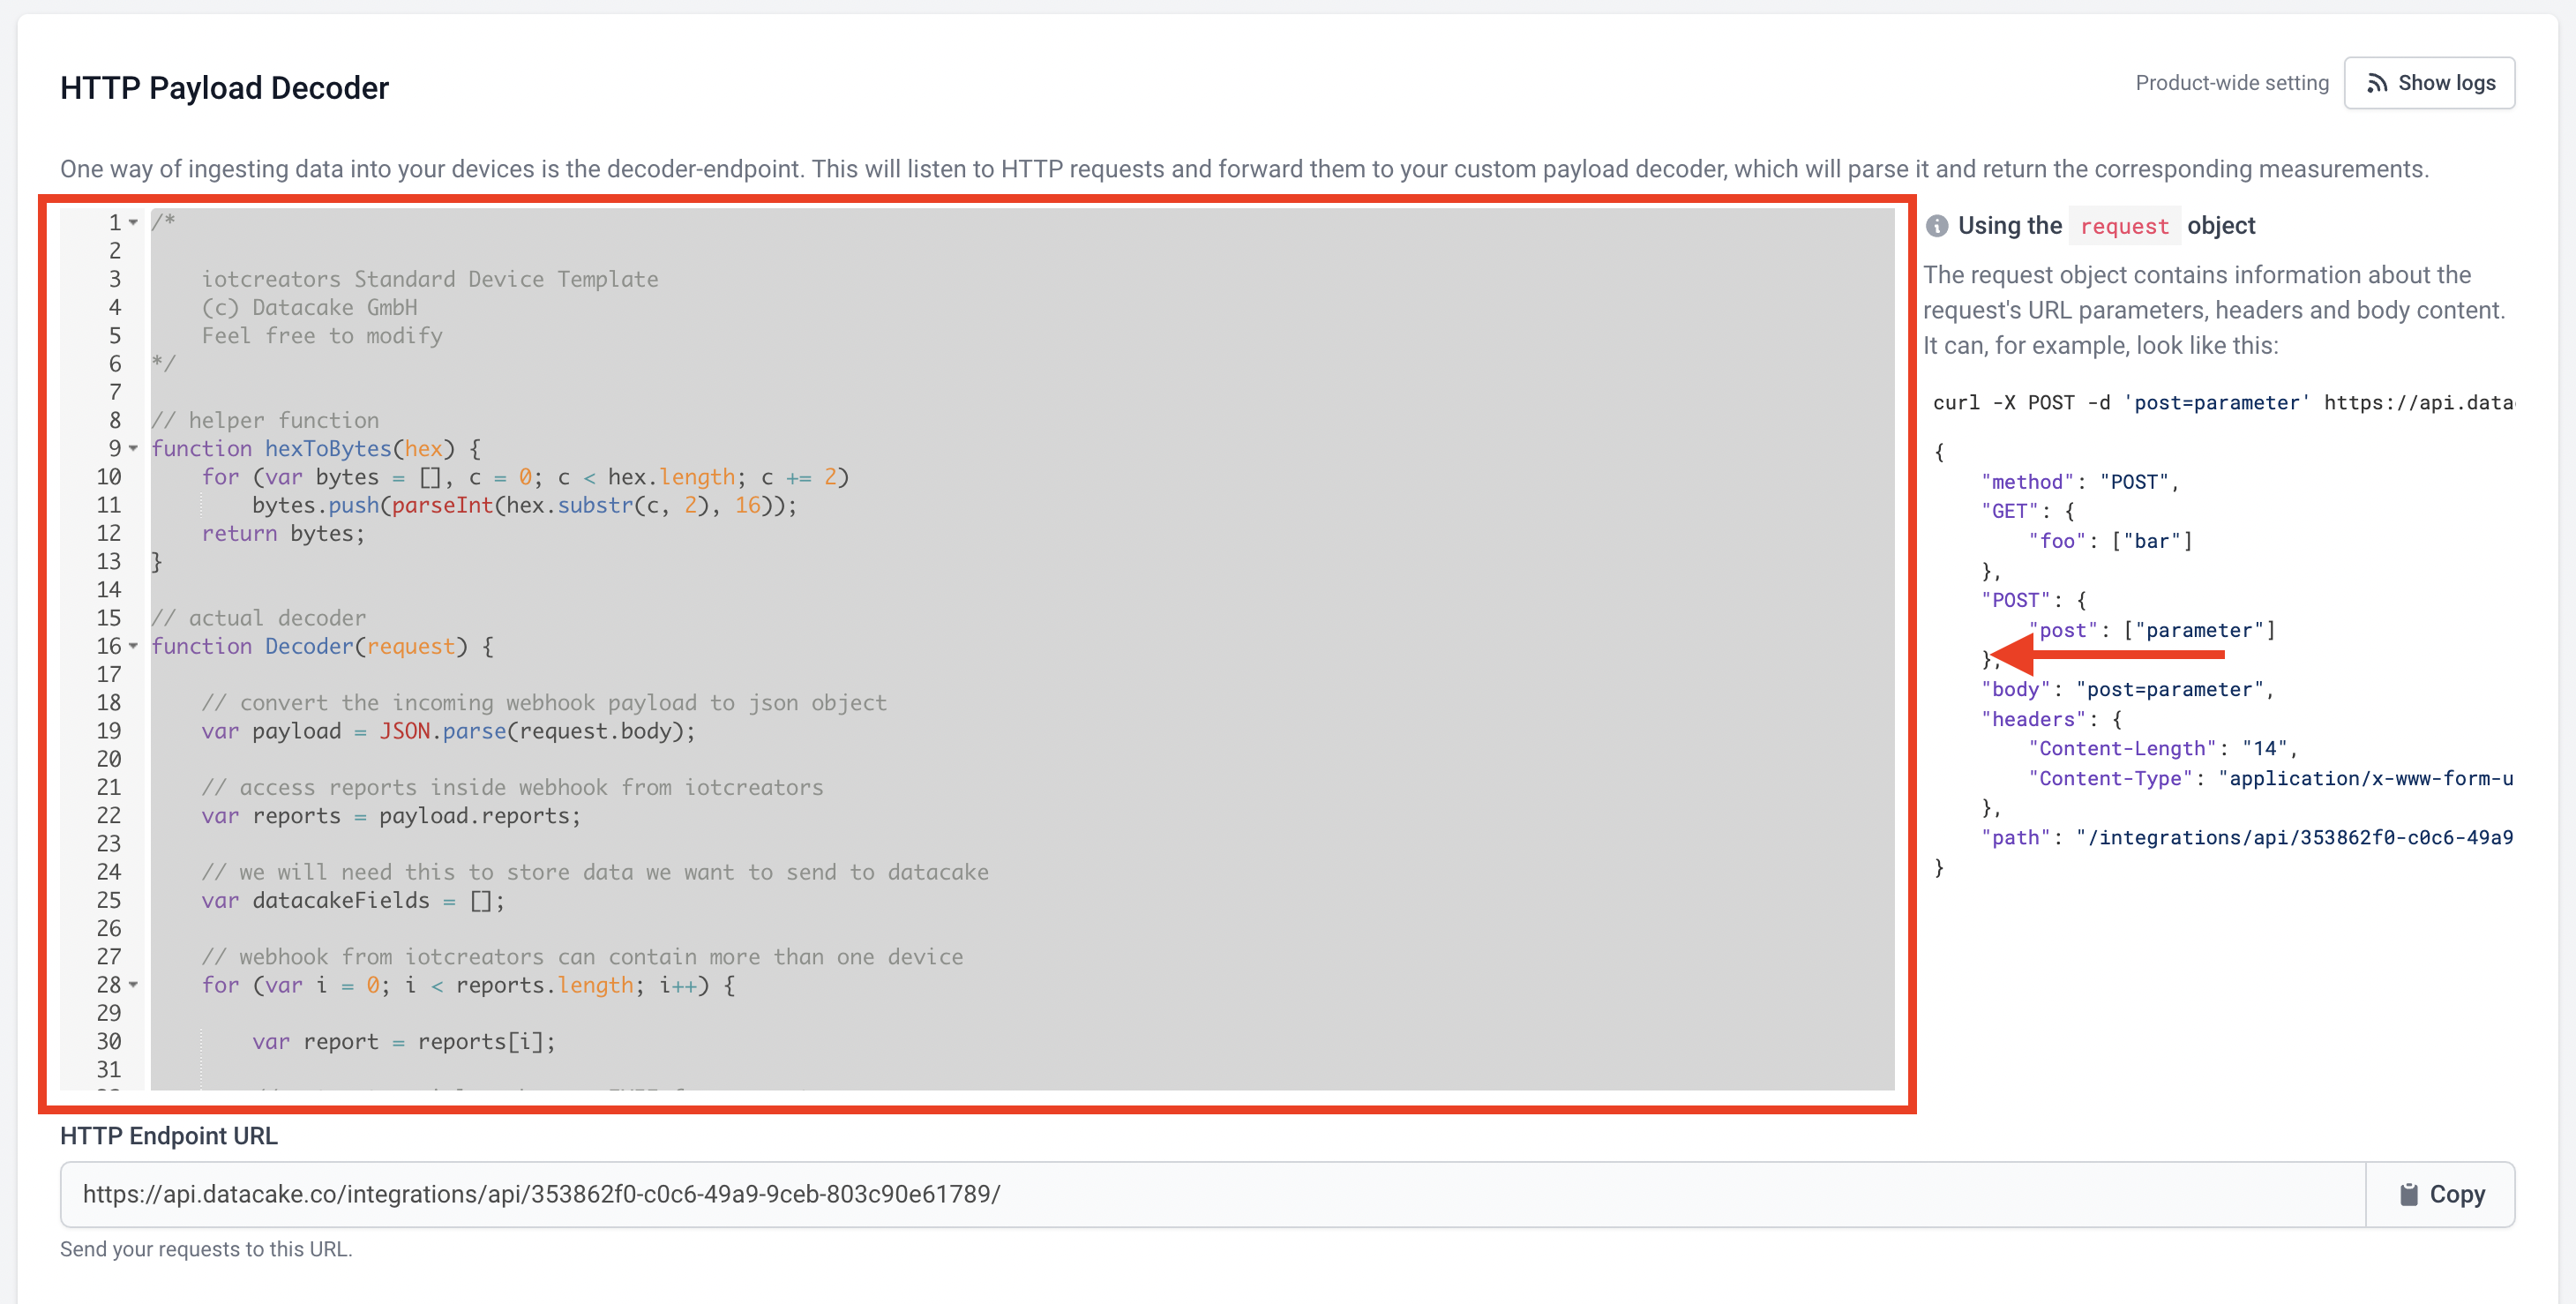
This code will be executed whenever Datacake receives a message from iotcreators.
Payload Decoder
The following code example shows the decoder of the default template for iotcreators devices on Datacake.
/*

    iotcreators Standard Device Template
    (c) Datacake GmbH
    Feel free to modify
*/

// helper function
function hexToBytes(hex) {
    for (var bytes = [], c = 0; c < hex.length; c += 2)
        bytes.push(parseInt(hex.substr(c, 2), 16));
    return bytes;
}

// actual decoder
function Decoder(request) {

    // convert the incoming webhook payload to json object
    var payload = JSON.parse(request.body);

    // access reports inside webhook from iotcreators
    var reports = payload.reports;

    // we will need this to store data we want to send to datacake
    var datacakeFields = [];

    // webhook from iotcreators can contain more than one device
    for (var i = 0; i < reports.length; i++) {

        var report = reports[i];

        // extract serial number or IMEI from report
        // one report = one device
        var serial = report.serialNumber;

        // extract sensor payload
        var sensorPayload = report.value;

        // convert byte string into hex-buffer
        // we need to do this in order to work with byte decoding
        var bytes = hexToBytes(sensorPayload);

        // extract and convert bytes
        // Note: Please adapt this to your sensor payload
        var temperature = ((bytes[0] << 8) + bytes[1]) / 10.0;
        var humidity = ((bytes[2] << 8) + bytes[3]) / 10.0;
        var battery = bytes[4] / 10.0;

        // Example for GPS Location
        var lat = 53.362; // please adapt to your device
        var lon = 6.394; // please adapt
        var location = "(" + lat + "," + lon + ")";

      	// now create an array which we are forwarding to Datacake
        // this array should contain dictionaries each holding a measurement value
        datacakeFields.push(
            {
                "device": serial // serial number so IMEI of Device on Datacake
                "field": "TEMPERATURE", // field identifier on database
                "value": temperature, // value for field coming out of webhook
            },
            {
                "device": serial
                "field": "HUMIDITY",
                "value": humidity,
            },
            {
                "device": serial
                "field": "BATTERY",
                "value": battery,
            },
            {
                "device": serial
                "field": "LOCATION",
                "value": location,
            }
        );
    }

    // returning sends the data to Datacake
    return datacakeFields;
}
This decoder works when your device sends data via iotcreators in the form of a hex string, for example as follows:
- Payload Data:
010a02fa55
Now, you need to adapt your decoder to the structure of your device. For example, if it sends more than just temperature, humidity and battery, then you need to extend the decoder accordingly. The decoder stored in Datacake should serve you as a basis.
If you want to know more about developing payload decoders on Datacake please make sure you check out their tutorials on the official Datacake documentation:
https://docs.datacake.de/integrations/webhook
Database Fields
In order for the values that can be returned from the decoder to also be stored in Datacake's database, fields must be created in the database on the device in Datacake.
To do this, you have to scroll down in the same configuration view until you reach the item "Database Fields".

There you will see that fields have already been created for the examples in the decoder. This comes with the default template from Datacake and can be customized as needed.
The important thing here is that you create fields for the data in the decoder. If you add new fields, then make sure that in the decoder these fields are addressed via the IDENTIFIER.

If you want to know more about creating fields, please visit the following Datacake documentation page.
https://docs.datacake.de/device/database/fields
Testing and validating the Decoder
Datacake also offers you tools to test your decoder. To do this, you need to paste the content of the webhook into a corresponding field below the decoder editor.
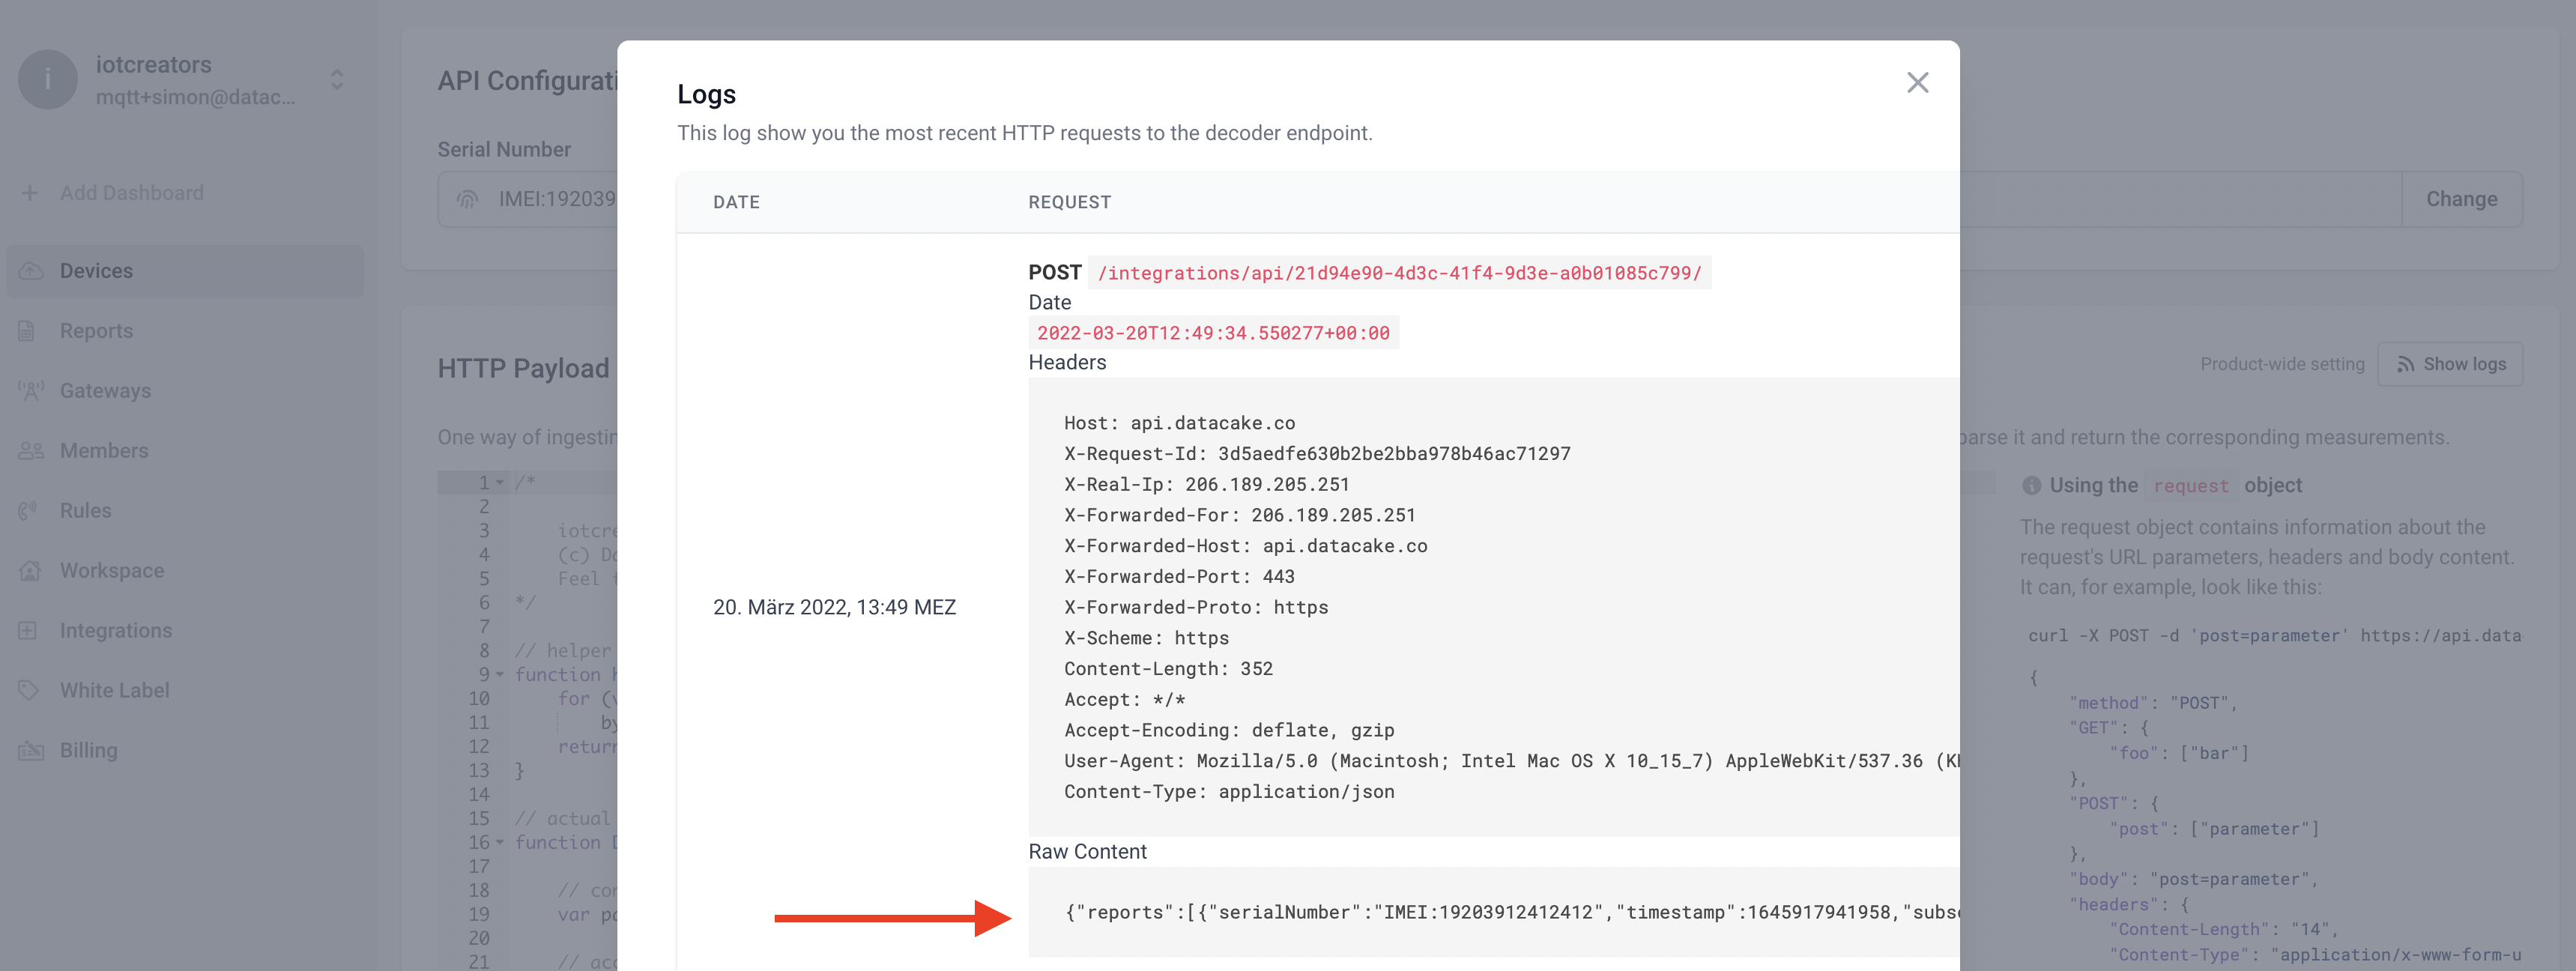
To get the content of the iotcreators webhook, you can open the logging function for the webhook URL on Datacake. For this you can find a small button on the upper right side of the payload decoder panel. If you click on it, another window will open.

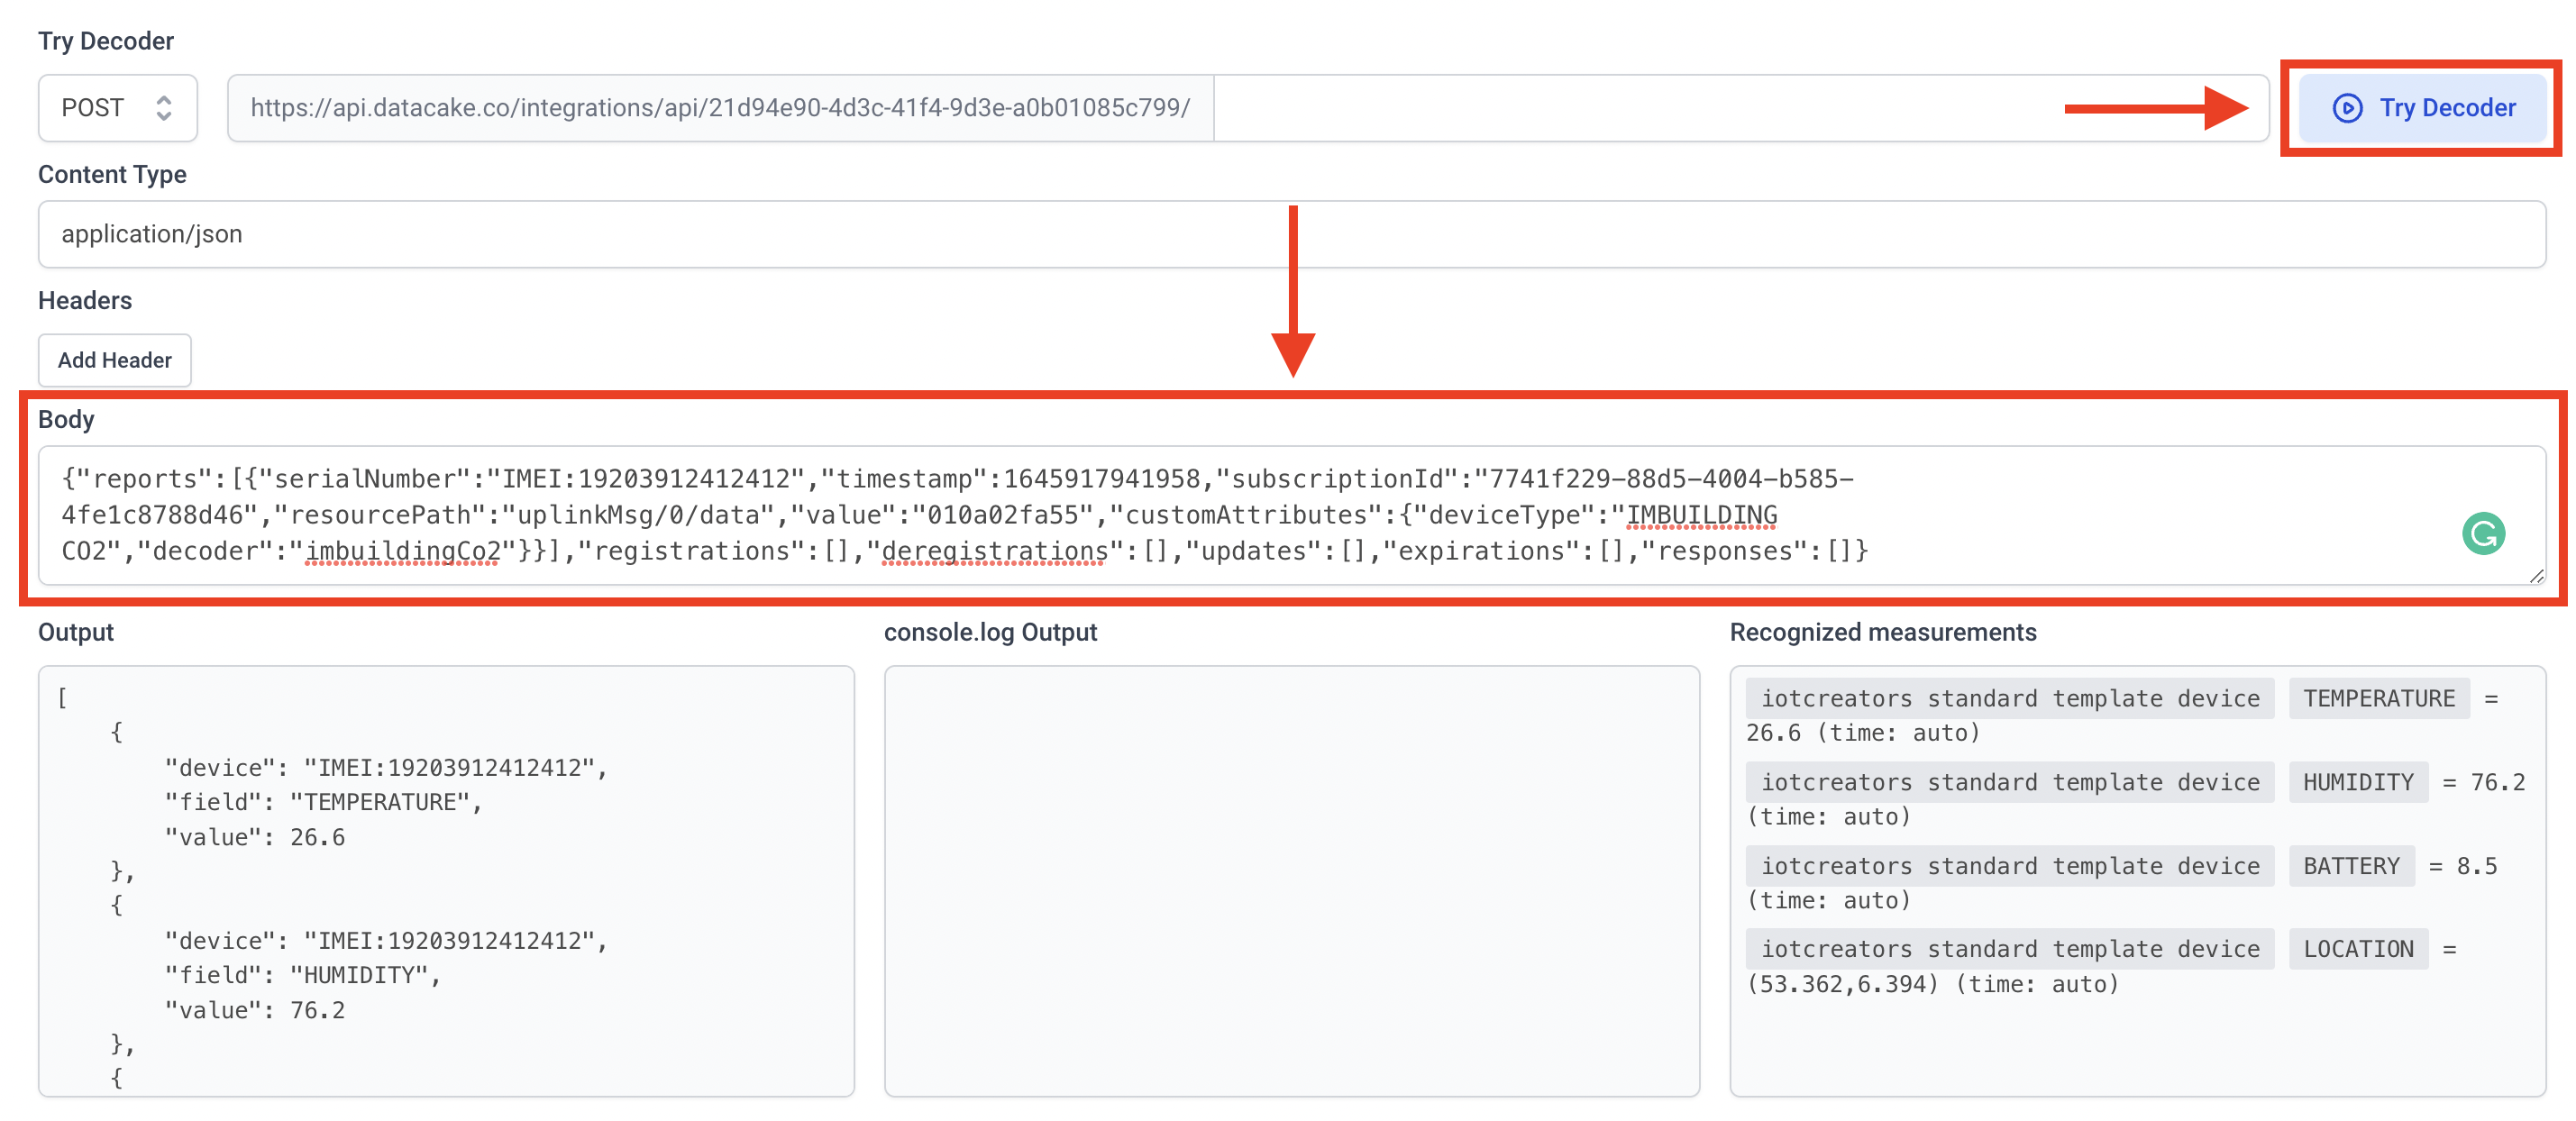
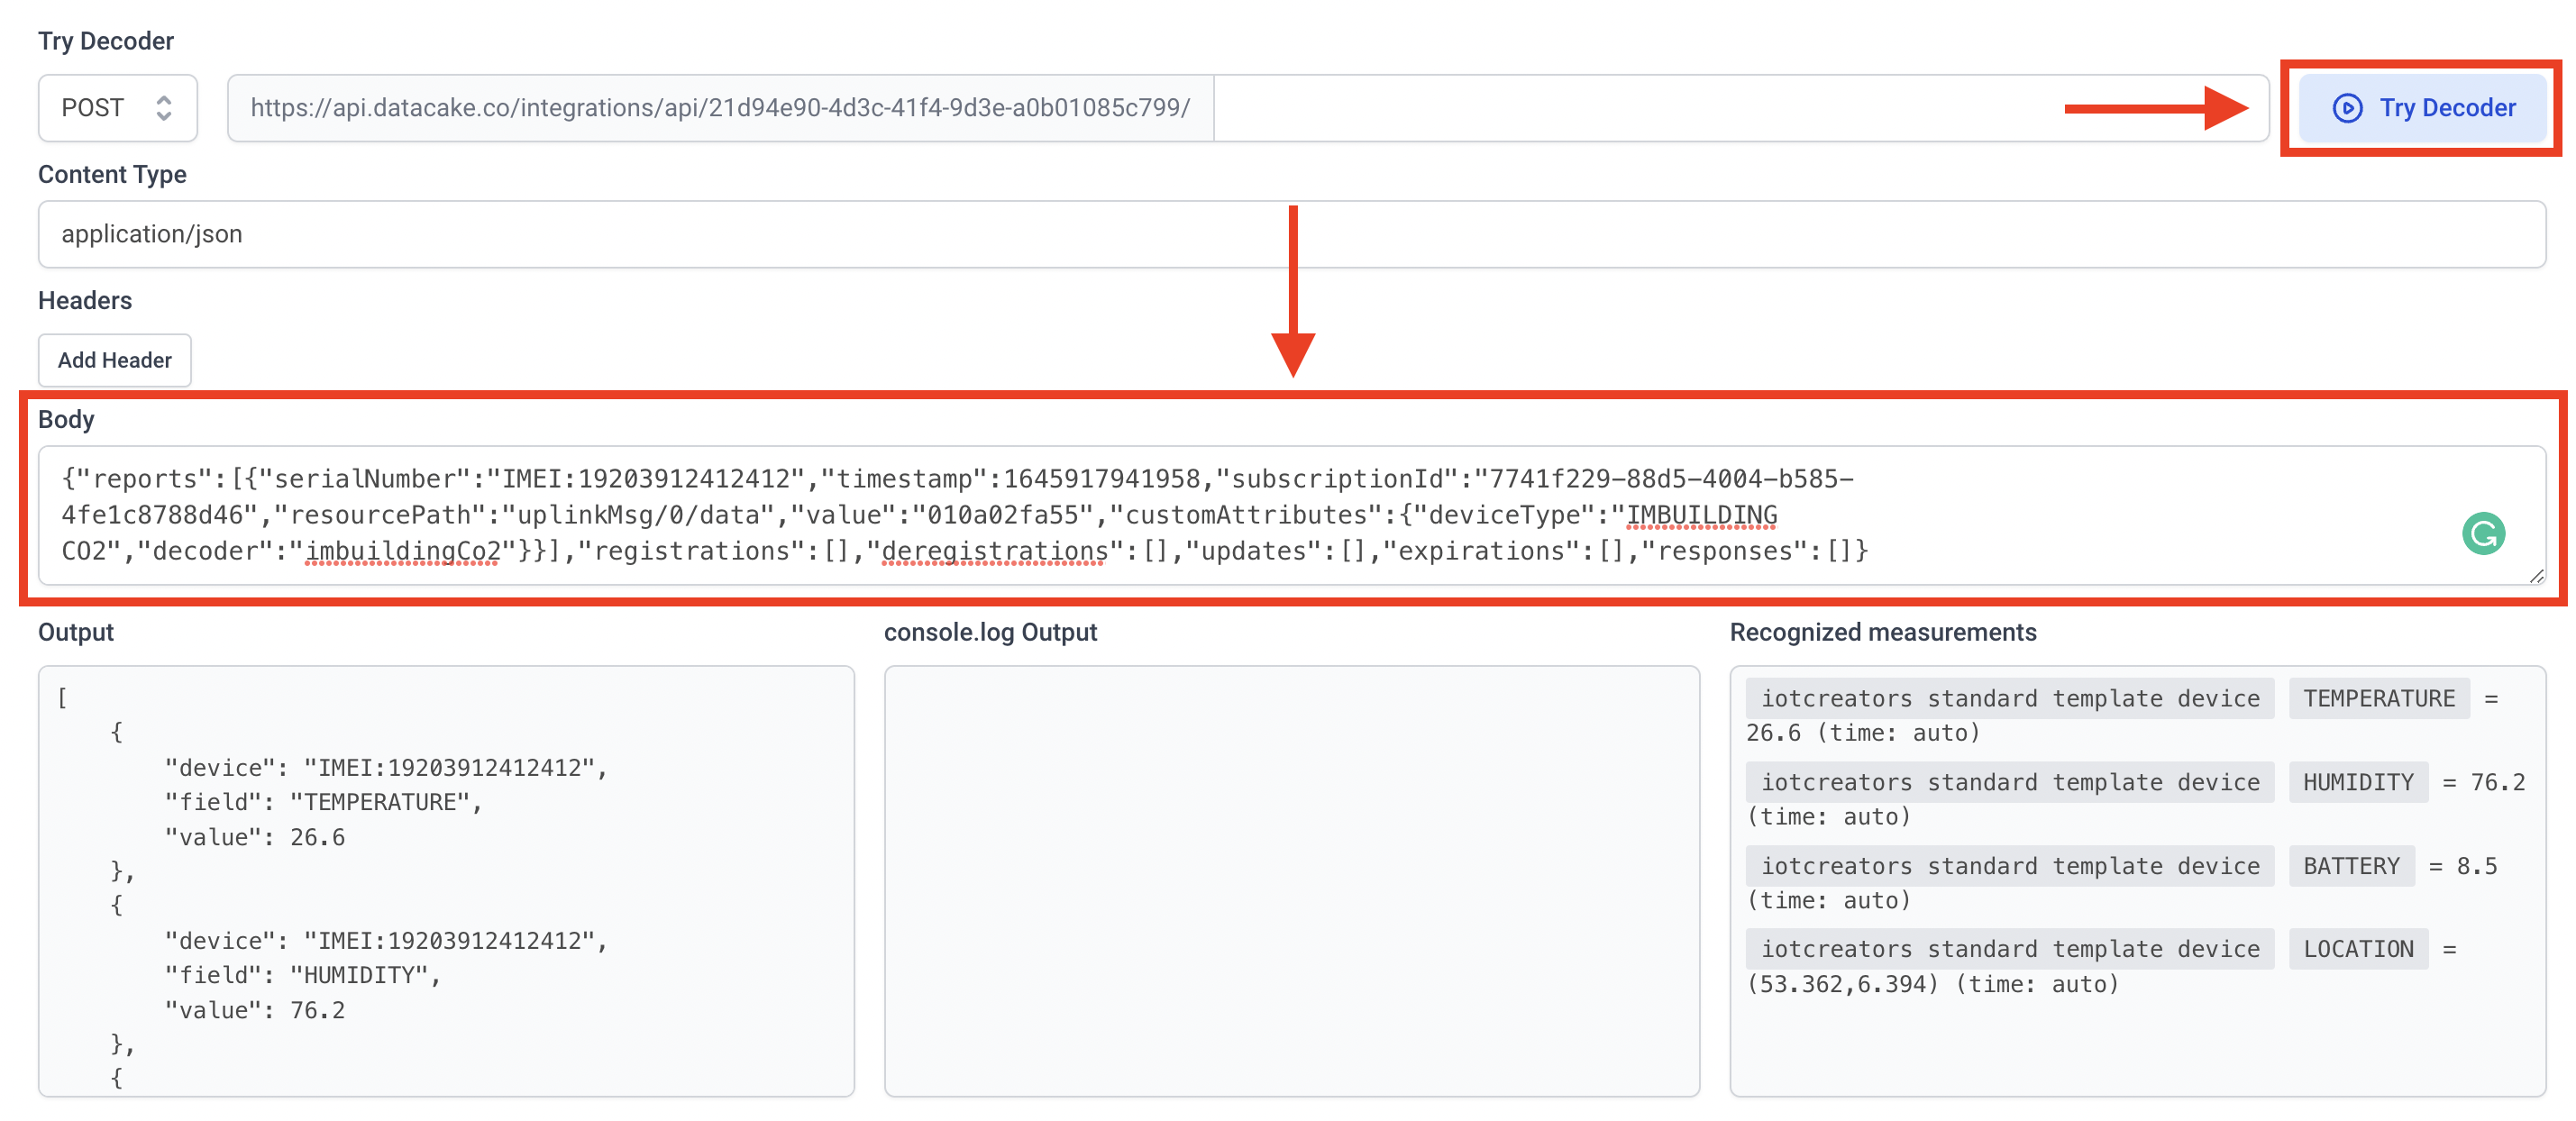
Now copy the whole content from the highlighted line and paste it into the body input field and then click on "Test Decoder".
Paste the copied contents into the Body field, and click on "Try Decoder".
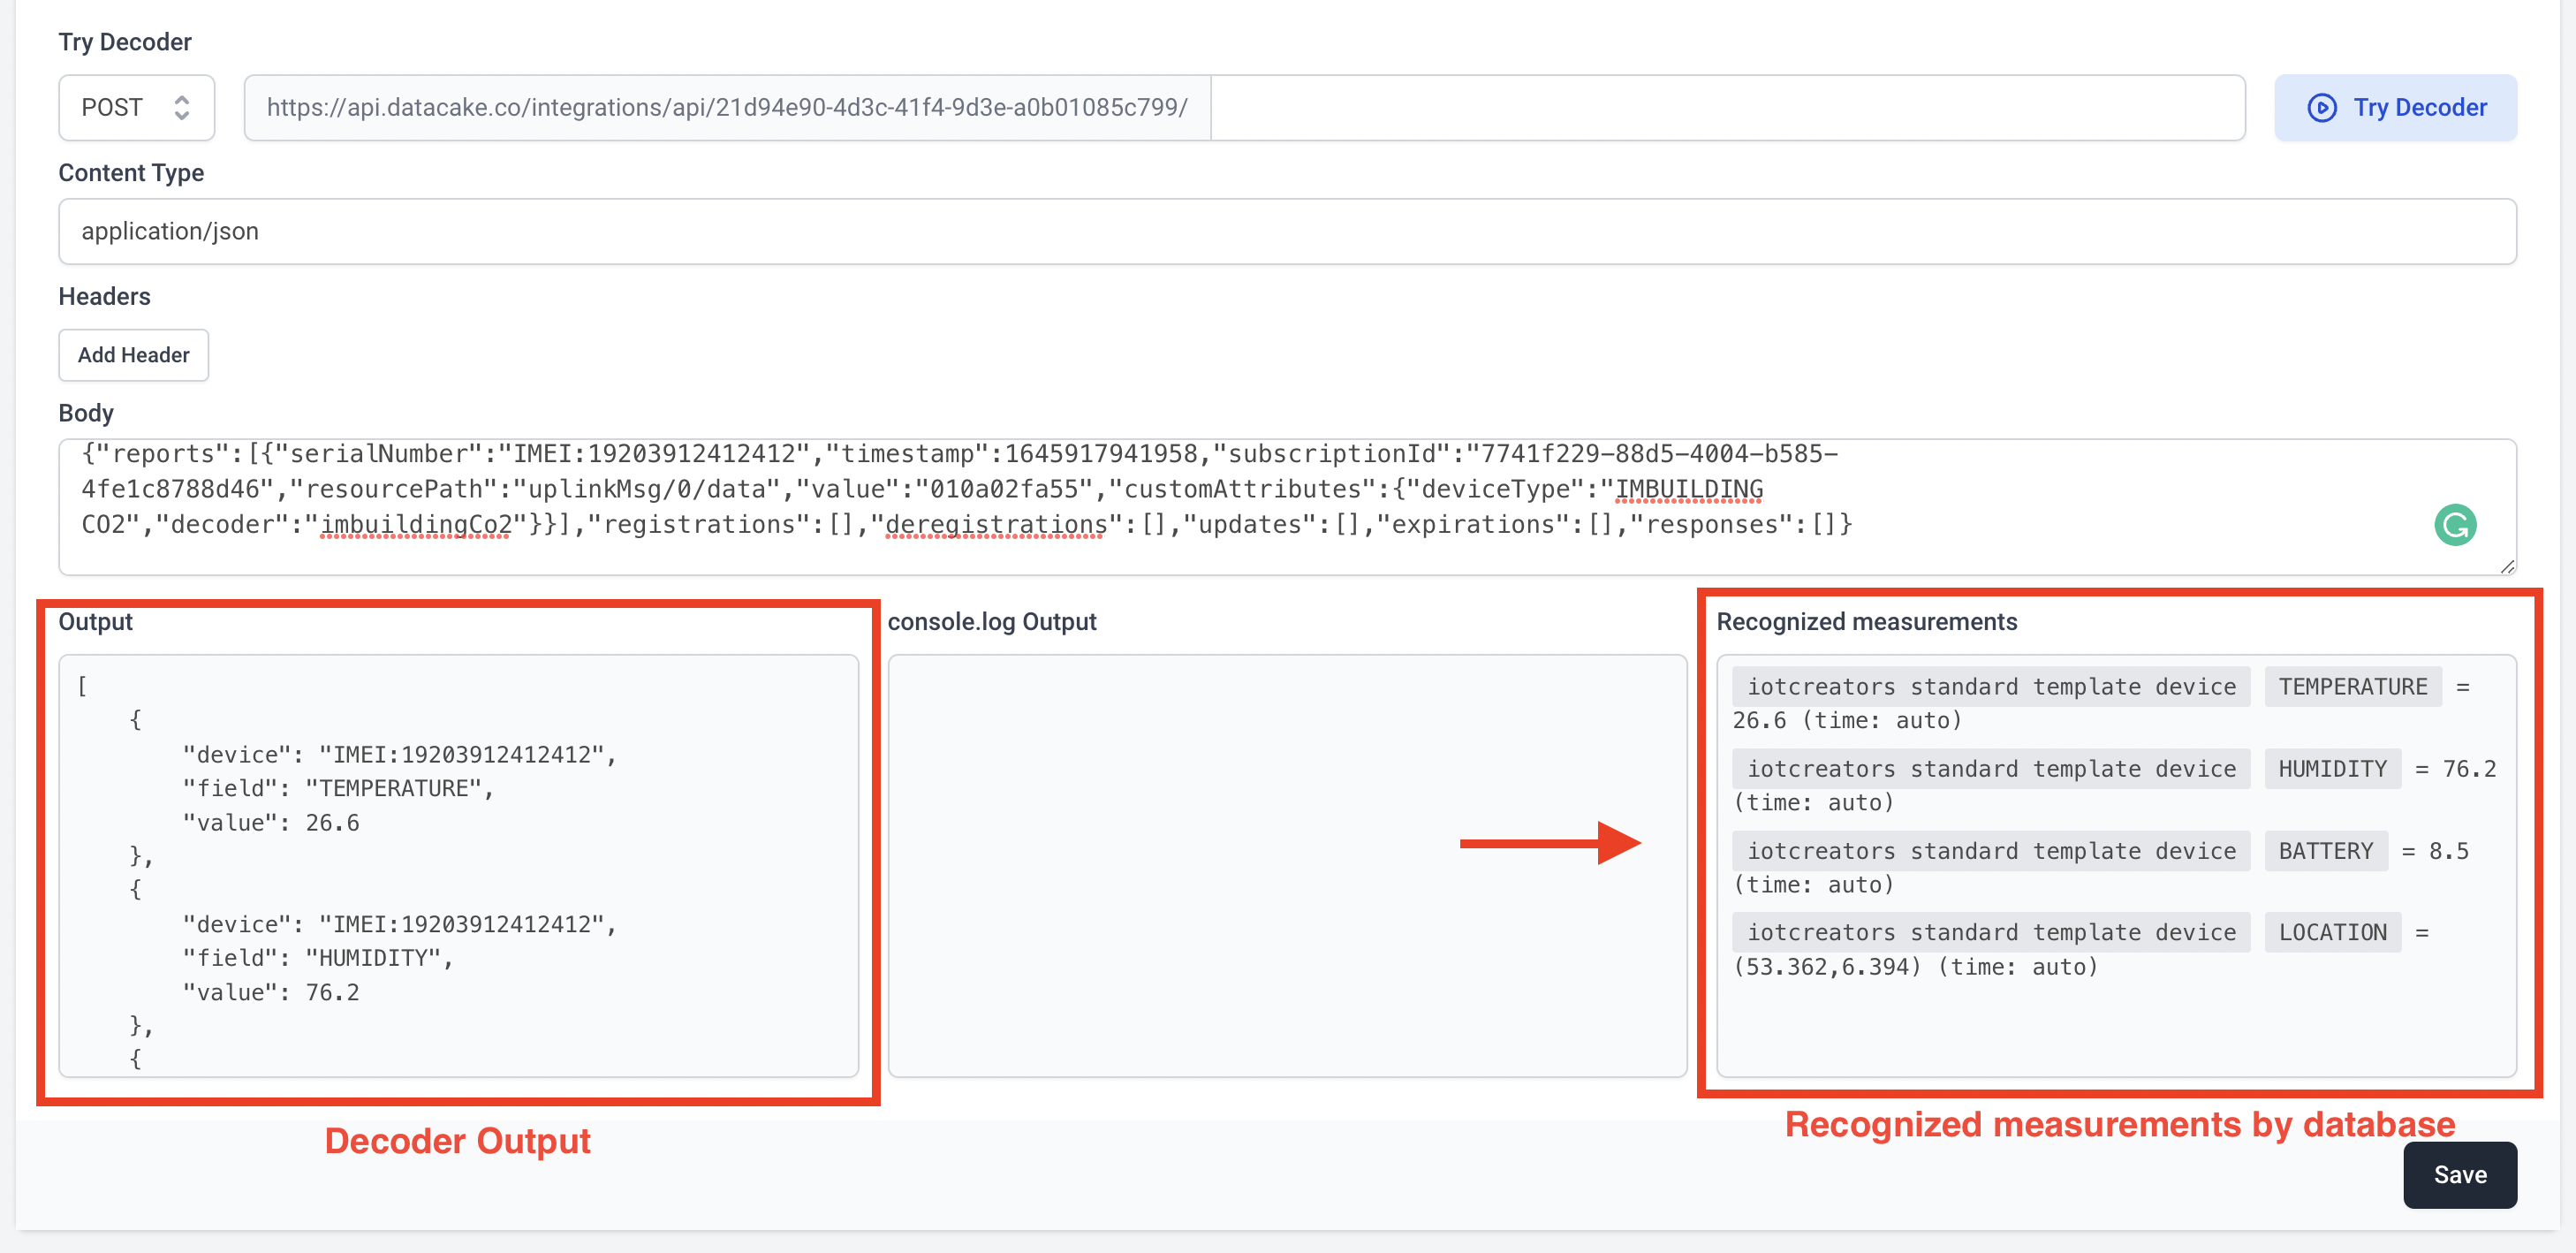
You will see what the decoder does in the three fields below the editor. Here you can see on the left side the output of the decoder, that is what was returned to Datacake via a return.
On the right side, you see the information of the decoder, whether it was able to assign the data to the database.
Next Steps
You have now successfully established a connection between your IoT device on iotcreators and Datacake. Now you can try out the other features of the platform.
If you encounter any questions or problems, you can always contact Datacake directly. The platform has a live support chat or you can send an email to support [at] datacake.de.
Updated almost 4 years ago
