Akkr8 sensor platform
Company introduction
Akkr8 provides a sensor platform that includes support for a wide range of sensors. Upon request, they can provide a Ready for IoT Creators-certified solution which includes a preset of sensors and NB-IoT connectivity.
Device configuration
When receiving the device, it will be preconfigured to connect to IoT Creators with its IMEI number and a password which can be found on a card that comes inside the box.
To register/"claim" the device you have to add it to your user account.
Follow these steps:
- In the IoTCreators portal, select "Register Device"
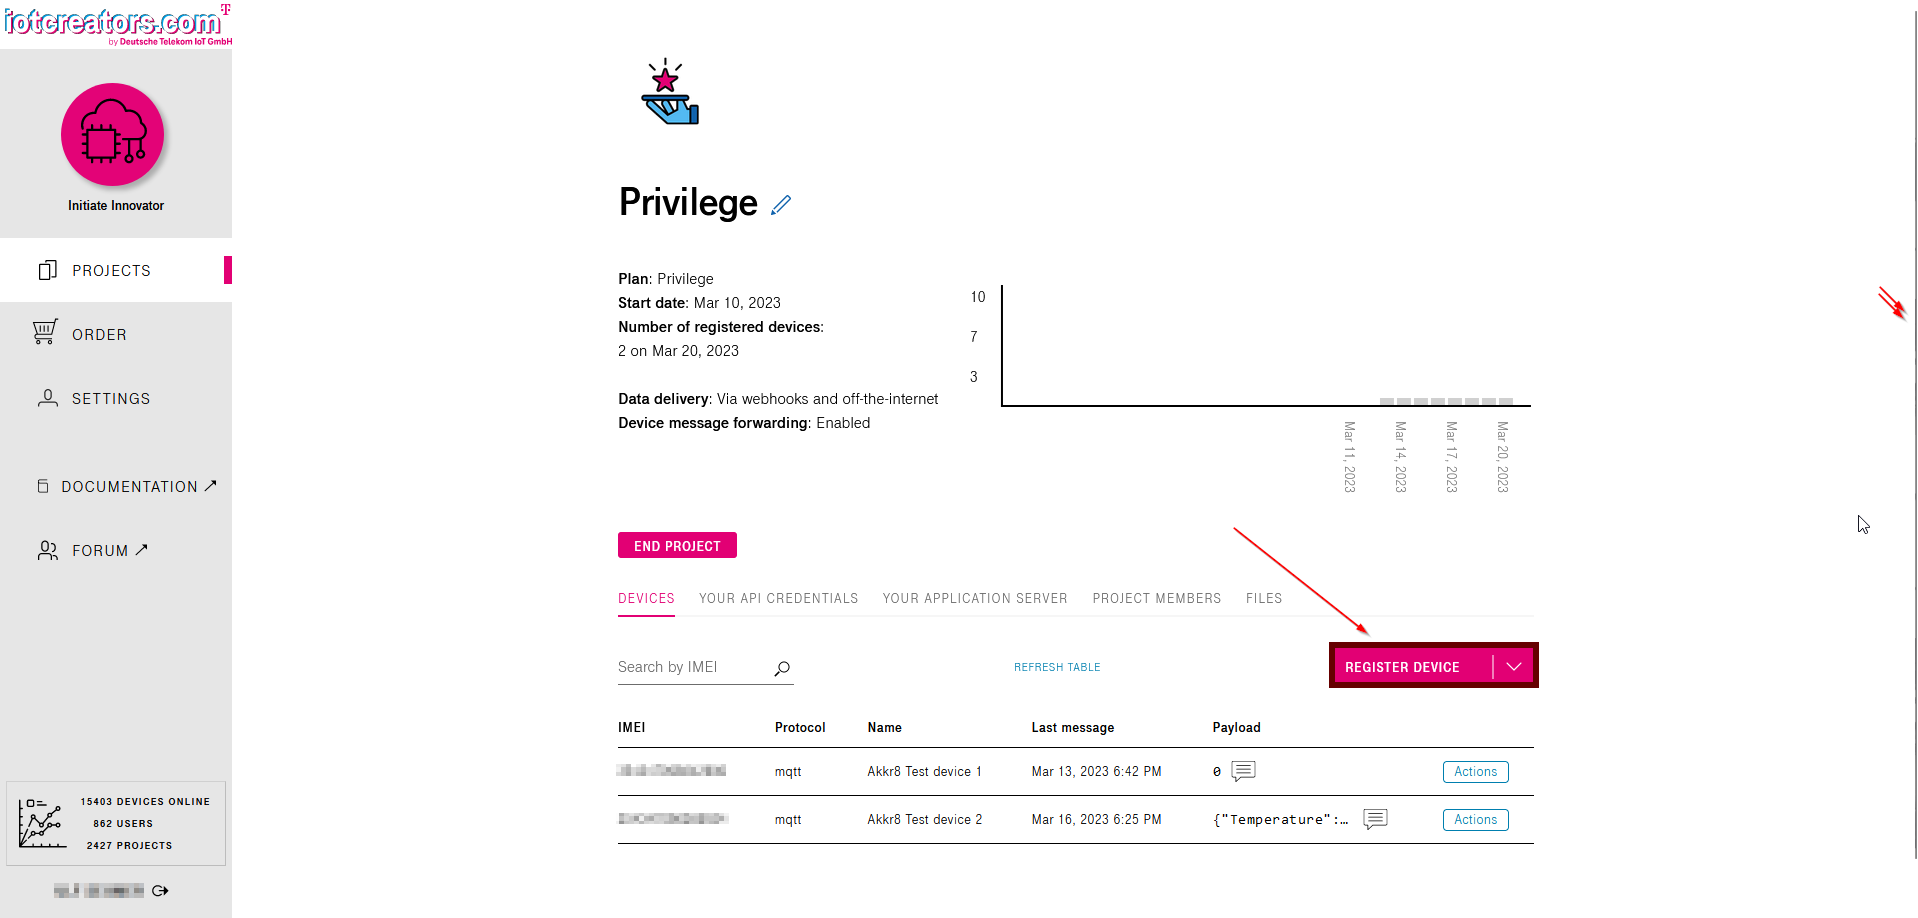
- In the box that pops up, do the following:
- Set "IMEI" to the IMEI number that can be found on the card in the box.
- Set "Name" to whatever you'd like. It will help you identify the sensor.
- Under protocol, select "MQTT".
- Leave the "Device Username" field empty and make sure that the "use IMEI as username" toggle is on.
- For the "Device Password " field, please see the card that came with the sensor. Make sure to note case-sensitivity.
- Click on "Register device"!
Congratulations!
Your Akkr8 device should now be able to connect and report data to the IoTCreators platform.
Turning on the device
It is advised that you wait a few minutes after adding the sensor to your account before you turn it on. This is to ensure that IoTCreators is given time to provision the added device and to avoid any frustrations on your end.
Akkr8 message format
The Akkr8 device reports data in the format of a JSON string.
The following keys are included:
Temperature: The temperature measured by the device (in Celsius).Humidity: The humidity measured by the device.Dig_In_0: The value of GPIO input 0Dig_In_1: The value of GPIO input 1Dig_In_2: The value of GPIO input 2read_errors: Indicates the number of sensors that failed to be read.sensor: A string that can be used to represent which sensors that were included in the recent payload.input_voltage: The input voltage that the device was fed with at the time of the measurement. Value in volts.device_data: Includes other non-sensor related data about the device.connection_status: The device status at the time the payload was uploaded. 2 means "Connected" and 0 means "Offline". The latter (0) will be sent if the device enters a critically low battery level and thus sends a "Last will and testament" message.battery_level: Battery level of the device in percentage.fw_ver: The version that the device is running.
Forwarding messages
Since IoTCreators is mainly a platform for storing messages, here are two examples of forwarding messages to your application.
Decoding payloads
Programming language examples
Code examples info
The examples in both languages assume an input of the actual value that was reported to the server. Callback URLs receive a JSON similar to this:
// {"reports": [{"serialNumber": "IMEI NUMBER", "timestamp": 1678731695094, "subscriptionId": "VALUE", "resourcePath": "uplinkMsg/0/data", "value": "{\\"Temperature\\": 22.05875, \\"read_errors\\": 0, \\"latlng\\": \\"59.289236,18.080914\\", \\"input_voltage\\": 4.967424, \\"device_data\\": {\\"connection_status\\": 2, \\"battery_level\\": 100, \\"fw_ver\\": \\"1.4.0\\"}, \\"Humidity\\": 37.87283, \\"Dig_In_0\\": 1, \\"Dig_In_1\\": 0, \\"Dig_In_2\\": 1, \\"sensor\\": \\"Temperature,_Dig_In_0,_Dig_In_1,_Dig_In_2,_and_Humidity\\"}", "customAttributes": {"device_protocol": "mqtt"}, "protocol": "MQTT"}], "registrations": [], "deregistrations": [], "updates": [], "expirations": [], "responses": []}
```
The input that the functions take is the value under the "value" key from the callback JSON.


**JavaScript example**
```javascript
/**
Decodes the value reported from an Akkr8 device in a data report.
@param reportValue The value that was reported to IoTCreators (a JSON string)
*/
function payloadDecoder(reportValue){
	const decodedPayload = JSON.parse(reportValue)
	return decodedPayload
}
Python example
import json
def payload_decoder(report_value:string)->dict:
	"""Decodes the value reported from an Akkr8 device in a data report.
	:param report_value The value that was reported to IoTCreators (a JSON string)"""
	decoded_payload = json.loads(report_value)
	return decoded_payload
Application server integration examples
Generic procedure
- To enable a callback URL used for forwarding messages, you go to "Your application server" in the Project view in IoTCreators and enter some details which will differ based on what platform you want to use for forwarding messages.
- The application server that you entered might for example support decoding payloads (or whatever that you want to do with them)
- Read on for some examples!
Generic example
For testing purposes, you can use the following Python code to set up a server that listens to incoming messages and prints them to the terminal
Don't use this in production
Important: This is only a testing server and should not be used in production since it starts using the built-in Flask WSGI server. A production-safe alternative is gunicorn.
"""data_receiver_server.py
Barebones code that starts a simple data receiver server for messages from IoTCreators.
The server uses the Flask framework"""
# Imports
from flask import Flask, request, Response
from http import HTTPStatus
import secrets
import json
server = Flask(__name__)
# Generates a password for access to the callback.
# NOTE: Since this is a testing server, the password is changed on server restarts!
PASSWORD = secrets.token_urlsafe(32)
def payload_decoder(report_value: str) -> dict:
    """Decodes the value reported from an Akkr8 device in a data report.
    :param report_value The value that was reported to IoTCreators (a JSON string)"""
    decoded_payload = json.loads(report_value)
    return decoded_payload
@server.route("/iotcreators", methods=["POST"])
def iot_creators_callback():
    """Callback handler for the IoTCreators callback"""
    # Validate authorization
    authorization = request.headers.get("Authorization", None)
    if authorization is not None and authorization.strip("Bearer").strip(" ") == PASSWORD:
        # Validate that request is JSON
        if request.is_json:
            # Log the receieved JSON to the console
            print(f"Raw data: {request.json}.")
            # Decode every report and print it out
            for report in request.json["reports"]:
                decoded_report = payload_decoder(request.json["value"])
            print("Decoded report data: ", decoded_report)
            # Do additional stuff with the JSON here if you want to
            return Response(status=HTTPStatus.NO_CONTENT)
        else:
            print("Received no JSON data.")
            return Response(status=HTTPStatus.NO_CONTENT)
    else:  # Handle bad or missing authorization
       print("Missing or bad authorization!")
    return Response(status=HTTPStatus.FORBIDDEN)
if __name__ == "__main__":
    # Run server
    print(
    f"Set the callback on IoTCreators to <server_url>/iotcreators and set Authorization header to: Bearer {PASSWORD}")
    server.run(port=5886)
When you run the server, you will get an output to the console like:
Set the callback on IoTCreators to <server_url>/iotcreators and set Authorization header to: Bearer <PASSWORD HERE>
From this, you can obtain the following values.
- Callback URL: To get a temporary external URL for testing purposes, you can use ngrok. Enter the command
ngrok http 5886in your terminal to get a URL that you can enter as the callback URL - Authorization header value: Copy the value of "
Bearer <PASSWORD HERE>" printed out in the command line.
ThingsBoard example
You can follow the steps below to use IoTCreators as a middleware between the Akkr8 device and a Thingsboard instance.
ℹ️Note: This feature is only available in ThingsBoard Cloud instances (not in the community version)
ℹ️Note: More about setting up a ThingsBoard connection with IoTCreators can be found here
Thingsboard setup
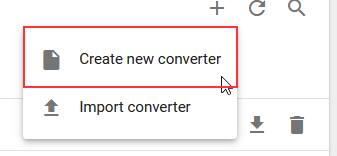
- In the sidebar of your Thingsboard instance, click on the "Data converters tab"
- Click on "Create new converter".
- Select a suitable name for the converter. A suggestion is "IoTCreators data decoder". In the code input, copy and paste the following decoder function:
/**
Decodes the value reported from an Akkr8 device in a data report.
@param reportValue The value that was reported to IoTCreators (a JSON string)
*/
function payloadDecoder(reportValue){
	const decodedPayload = JSON.parse(reportValue)
	return decodedPayload
}

/**
Decodes a received payload to a string. This is a built-in function provided by
ThingsBoard.
*/
function decodeToString(payload) {
   return String.fromCharCode.apply(String, payload)
}
// Decode payload
const iotCreatorsPayloadStr = decodeToString(payload)
const iotCreatorsPayload = payloadDecoder(iotCreatorsPayloadStr) // Since the payloadDecoder just uses JSON, we can apply it to the whole IoTCreators payload too
// Extract details
if (!iotCreatorsPayload.reports || iotCreatorsPayload.reports.length === 0){ // If no reports are available
    return null
}
const report = iotCreatorsPayload.reports[0] // Use the first report
// Extract the payload from the Akkr8 device
const rawAkkr8DevicePayload = report.value
const akkr8DevicePayload = payloadDecoder(rawAkkr8DevicePayload)
// Return result
const serialNumber = report.serialNumber
return {
    deviceName: serialNumber, // Use the IoTCreators serial number as the device name
    deviceType: "default", // (change this if you like. It's the defaults!)
    customerName: "customer", // (change this if you like. It's the defaults!)
    groupName: "AKKR8", // Group all AKKR8 devices together
    attributes: { // Provide the raw string-payload to ThingsBoard...
        data: rawAkkr8DevicePayload
    },
    telemetry: akkr8DevicePayload // ...and use the decoded one for the telemetry!
}
-
Next, we want to add a integration for Akkr8 sensors. Click on the "Integration" tab in the sidebar.

-
Click on the plus sign (in the top right) and then set the integration type to HTTP and give it a suitable name. One example is "IoTCreators". Make sure that the toggles matches the settings in the screenshot above. Then, click on "Next"
-
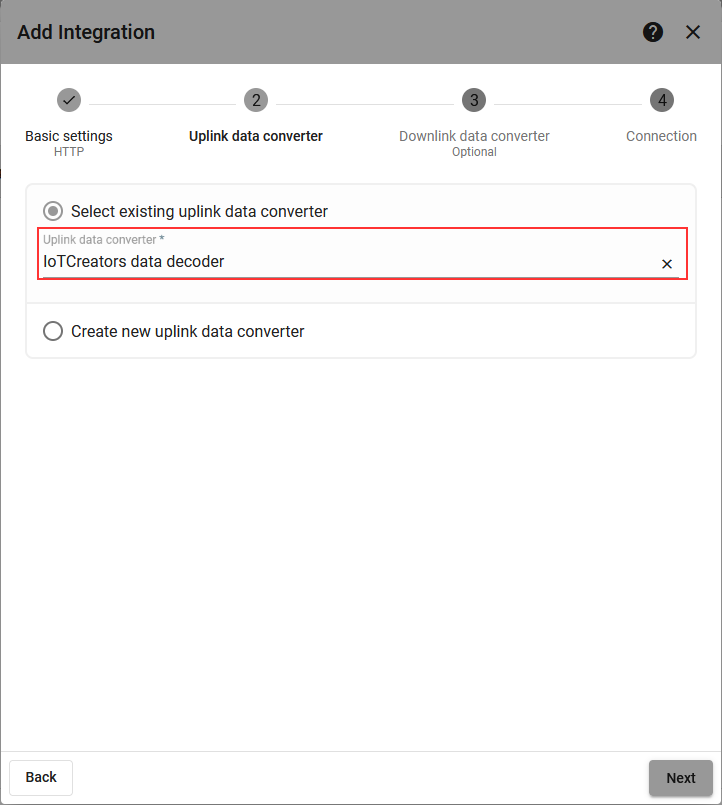
Choose "Select existing uplink data converter" and then select the decoder that you created earlier. Then, click on "Next"
-
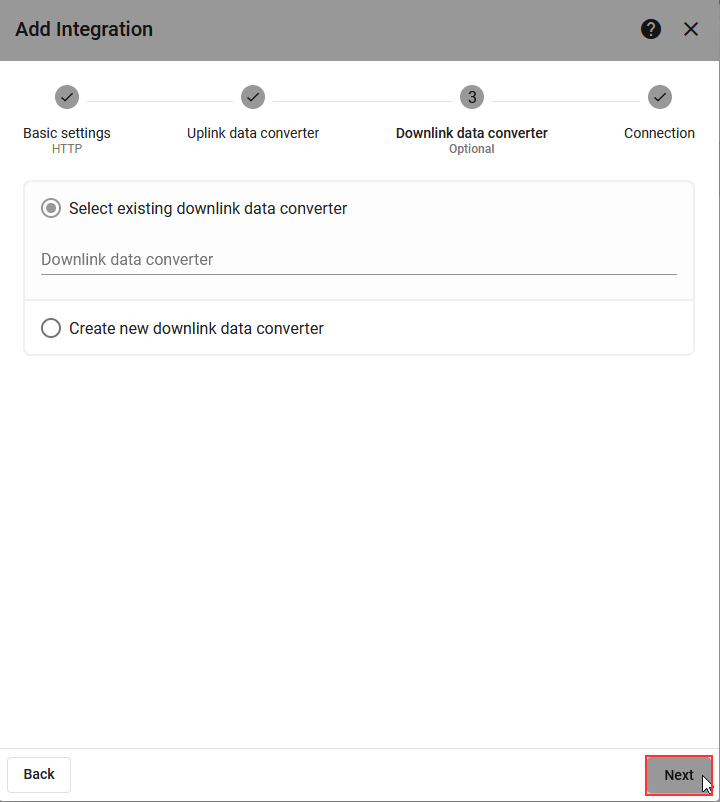
Leave the "Downlink data converter" field blank. Just click on "Next".
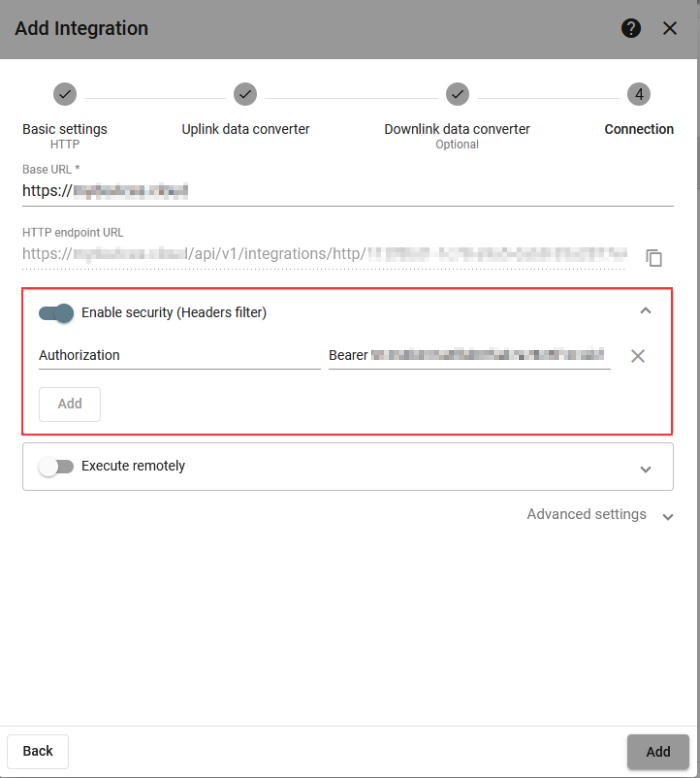
-
The Base URL setting and HTTP endpoint should already be filled out with sensible default values. However, it is a good practise to protect your endpoint. Thefore, toggle the "Enable security (Headers filter)" setting and add a header with the name "Authorization". As a value, set it to
Bearerand then a random password afterwards. Later, we will set up IoTCreators to provide these authorization values. An example could beBearer e8e9059e46b095d44ace80ca72b32c64.
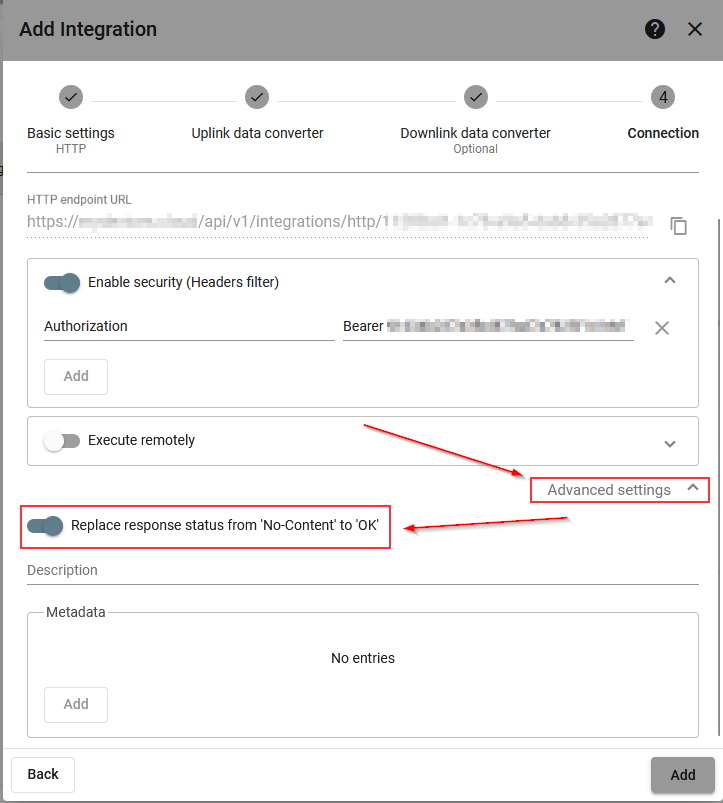
-
Now, click on "Advanced settings" and toggle the "Replace response status from 'No-Content' to 'OK'" toggle to on. Then, click on add.
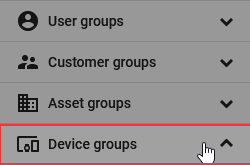
-
The function we copied and pasted earlier assumes a device group name called "Akkr8". Let's create that group so you can group Akkr8 devices! In the sidebar, click on "Device groups".
-
Add a new device group by clicking on the plus sign.

-
Set the group name to Akkr8, add an optional description for your reference and finally click on "Add".
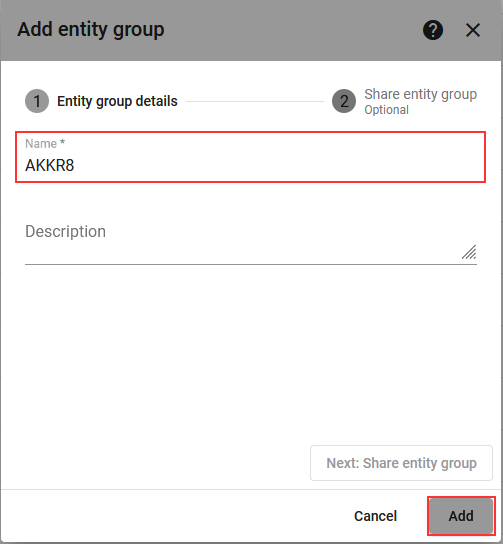
💡Pro tip: If you modify the converter, you can change the group name that Akkr8 devices are put in.
Only this line needs to be changed:
groupName: "AKKR8", // Group all AKKR8 devices together
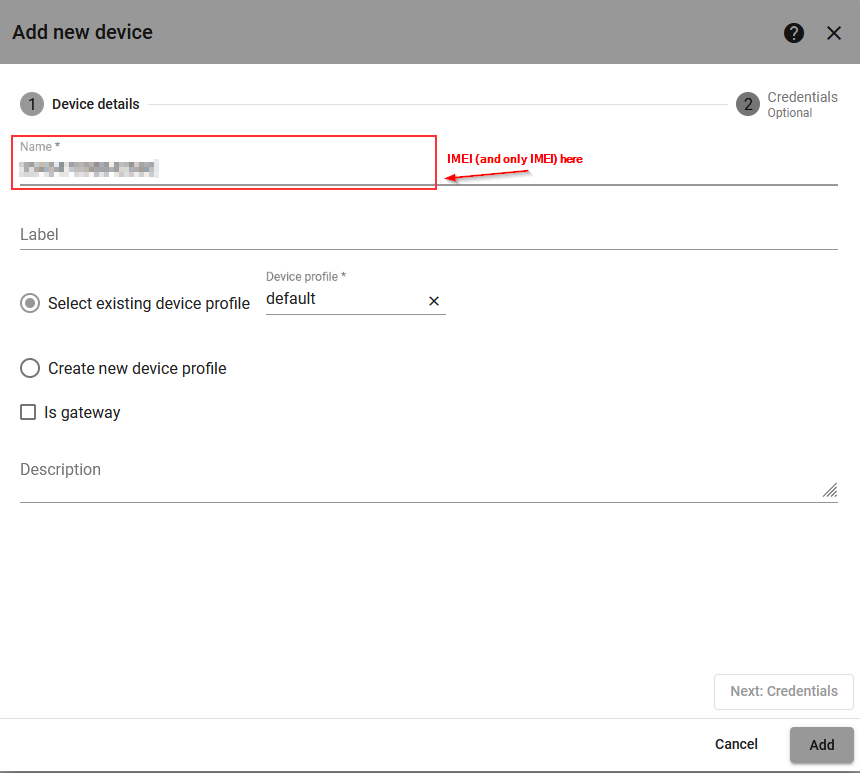
- For each device that you want to add, add the device to the group. This can be done in multiple ways, for example by clicking on the newly created group and then on the plus sign. For the device name, set it to the IMEI. Then click on "Add".
- Now, go back to the integration page that you just created. Copy these two things:
- Callback URL: The value of the HTTP Endpoint URL field (see the highlighted copy button)
- Authorization header value: The value of the authorization header field
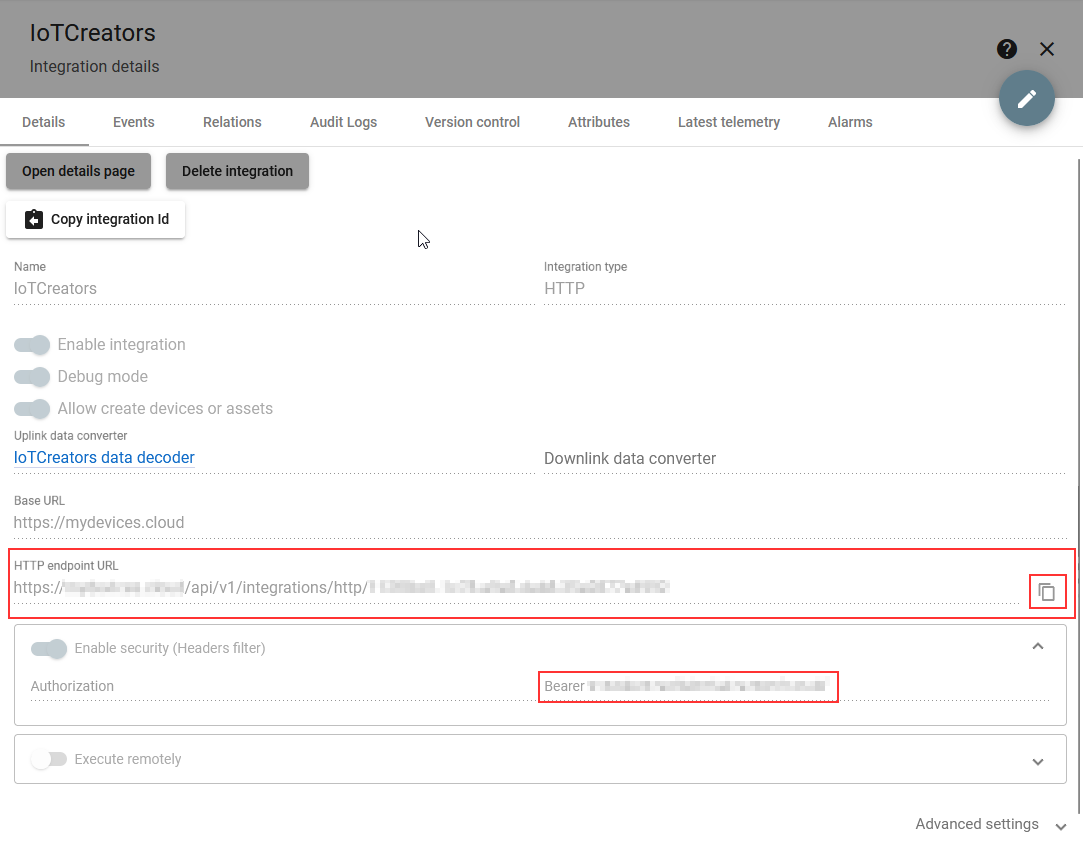
- Then, go to the Linking platforms to IoTCreators step to finalize setup.
Linking platforms to IoTCreators
The procedure here is the same for the "Thingsboard example" and the "Generic example", it's just different values that you fill out. We'll get to that just in a second.
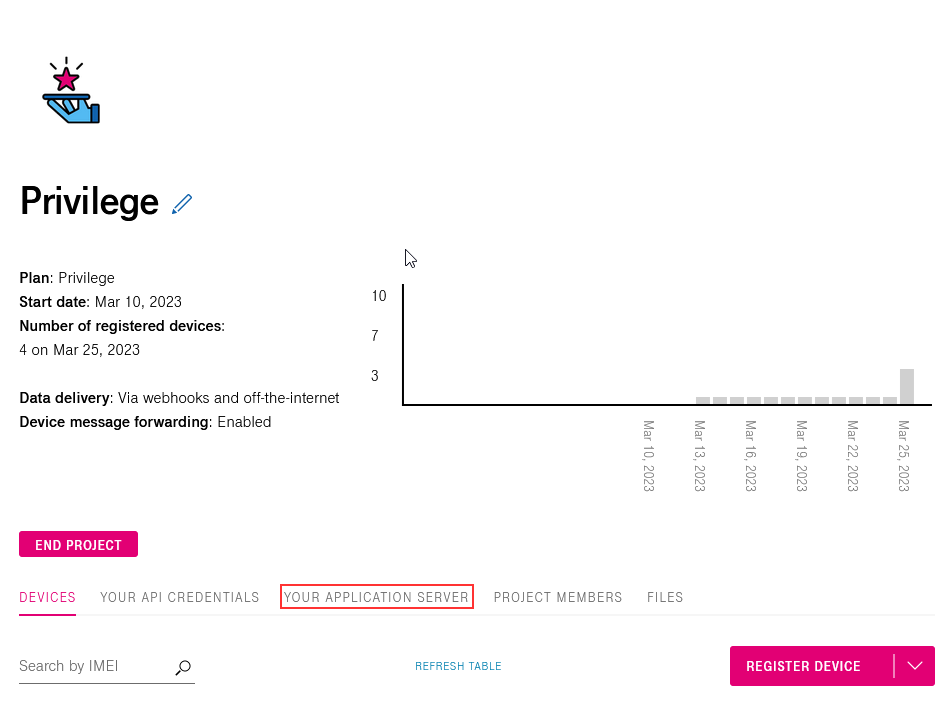
- In your IoTCreators project view, click on "Your application server".
ℹ️ Note: If you are unsure which values to put in the boxes below, go back to the instructions for the platform that you are trying to integrate. They are explained over there!
- Fill out the callback URL with the value that you obtained earlier.

- Select "+ Add header". Set the header name to "Authorization", then copy and paste the value of the authorization header obtained above as the value.
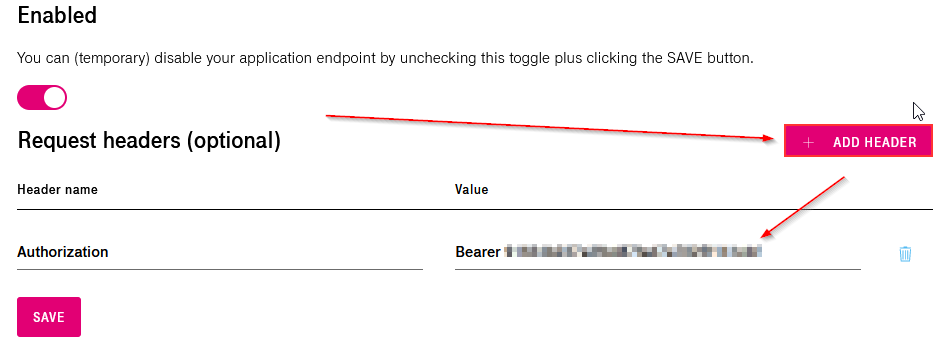
- Finally, don't forget to click on "SAVE"
- Done! Once device data is sent to IoTCreators, you should now receive it on your end. See "Validating that the application server integration works" for validation instructions.
Validating that the application server integration works
Generic example
For the generic example, you should receive console output with the decoded reported values:
Decoded report data: {"Temperature": 22.5, ...}
Look for any error messages in the console that might help with troubleshooting.
ThingsBoard
The reported values should show up if you click on the device that you added and then go to "Latest telemetry".
Updated about 3 years ago